Chat
ConnectyCube Chat API is built on top of Real-time(XMPP) protocol. In order to use it you need to setup real-time connection with ConnectyCube Chat server and use it to exchange data.
By default Real-time Chat works over secure TLS connection.
Connect to chat
Section titled “Connect to chat”const userCredentials = { userId: 4448514, password: "awesomepwd",};
ConnectyCube.chat .connect(userCredentials) .then(() => { // connected }) .catch((error) => {});Connect to chat using custom authentication providers
Section titled “Connect to chat using custom authentication providers”In some cases we don’t have a user’s password, for example when login via:
- Firebase phone authorization
- Custom identity authentication
- etc.
In such cases ConnectyCube API provides possibility to use ConnectyCube session token as a password for chat connection:
// get current ConnectyCube session token and set as user's passwordconst token = ConnectyCube.service.sdkInstance.session.token;
const userCredentials = {    userId: 4448514,    password: token};
Connection status
Section titled “Connection status”The following snippet can be used to determine whether a user is connected to chat or not:
const isConnected = ConnectyCube.chat.isConnected;Disconnect
Section titled “Disconnect”ConnectyCube.chat.disconnect();
ConnectyCube.chat.onDisconnectedListener = onDisconnectedListener;
function onDisconnectedListener() {}Reconnection
Section titled “Reconnection”The SDK reconnects automatically when connection to Chat server is lost.
The following 2 callbacks are used to track the state of connection:
ConnectyCube.chat.onDisconnectedListener = onDisconnectedListener;ConnectyCube.chat.onReconnectListener = onReconnectListener;
function onDisconnectedListener() {}function onReconnectListener() {}
Dialogs
Section titled “Dialogs”All chats between users are organized in dialogs. The are 4 types of dialogs:
- 1-1 chat - a dialog between 2 users.
- group chat - a dialog between specified list of users.
- public group chat - an open dialog. Any user from your app can chat there.
- broadcast - chat where a message is sent to all users within application at once. All the users from the application are able to join this group. Broadcast dialogs can be created only via Admin panel.
You need to create a new dialog and then use it to chat with other users. You also can obtain a list of your existing dialogs.
Create new dialog
Section titled “Create new dialog”Create 1-1 chat
Section titled “Create 1-1 chat”You need to pass type: 3 (1-1 chat) and an id of an opponent you want to create a chat with:
const params = {  type: 3,  occupants_ids: [56],};
ConnectyCube.chat.dialog  .create(params)  .then((dialog) => {})  .catch((error) => {});
Create group chat
Section titled “Create group chat”You need to pass type: 2 and ids of opponents you want to create a chat with:
const params = {  type: 2,  name: "Friday party",  occupants_ids: [29085, 29086, 29087],  description: "lets dance the night away",  photo: "party.jpg",};
ConnectyCube.chat.dialog  .create(params)  .then((dialog) => {})  .catch((error) => {});
Create public group chat
Section titled “Create public group chat”It’s possible to create a public group chat, so any user from you application can join it. There is no a list with occupants, this chat is just open for everybody.
You need to pass type: 4 and ids of opponents you want to create a chat with:
const params = {  type: 4,  name: "Blockchain trends",};
ConnectyCube.chat.dialog  .create(params)  .then((dialog) => {})  .catch((error) => {});
Response example from ConnectyCube.chat.dialog.create(params) - see
Chat metadata
Section titled “Chat metadata”A dialog can have up to 3 custom sub-fields to store additional information that can be linked to chat.
To start using extensions, allowed fields should be added first. Go to Admin panel > Chat > Custom Fields and provide allowed custom fields.
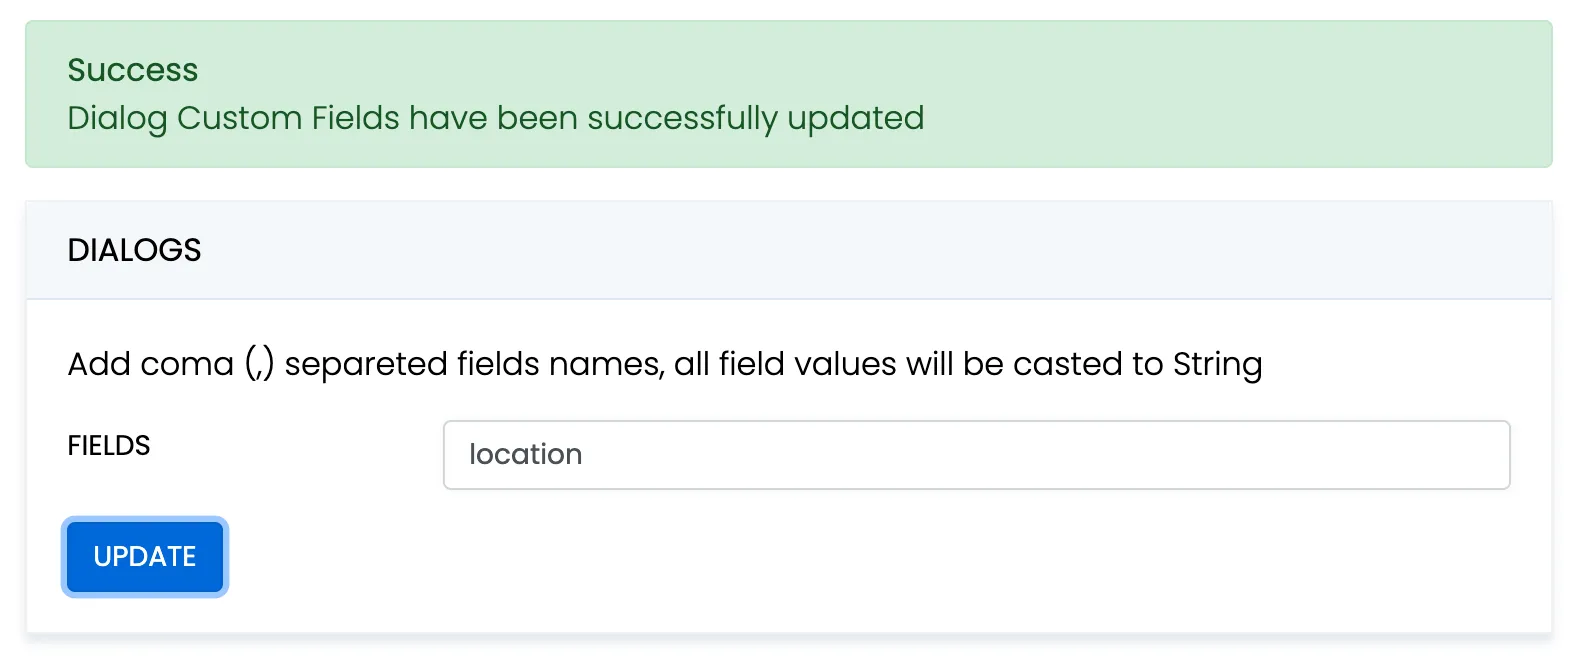
When create a dialog, the extensions field object must contain allowed fields only. Others fields will be ignored. The values will be casted to string.
const params = {  type: 2,  name: "Friday party",  occupants_ids: [29085, 29086, 29087],  description: "lets dance the night away",  extensions: {location: "Sun bar"},};
ConnectyCube.chat.dialog  .create(params)  .then((dialog) => {})  .catch((error) => {});
When remove custom field in Admin panel, this field will be removed in all dialogs respectively.
These parameters also can be used as a filter for retrieving dialogs.
Chat permissions
Section titled “Chat permissions”Chat could have different permissions to managa data access. This is managed via permissions field.
At the moment, only one permission available - allow_preview - which allows to retrieve dialog’s messages for user who is not a member of dialog. This is useful when implement feature like Channels where a user can open chat and preview messages w/o joining it.
List dialogs
Section titled “List dialogs”It’s common to request all your dialogs on every app login:
const filters = {};
ConnectyCube.chat.dialog  .list(filters)  .then((result) => {})  .catch((error) => {});
Response example from ConnectyCube.chat.dialog.list(filters) - see
More filters available here
If you want to retrieve only dialogs updated after some specific date time, you can use updated_at[gt] filter. This is useful if you cache dialogs somehow and do not want to obtain the whole list of your dialogs on every app start.
Update dialog
Section titled “Update dialog”User can update group chat name, photo or add/remove occupants:
const dialogId = "5356c64ab35c12bd3b108a41";const toUpdateParams = { name: "Crossfit2" };
ConnectyCube.chat.dialog  .update(dialogId, toUpdateParams)  .then((dialog) => {})  .catch((error) => {});
Add/Remove occupants
Section titled “Add/Remove occupants”To add more occupants use push_all operator.
To remove yourself from the dialog use pull_all operator:
const dialogId = "5356c64ab35c12bd3b108a41";const toUpdateParams = { push_all: { occupants_ids: [97, 789] } };
ConnectyCube.chat.dialog  .update(dialogId, toUpdateParams)  .then((dialog) => {})  .catch((error) => {});
Response example from ConnectyCube.chat.dialog.update(dialogId, toUpdateParams) - see
Note
Only group chat owner can remove other users from group chat.
Remove dialog
Section titled “Remove dialog”The following snippet is used to delete a dialog:
const dialogId = "5356c64ab35c12bd3b108a41";// const dialogIds = ['5356c64ab35c12bd3b108a41', ..., '5356c64ab35c12bd3b108a84']
ConnectyCube.chat.dialog.delete(dialogId).catch((error) => {});
This request will remove this dialog for current user, but other users still will be able to chat there. Only group chat owner can remove the group dialog for all users.
You can also delete multiple dialogs in a single request.
Clear dialog history
Section titled “Clear dialog history”The following snippet is used to clear dialog history by ID:
const dialogId = "5356c64ab35c12bd3b108a41";
ConnectyCube.chat.dialog.clearHistory(dialogId).catch((error) => {});
This request will clear all messages in the dialog for current user, but not for other users.
Subscribe to dialog
Section titled “Subscribe to dialog”In order to be able to chat in public dialog, you need to subscribe to it:
const dialogId = "5356c64ab35c12bd3b108a41";
ConnectyCube.chat.dialog  .subscribe(dialogId)  .then((dialog) => {})  .catch((error) => {});
It’s also possible to subscribe to group chat dialog.
Response example from ConnectyCube.chat.dialog.subscribe(dialogId) - see
Unsubscribe from dialog
Section titled “Unsubscribe from dialog”const dialogId = "5356c64ab35c12bd3b108a41";
ConnectyCube.chat.dialog.unsubscribe(dialogId).catch((error) => {});Retrieve public dialog occupants
Section titled “Retrieve public dialog occupants”A public chat dialog can have many occupants. There is a separated API to retrieve a list of public dialog occupants:
const dialogId = "5356c64ab35c12bd3b108a41";const params = { limit: 100, skip: 0,};ConnectyCube.chat.dialog .getPublicOccupants(dialogId, params) .then((result) => { // result.items }) .catch((error) => {});Response example from ConnectyCube.chat.dialog.getPublicOccupants(dialogId, params):
{ "items": [ { "id": 51941, "full_name": "Dacia Kail", "email": "dacia_k@domain.com", "login": "Dacia", "phone": "+6110797757", "website": null, "created_at": "2018-12-06T09:16:26Z", "updated_at": "2018-12-06T09:16:26Z", "last_request_at": null, "external_user_id": 52691165, "facebook_id": "91234409", "twitter_id": "83510562734", "blob_id": null, "custom_data": null, "avatar": null, "user_tags": null }, { "id": 51946, "full_name": "Gabrielle Corcoran", "email": "gabrielle.corcoran@domain.com", "login": "gabby", "phone": "+6192622155", "website": "http://gabby.com", "created_at": "2018-12-06T09:29:57Z", "updated_at": "2018-12-06T09:29:57Z", "last_request_at": null, "external_user_id": null, "facebook_id": "95610574", "twitter_id": null, "blob_id": null, "custom_data": "Responsible for signing documents", "avatar": null, "user_tags": "vip,accountant" } ... ]}Add / Remove admins
Section titled “Add / Remove admins”Options to add or remove admins from the dialog can be done by Super admin (dialog’s creator) only. Options are supported in group chat, public or broadcast.
Up to 5 admins can be added to chat.
const dialogId = "5356c64ab35c12bd3b108a41";const adminsUsersIds = [45, 89];
ConnectyCube.chat.dialog  .addAdmins(dialogId, adminsUsersIds)  .then((dialog) => {})  .catch((error) => {});
const dialogId = "5356c64ab35c12bd3b108a41";const adminsUsersIds = [45, 89];
ConnectyCube.chat.dialog .removeAdmins(dialogId, adminsUsersIds) .then((dialog) => {}) .catch((error) => {});Response example from ConnectyCube.chat.dialog.addAdmins(dialogId, adminsUsersIds)/ConnectyCube.chat.dialog.removeAdmins(dialogId, adminsUsersIds) - see
Update notifications settings
Section titled “Update notifications settings”A user can turn on/off push notifications for offline messages in a dialog. By default push notification are turned ON, so offline user receives push notifications for new messages in a chat.
const dialogId = "5356c64ab35c12bd3b108a41";const enabled = false;
ConnectyCube.chat.dialog  .updateNotificationsSettings(dialogId, enabled)  .then((result) => {})  .catch((error) => {});
Response example from ConnectyCube.chat.dialog.updateNotificationsSettings(dialogId, enabled) - see
Get notifications settings
Section titled “Get notifications settings”Check a status of notifications setting - either it is ON or OFF for a particular chat.
Available responses: 1 - enabled, 0 - disabled.
const dialogId = "5356c64ab35c12bd3b108a41";
ConnectyCube.chat.dialog  .getNotificationsSettings(dialogId)  .then((result) => {})  .catch((error) => {});
Response example from ConnectyCube.chat.dialog.getNotificationsSettings(dialogId) - see
Chat history
Section titled “Chat history”Every chat dialog stores its chat history which you can retrieve:
const dialogId = "5356c64ab35c12bd3b108a41";const params = {  chat_dialog_id: dialogId,  sort_desc: "date_sent",  limit: 100,  skip: 0,};
ConnectyCube.chat.message  .list(params)  .then((messages) => {})  .catch((error) => {});
Response example from ConnectyCube.chat.message.list(params) - see
If you want to retrieve chat messages that were sent after or before specific date time only, you can use date_sent[gt] or date_sent[lt] filter. This is useful if you implement pagination for loading messages in your app.
Send/Receive chat messages
Section titled “Send/Receive chat messages”1-1 chat
Section titled “1-1 chat”const dialog = ...;const opponentId = 78;const message = { type: dialog.type === 3 ? 'chat' : 'groupchat', body: "How are you today?", extension: { save_to_history: 1, dialog_id: dialog._id }};
message.id = ConnectyCube.chat.send(opponentId, message);
// ...
ConnectyCube.chat.onMessageListener = onMessage;
function onMessage(userId, message) { console.log('[ConnectyCube.chat.onMessageListener] callback:', userId, message)}Group chat
Section titled “Group chat”The group chat join is not a required step anymore. You can send/receive chat messages in a group chat w/o joining it.
Before you start chatting in a group dialog, you need to join it by calling join function:
const dialog = ...;
ConnectyCube.chat.muc.join(dialog._id).catch(error => {});
Then you are able to send/receive messages:
const message = {  type: dialog.type === 3 ? "chat" : "groupchat",  body: "How are you today?",  extension: {    save_to_history: 1,    dialog_id: dialog._id,  }};
message.id = ConnectyCube.chat.send(dialog._id, message);
// ...
ConnectyCube.chat.onMessageListener = onMessage;
function onMessage(userId, message) {  console.log("[ConnectyCube.chat.onMessageListener] callback:", userId, message);}
When it’s done you can leave the group dialog by calling leave function:
ConnectyCube.chat.muc.leave(dialog._id).catch((error) => {});Message metadata
Section titled “Message metadata”A chat message can have custom sub-fields to store additional information that can be linked to the particular chat message.
When create a message, the custom data can be attached via extension field:
const message = { ... extension: { field_one: "value_one", field_two: "value_two" }};‘Sent’ status
Section titled “‘Sent’ status”There is a ‘sent’ status to ensure that message is delivered to the server.
In order to use the feature you need to enable it when you pass config in ConnectyCube.init:
chat: { streamManagement: { enable: true; }}The following callback is used to track it:
ConnectyCube.chat.onSentMessageCallback = function (messageLost, messageSent) {};‘Delivered’ status
Section titled “‘Delivered’ status”The following callback is used to track the ‘delivered’ status:
ConnectyCube.chat.onDeliveredStatusListener = function (messageId, dialogId, userId) { console.log("[ConnectyCube.chat.onDeliveredStatusListener] callback:", messageId, dialogId, userId);};The SDK sends the ‘delivered’ status automatically when the message is received by the recipient.
This is controlled by markable: 1 parameter when you send a message. If markable is 0 or omitted, then you can send the delivered status manually:
const params = {  messageId: "557f1f22bcf86cd784439022",  userId: 21,  dialogId: "5356c64ab35c12bd3b108a41",};
ConnectyCube.chat.sendDeliveredStatus(params);
‘Read’ status
Section titled “‘Read’ status”Send the ‘read’ status:
const params = {  messageId: "557f1f22bcf86cd784439022",  userId: 21,  dialogId: "5356c64ab35c12bd3b108a41",};
ConnectyCube.chat.sendReadStatus(params);
// ...
ConnectyCube.chat.onReadStatusListener = function (messageId, dialogId, userId) {  console.log("[ConnectyCube.chat.onReadStatusListener] callback:", messageId, dialogId, userId);};
‘Is typing’ status
Section titled “‘Is typing’ status”The following ‘typing’ notifications are supported:
- typing: The user is composing a message. The user is actively interacting with a message input interface specific to this chat session (e.g., by typing in the input area of a chat window)
- stopped: The user had been composing but now has stopped. The user has been composing but has not interacted with the message input interface for a short period of time (e.g., 30 seconds)
Send the ‘is typing’ status:
const opponentId = 78; // for 1-1 chats// const dialogJid = ..; // for group chat
ConnectyCube.chat.sendIsTypingStatus(opponentId);ConnectyCube.chat.sendIsStopTypingStatus(opponentId);
// ...
ConnectyCube.chat.onMessageTypingListener = function (isTyping, userId, dialogId) {  console.log("[ConnectyCube.chat.onMessageTypingListener] callback:", isTyping, userId, dialogId);};
Attachments (photo / video)
Section titled “Attachments (photo / video)”Chat attachments are supported with the cloud storage API. In order to send a chat attachment you need to upload the file to ConnectyCube cloud storage and obtain a link to the file (file UID). Then you need to include this UID into chat message and send it.
// for example, a file from HTML form input fieldconst inputFile = $("input[type=file]")[0].files[0];const fileParams = {  name: inputFile.name,  file: inputFile,  type: inputFile.type,  size: inputFile.size,  public: false,};
const prepareMessageWithAttachmentAndSend = (file) => {  const message = {    type: dialog.type === 3 ? "chat" : "groupchat",    body: "attachment",    extension: {      save_to_history: 1,      dialog_id: dialog._id,      attachments: [{ uid: file.uid, id: file.id, type: "photo" }],    },  };
  // send the message  message.id = ConnectyCube.chat.send(dialog._id, message);};
ConnectyCube.storage  .createAndUpload(fileParams)  .then(prepareMessageWithAttachmentAndSend)  .catch((error) => {});
Response example from ConnectyCube.storage.createAndUpload(fileParams):
{ "account_id": 7, "app_id": 12, "blob_object_access": { "blob_id": 421517, "expires": "2020-10-06T15:51:38Z", "id": 421517, "object_access_type": "Write", "params": "https://s3.amazonaws.com/cb-shared-s3?Content-Type=text%2Fplain..." }, "blob_status": null, "content_type": "text/plain", "created_at": "2020-10-06T14:51:38Z", "id": 421517, "name": "awesome.txt", "public": false, "set_completed_at": null, "size": 11, "uid": "7cafb6030d3e4348ba49cab24c0cf10800", "updated_at": "2020-10-06T14:51:38Z"}If you are running Node.js environment, the following code snippet can be used to access a file:
const fs = require("fs");const imagePath = __dirname + "/dog.jpg";
let fileParams;
fs.stat(imagePath, (error, stats) => {  fs.readFile(srcIMG, (error, data) => {    if (error) {      throw error;    } else {      fileParams = {        file: data,        name: "image.jpg",        type: "image/jpeg",        size: stats.size,      };
      // upload      // ...    }  });});
The same flow is supported on the receiver’s side. When you receive a message, you need to get the file UID and then download the file from the cloud storage.
ConnectyCube.chat.onMessageListener = (userId, message) => {  if (message.extension.hasOwnProperty("attachments")) {    if (message.extension.attachments.length > 0) {      const fileUID = message.extension.attachments[0].uid;      const fileUrl = ConnectyCube.storage.privateUrl(fileUID);      const imageHTML = "<img src='" + fileUrl + "' alt='photo'/>";
      // insert the imageHTML as HTML template    }  }};
In a case you want remove a shared attachment from server:
ConnectyCube.storage .delete(file.id) .then(() => {}) .catch((error) => {});Attachments (location)
Section titled “Attachments (location)”Sharing location attachments is nothing but sending 2 numbers: latitude and longitude.
These values can be accessed using any JS library available in npm registry.
const latitude = "64.7964274";const longitude = "-23.7391878";
const message = {  type: dialog.type === 3 ? "chat" : "groupchat",  body: "attachment",  extension: {    save_to_history: 1,    dialog_id: dialog._id,    attachments: [{ latitude, longitude, type: "place" }],  },};
// send the messagemessage.id = ConnectyCube.chat.send(dialog._id, message);
On the receiver’s side the location attachment can be accessed the following way:
ConnectyCube.chat.onMessageListener = (userId, message) => {  if (message.extension.hasOwnProperty("attachments")) {    if (message.extension.attachments.length > 0) {      const attachment = message.extension.attachments[0];
      const latitude = attachment.latitude;      const longitude = attachment.longitude;
      // and now display the map      // ...    }  }};
Edit message
Section titled “Edit message”Use the following code snippet to edit a message (correct message body). Other user(s) will receive the ‘edit’ message info via callback:
ConnectyCube.chat.editMessage({  to: 123, // either a user id if this is 1-1 chat or a chat dialog id  dialogId: "52e6a9c8a18f3a3ea6001f18",  body: "corrected message body",  originMessageId: "58e6a9c8a1834a3ea6001f15", // origin message id to edit  last: false // pass 'true' if edit last (the newest) message in history})
...
ConnectyCube.chat.onMessageUpdateListener = (messageId, isLast, updatedBody, dialogId, userId) => {
}
Also, you can update a message via HTTP API:
// const messageIds = ""; // to update allconst messageIds = ["55fd42369575c12c2e234c64", "55fd42369575c12c2e234c68"].join(","); // or one - "55fd42369575c12c2e234c64"const params = {  read: 1, // mark message as read  delivered: 1, // mark message as delivered  message: "corrected message body", // update message body  chat_dialog_id: "5356c64ab35c12bd3b108a41",};
ConnectyCube.chat.message  .update(messageIds, params)  .then(() => {})  .catch((error) => {});
Message reactions
Section titled “Message reactions”Add/Remove reactions
Section titled “Add/Remove reactions”User can add/remove message reactions and listen message reaction events
Add
const messageId = '58e6a9c8a1834a3ea6001f15' const reaction = '🔥' ConnectyCube.chat.message.addReaction(messageId, reaction) .then(() => {}) .catch(err => {})Remove
const messageId = '58e6a9c8a1834a3ea6001f15' const reaction = '👎' ConnectyCube.chat.message.removeReaction(messageId, reaction) .then(() => {}) .catch(err => {})Add/Remove
const messageId = '58e6a9c8a1834a3ea6001f15' const reactionToAdd = '👎' const reactionToRemove = '🚀' ConnectyCube.chat.message.updateReaction(messageId, reactionToAdd, reactionToRemove) .then(() => {}) .catch(err => {})Listen reactions
Section titled “Listen reactions”ConnectyCube.chat.onMessageReactionsListener = (messageId, userId, dialogId, addReaction, removeReaction) => {
}List message reactions
Section titled “List message reactions”User can list message reactions
const messageId = '58e6a9c8a1834a3ea6001f15' ConnectyCube.chat.message.listReactions(messageId) .then(reactions => reactions) .catch(err => {})Response example from ConnectyCube.chat.message.listReactions(messageId) - see
Delete messages
Section titled “Delete messages”Use the following code snippet to delete a message. Other user(s) will receive the ‘delete’ message info via callback:
ConnectyCube.chat.deleteMessage({  to: 123, // either a user id if this is 1-1 chat or a chat dialog id  dialogId: "52e6a9c8a18f3a3ea6001f18",  messageId: "58e6a9c8a1834a3ea6001f15" // message id to delete})
...
ConnectyCube.chat.onMessageDeleteListener = (messageId, dialogId, userId) => {
}
If you want to delete a message for yourself only, use the following API:
const messageIds = ["55fd42369575c12c2e234c64", "55fd42369575c12c2e234c68"].join(",");const params = {};
ConnectyCube.chat.message  .delete(messageIds, params)  .then((result) => {})  .catch((error) => {});
Response example from ConnectyCube.chat.message.delete(messageIds) - see
This request will remove the messages from current user history only, without affecting the history of other users.
Unread messages count
Section titled “Unread messages count”You can request total unread messages count and unread count for particular dialog:
const params = { dialogs_ids: ["5356c64ab35c12bd3b108a41"] };
ConnectyCube.chat.message  .unreadCount(params)  .then((result) => {})  .catch((error) => {});
Response example from ConnectyCube.chat.message.unreadCount(params) - see
Mark as read all chat messages
Section titled “Mark as read all chat messages”The following snippet is used to mark all messages as read on a backend for dialog ID:
const messageIds = ""; // use "" to update allconst params = {  read: 1,  chat_dialog_id: "5356c64ab35c12bd3b108a41",};
ConnectyCube.chat.message  .update("", params)  .then(() => {})  .catch((error) => {});
Search
Section titled “Search”The following API is used to search for messages and chat dialogs:
const params = {  /* ... */};
ConnectyCube.chat  .search(params)  .then((result) => {})  .catch((error) => {});
Response example from ConnectyCube.chat.search(params) - see
Please refer to Global search parameters for more info on how to form search params.
Chat alerts
Section titled “Chat alerts”When you send a chat message and the recipient/recipients is offline, then automatic push notification will be fired.
In order to receive push notifications you need to subscribe for it. Please refer to Push Notifications guide.
To configure push template which users receive - go to Dashboard Console, Chat Alerts page
Also, here is a way to avoid automatically sending push notifications to offline recipient/recipients. For it add the silent parameter with value 1 to the extension of the message.
const message = { ... extension: { ... silent: 1, },};After sending such a message, the server won’t create the push notification for offline recipient/recipients.
Note
Currently push notifications are supported on mobile environment only.
Mark a client as Active/Inactive
Section titled “Mark a client as Active/Inactive”When you send a chat message and the recipient/recipients is offline, then automatic push notification will be fired.
Sometimes a client app can be in a background mode, but still online. In this case it’s useful to let server know that a user wants to receive push noificattions while still is connected to chat.
For this particular case we have 2 handy methods: ‘markInactive’ and ‘markActive’:
ConnectyCube.chat.markInactive();ConnectyCube.chat.markActive();The common use case for these APIs is to call ‘markInactive’ when an app goes to background mode and to call ‘markActive’ when an app goes to foreground mode.
Get last activity
Section titled “Get last activity”There is a way to get an info when a user was active last time, in seconds.
This is a modern approach for messengers apps, e.g. to display this info on a Contacts screen or on a User Profile screen.
const userId = 123234;
ConnectyCube.chat  .getLastUserActivity(userId)  .then((result) => {    const userId = result.userId;    const seconds = result.seconds;    // 'userId' was 'seconds' ago  })  .catch((error) => {});
Last activity subscription
Section titled “Last activity subscription”Listen to user last activity status via subscription.
ConnectyCube.chat.subscribeToUserLastActivityStatus(userId);ConnectyCube.chat.unsubscribeFromUserLastActivityStatus(userId);
ConnectyCube.chat.onLastUserActivityListener = (userId, seconds) => {};
System messages
Section titled “System messages”In a case you want to send a non text message data, e.g. some meta data about chat, some events or so - there is a system notifications API to do so:
const userId = 123234;
const msg = {  body: "dialog/UPDATE_DIALOG",  extension: {    photo_uid: "7cafb6030d3e4348ba49cab24c0cf10800",    name: "Our photos",  },};
ConnectyCube.chat.sendSystemMessage(userId, msg);
ConnectyCube.chat.onSystemMessageListener = function (msg) {};
Moderation
Section titled “Moderation”The moderation capabilities help maintain a safe and respectful chat environment. We have options that allow users to report inappropriate content and manage their personal block lists, giving them more control over their experience.
Report user
Section titled “Report user”For user reporting to work, it requires the following:
- Go to ConnectyCube Daashboard
- select your Application
- Navigate to Custom module via left sidebar
- Create new table called UserReports with the following fields:
- reportedUserId - integer
- reason - string
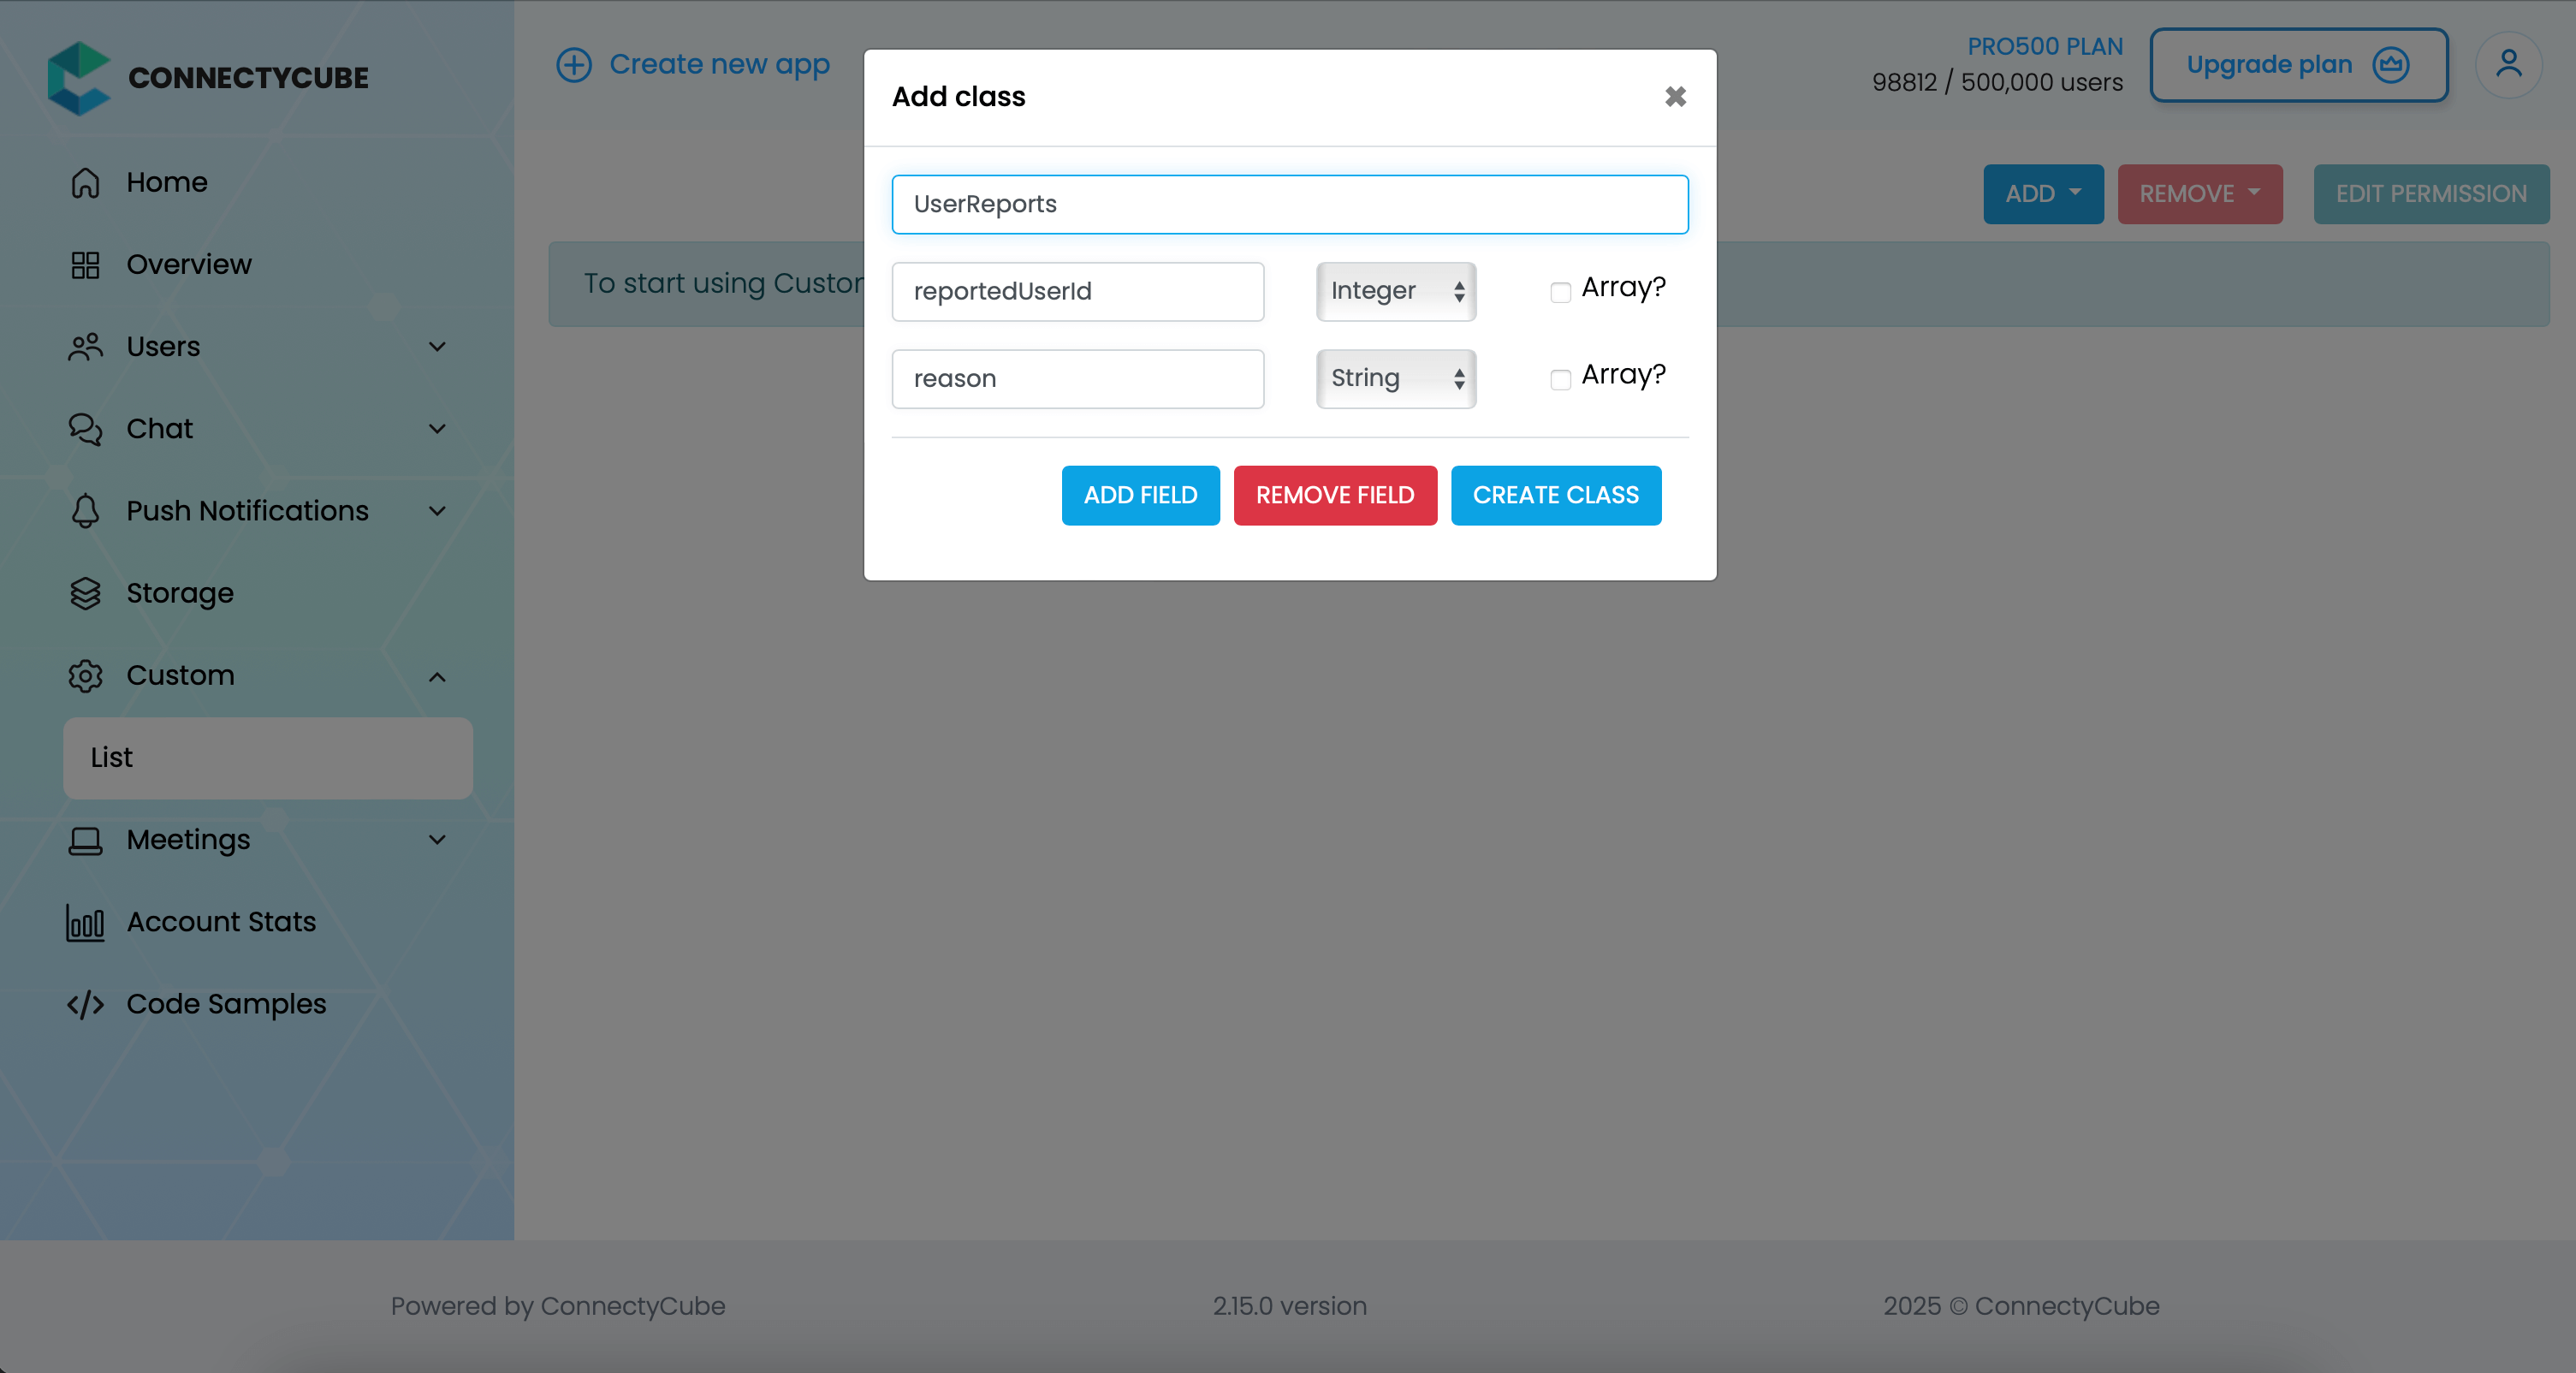
Once the table is created, you can create a report with the following code snippet and then see all the reports in Dashboard:
const reportedUserId = 45const reason = "User is spamming with bad words"await ConnectyCube.data.create('UserReports', { reportedUserId, reason });Report message
Section titled “Report message”For message reporting to work, the same approach to user reporting above could be used.
You need to create new table called MessageReports with the following fields:
- reportedMessageId - integer
- reason - string
Once the table is created, you can create a report with the following code snippet and then see all the reports in Dashboard:
const reportedMessageId = "58e6a9c8a1834a3ea6001f15"const reason = "The message contains phishing links"await ConnectyCube.data.create('MessageReports', { reportedMessageId, reason });Block user
Section titled “Block user”Block list (aka Privacy list) allows enabling or disabling communication with other users. You can create, modify, or delete privacy lists, define a default list.
The user can have multiple privacy lists, but only one can be active.
Create privacy list
Section titled “Create privacy list”A privacy list must have at least one element in order to be created.
You can choose a type of blocked logic. There are 2 types:
- Block in one way. When you blocked a user, but you can send messages to him.
- Block in two ways. When you blocked a user and you also can’t send messages to him.
const users = [  { user_id: 34, action: "deny" },  { user_id: 48, action: "deny", mutualBlock: true }, // it means you can't write to user  { user_id: 18, action: "allow" },];const list = { name: "myList", items: users };
ConnectyCube.chat.privacylist.create(list).catch((error) => {});
In order to be used the privacy list should be not only set, but also activated(set as default).
Activate privacy list
Section titled “Activate privacy list”In order to activate rules from a privacy list you should set it as default:
const listName = "myList";
ConnectyCube.chat.privacylist.setAsDefault(listName).catch((error) => {});
Update privacy list
Section titled “Update privacy list”There is a rule you should follow to update a privacy list:
- If you want to update or set new privacy list instead of current one, you should decline current default list first.
const listName = "myList";const list = {  name: listName,  items: [{ user_id: 34, action: "allow" }],};
ConnectyCube.chat.privacylist  .setAsDefault(null)  .then(() => ConnectyCube.chat.privacylist.update(list))  .then(() => ConnectyCube.chat.privacylist.setAsDefault(listName))  .catch((error) => {});
Retrieve privacy list names
Section titled “Retrieve privacy list names”To get a list of all your privacy lists’ names use the following request:
let names;
ConnectyCube.chat.privacylist  .getNames()  .then((response) => (names = response.names))  .catch((error) => {});
Response example from ConnectyCube.chat.privacylist.getNames():
{ "active": null, "default": null, "names": ["myList", "blockedusers"]}Retrieve privacy list with name
Section titled “Retrieve privacy list with name”To get the privacy list by name you should use the following method:
const listName = "myList";
let name, items;
ConnectyCube.chat.privacylist.getList(listName).then((response) => {  name = response.name;  items = response.items;});
Response example from ConnectyCube.chat.privacylist.getList(listName):
{ "name": "myList", "items": [ { "user_id": 34, "action": "deny" }, { "user_id": 48, "action": "deny", "mutualBlock": true }, { "user_id": 18, "action": "allow" } ]}Remove privacy list
Section titled “Remove privacy list”To delete a list you can call a method below or you can edit a list and set items to nil.
const listName = "myList";
ConnectyCube.chat.privacylist.delete(listName).catch((error) => {});
Blocked user attempts to communicate with user
Section titled “Blocked user attempts to communicate with user”Blocked users will be receiving an error when trying to chat with a user in a 1-1 chat and will be receiving nothing in a group chat:
ConnectyCube.chat.onMessageErrorListener = function (messageId, error) {};Ping server
Section titled “Ping server”Sometimes, it can be cases where TCP connection to Chat server can go down without the application layer knowing about it.
To check that chat connection is still alive or to keep it to be alive there is a ping method:
const PING_TIMEOUT = 3000; // default is 5000 ms
ConnectyCube.chat.pingWithTimeout(PING_TIMEOUT)  .then(() => {    // Chat connection is alive  }).catch((error) => {    // No connection with chat server    // Let's try to re-connect  })
Pause chat connection when ping fails
Section titled “Pause chat connection when ping fails”Temporarily stop the chat connection if the server does not respond to the ping request.
This allows the client to attempt automatic reconnection as soon as the chat connection becomes available again:
const PING_TIMEOUT = 1000;
try {  await ConnectyCube.chat.pingWithTimeout(PING_TIMEOUT)} catch (error) {  ConnectyCube.chat.terminate()}
Handle browser offline event with ping check
Section titled “Handle browser offline event with ping check”Listen for the browser’s offline event and try to ping the chat server if the event fires:
const PING_TIMEOUT = 3000;
window.addEventListener("offline", () => {  try {    await ConnectyCube.chat.pingWithTimeout(PING_TIMEOUT);  } catch (error) {    ConnectyCube.chat.terminate();  }});
Maintain chat connection with periodic pings (VPN-friendly)
Section titled “Maintain chat connection with periodic pings (VPN-friendly)”Regularly send pings to check if the chat connection is still alive.
If a ping fails, send another ping after a short delay to handle cases where the first failure was temporary; terminate the connection if the second ping also fails:
const PING_INTERVAL = 40000;const PING_TIMEOUT = 1000;const PING_DELAY = 3000;
let pingInterval = null;
const startPingWithInterval = () => {  pingInterval = setInterval(async () => {    try {      await ConnectyCube.chat.pingWithTimeout(PING_TIMEOUT);    } catch (error) {      setTimeout(async () => {        try {          await ConnectyCube.chat.pingWithTimeout(PING_TIMEOUT);        } catch (error) {          ConnectyCube.chat.terminate();        }      }, PING_DELAY);    }  }, PING_INTERVAL);}
const stopPingWithInterval = () => {  if (pingInterval) {    clearInterval(pingInterval);    pingInterval = null;  }}