How to generate APNS certificate
Create App ID
Section titled “Create App ID”Each iOS application that uses the APNs must have a unique application ID that uniquely identifies your app. The following steps describe how to create an Apple App ID for your application.
If you already have an App ID, you can skip these steps.
-
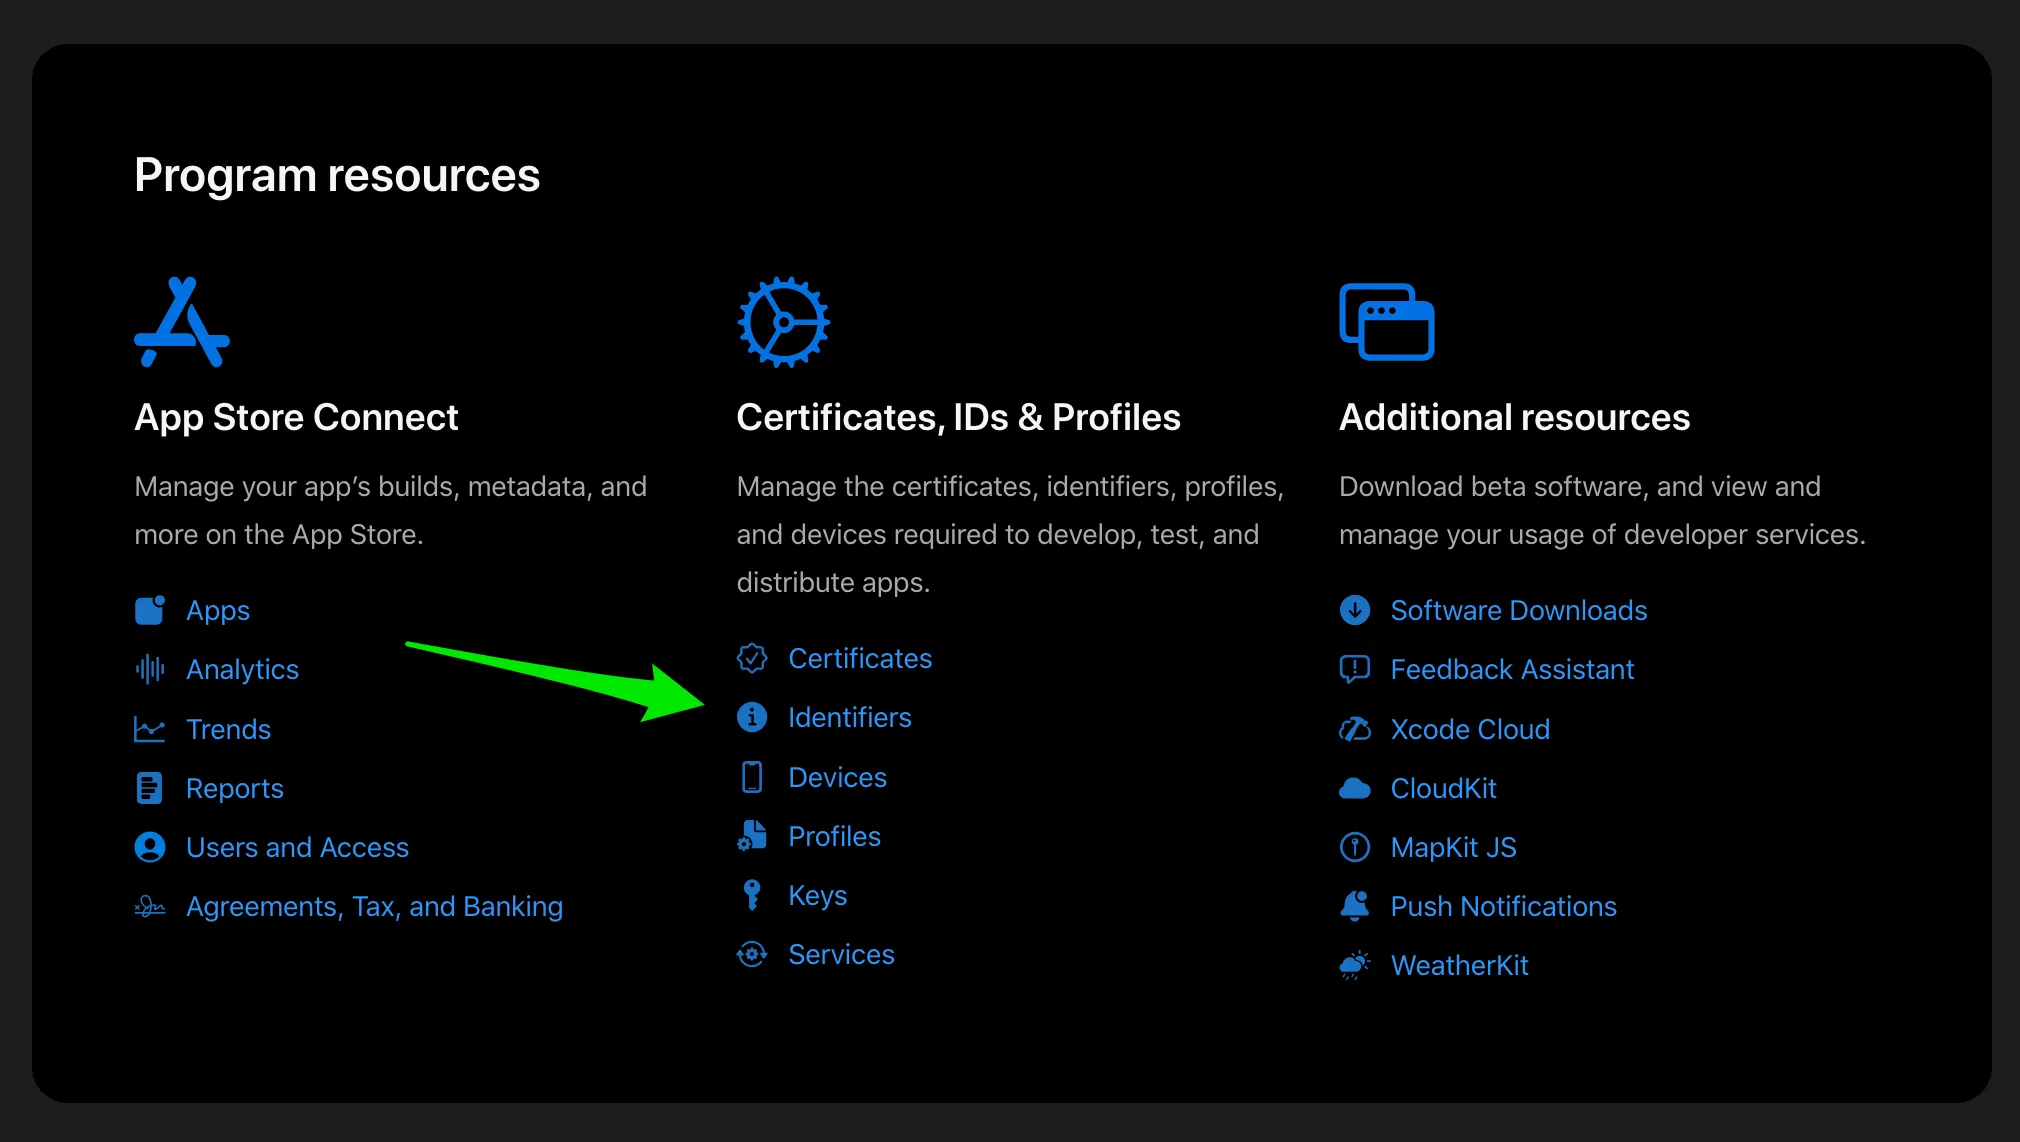
Once you have signed in to the iPhone Developer Connection Portal, click on Identifiers on Certificates, IDs & Profiles. column
-
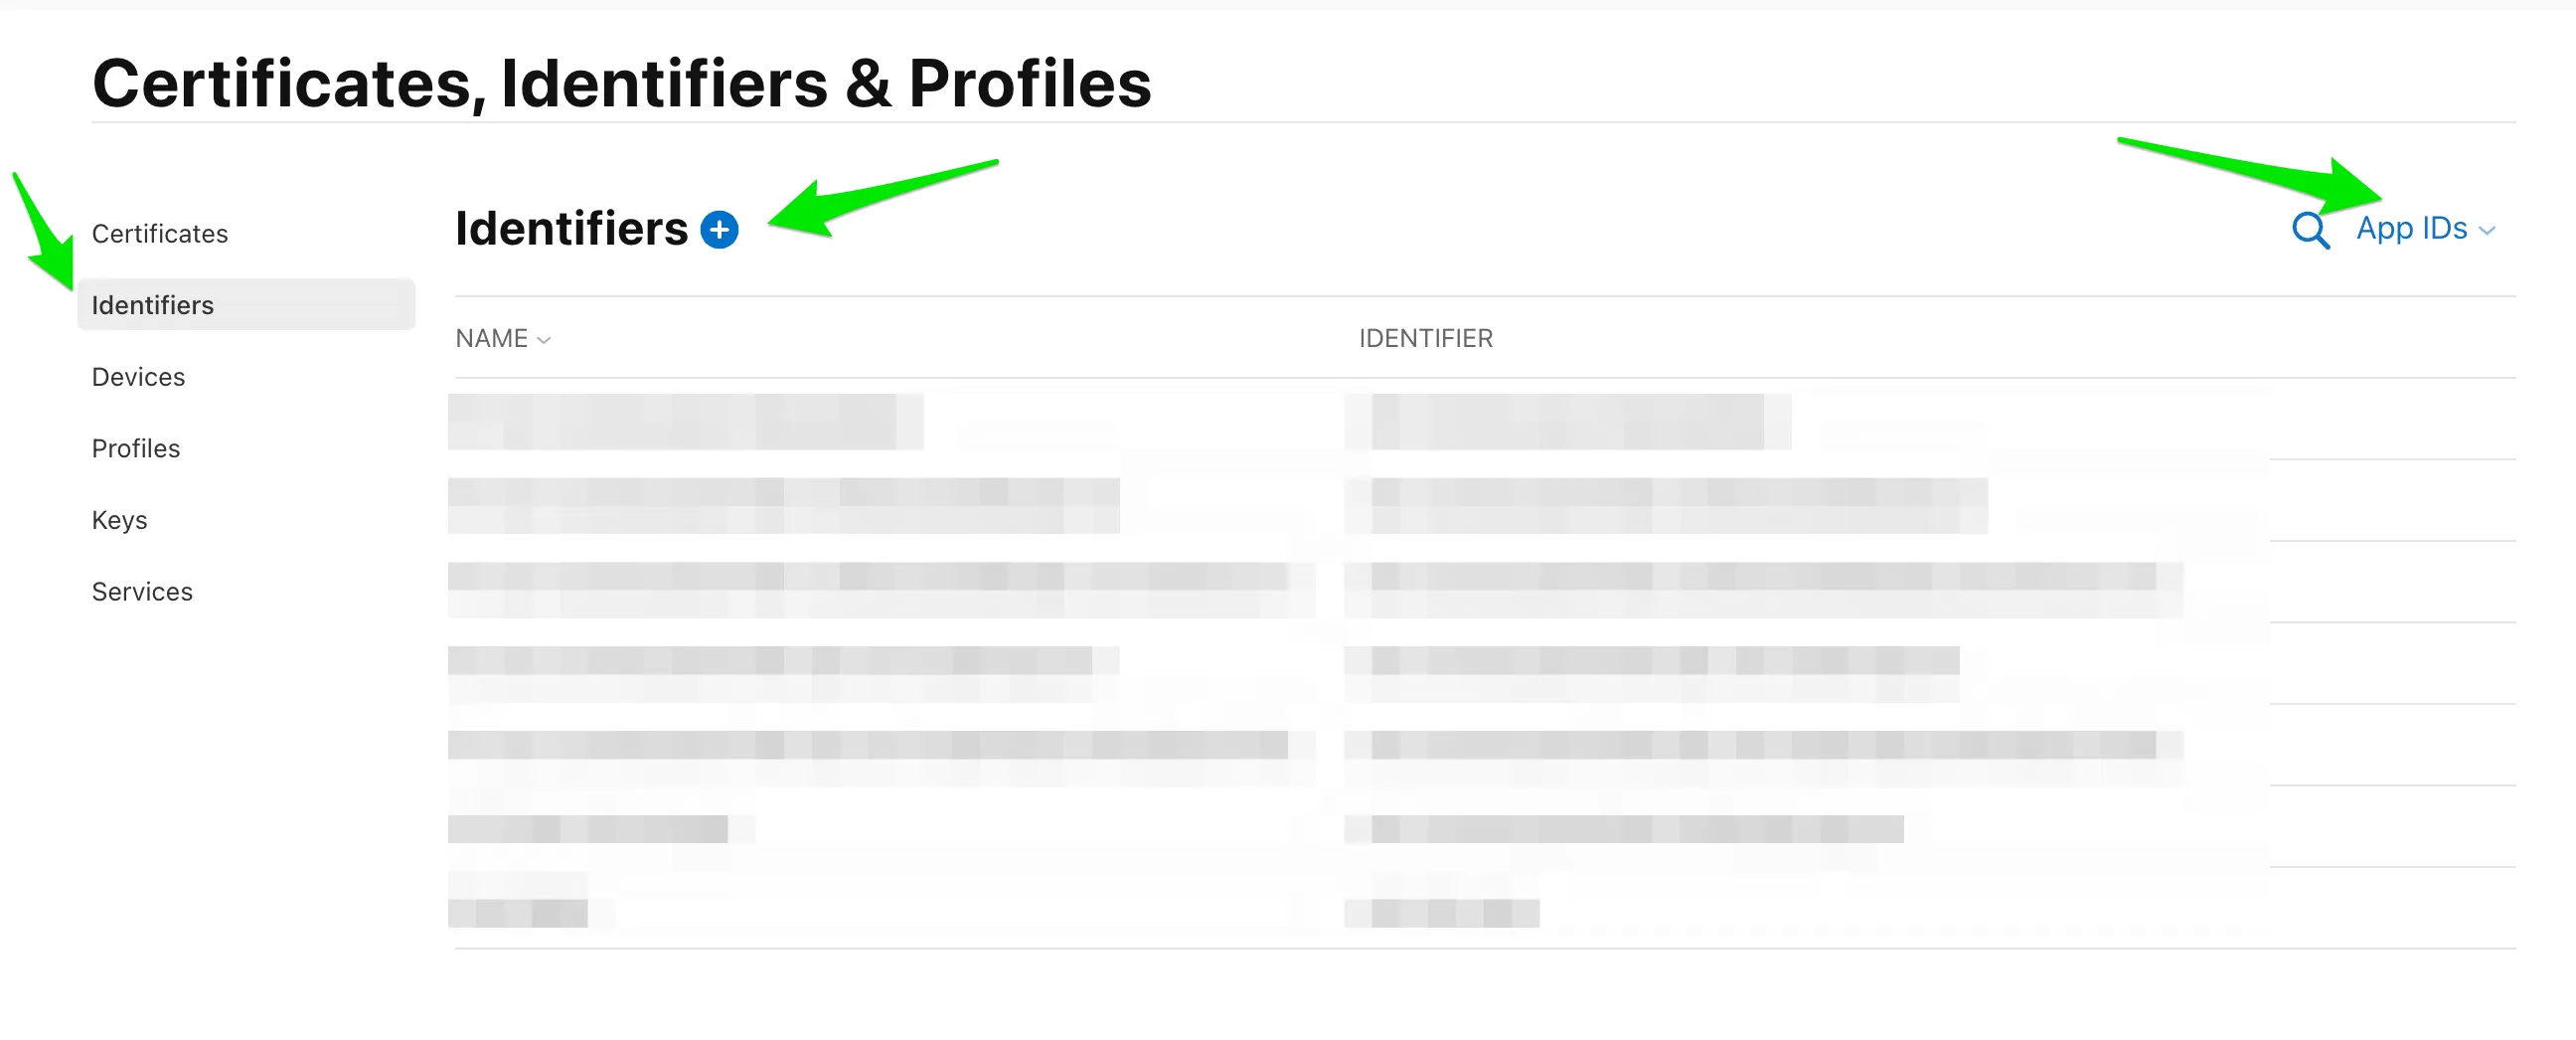
On the next screen, select App IDs in the right dropdown and then click on the plus button
-
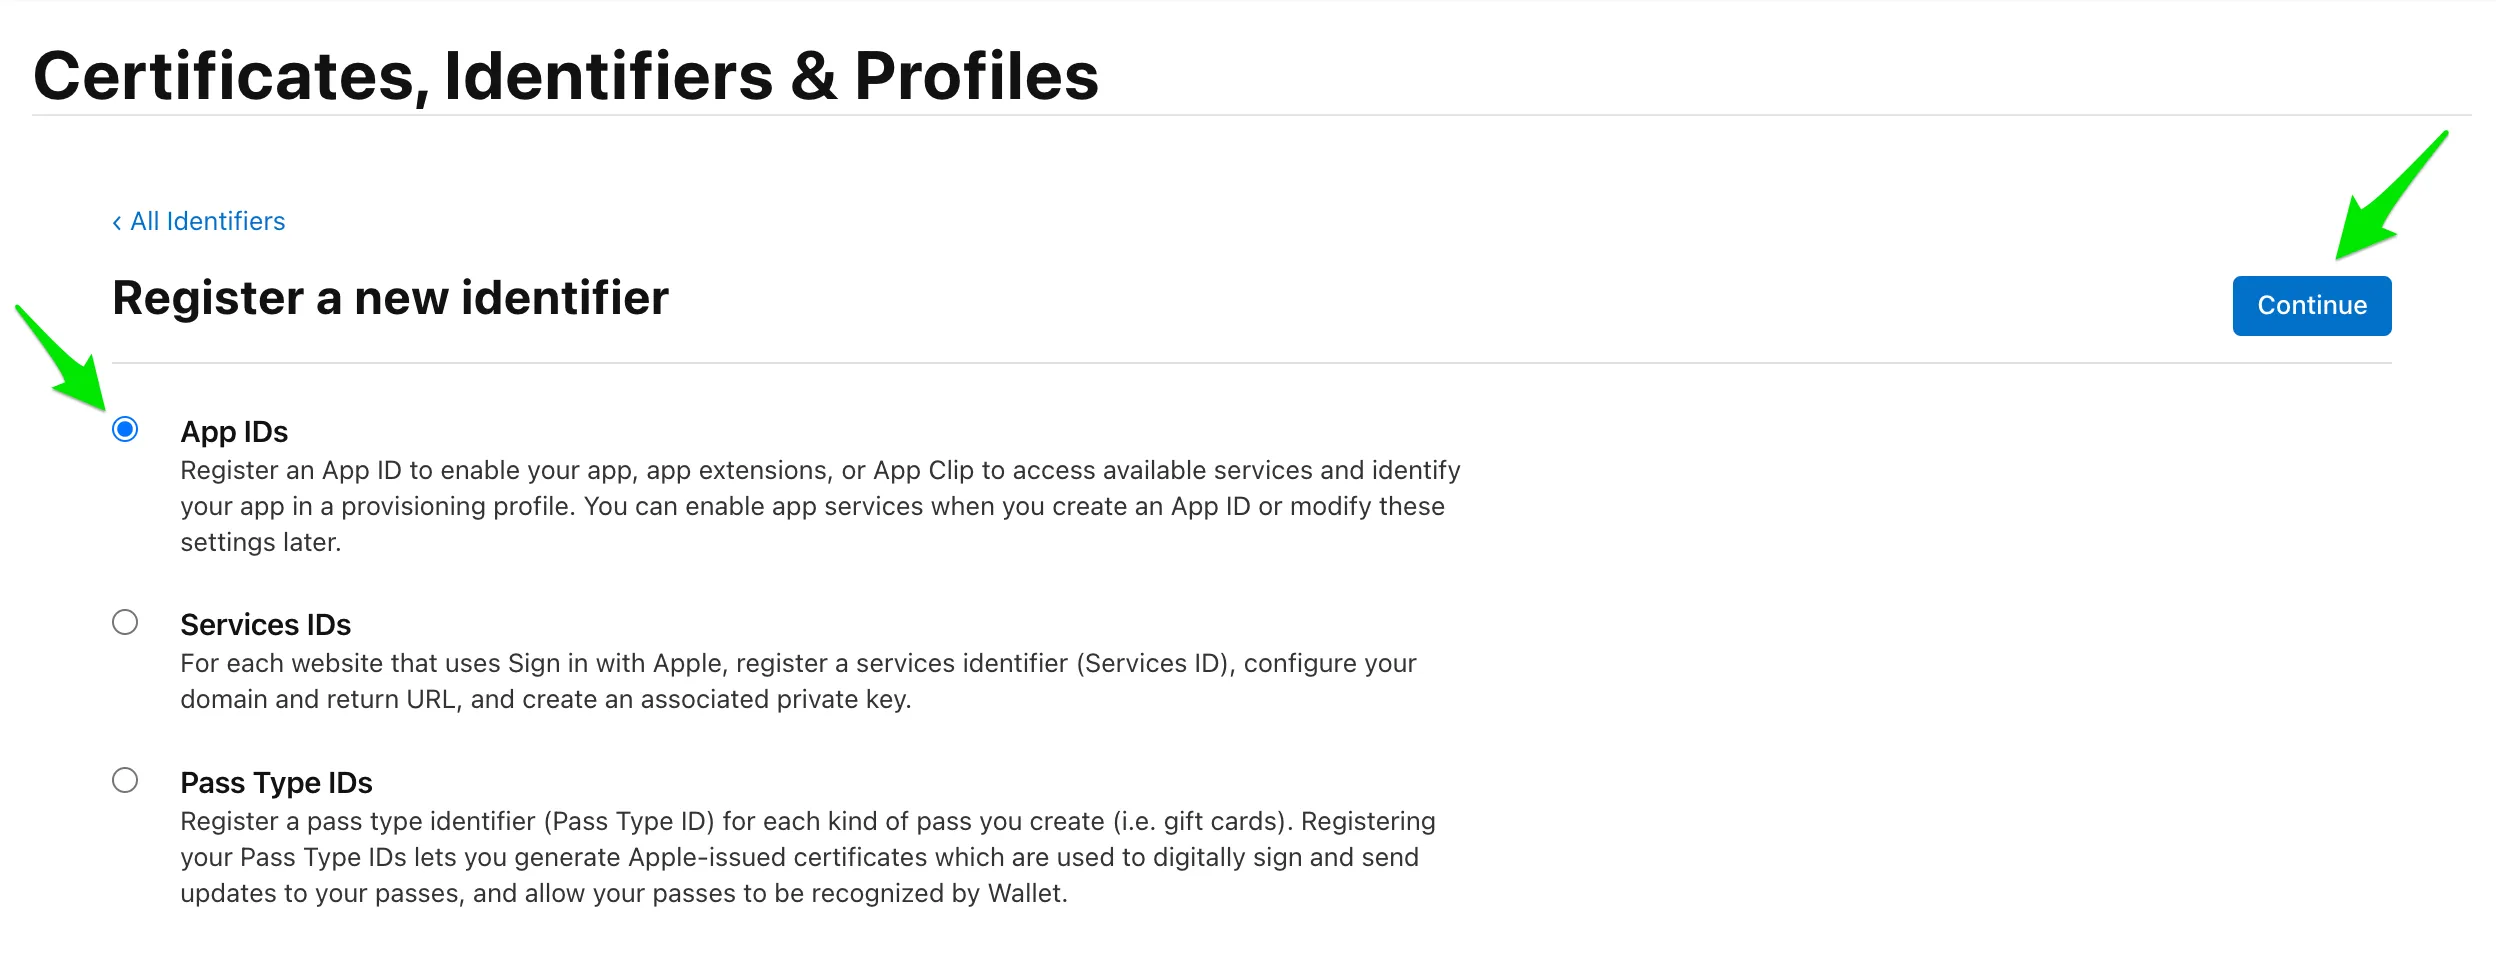
On the next screen, select App IDs in the radio menu and then click on the Continue button
-
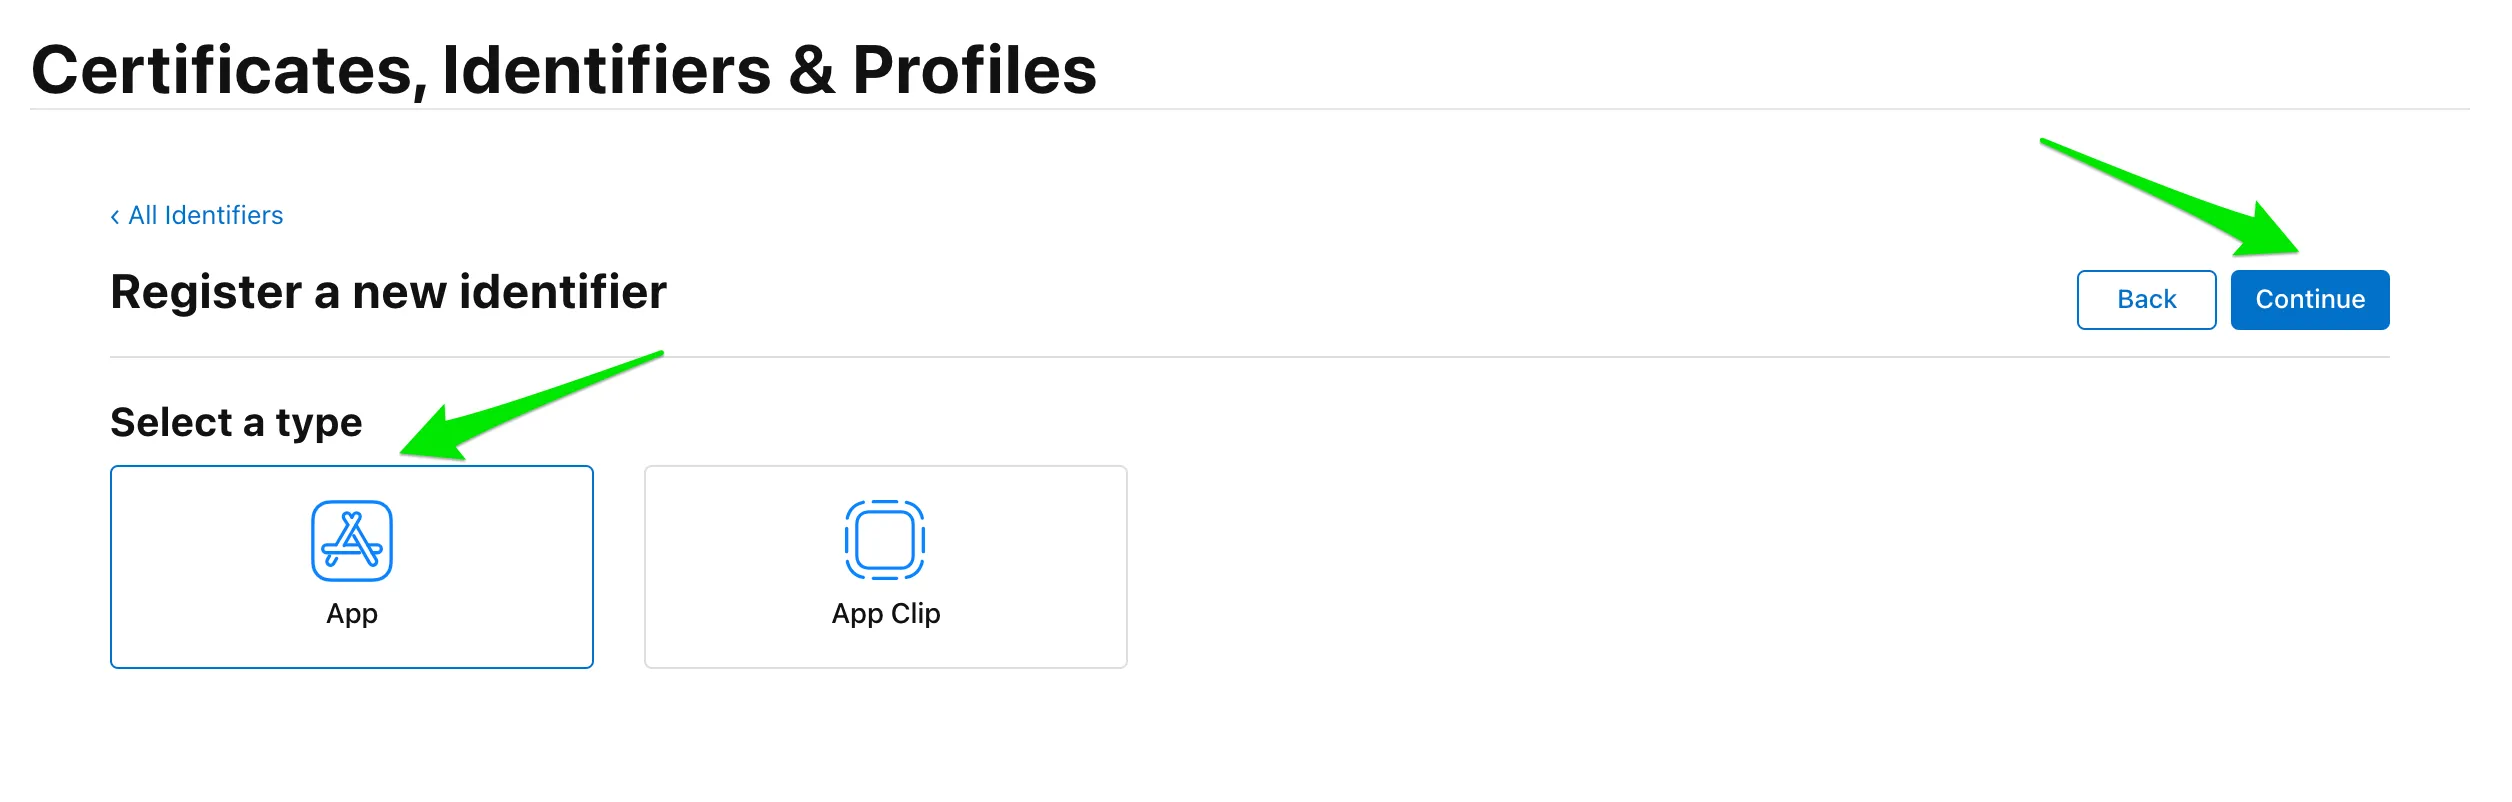
On the next screen, select App and then click on the Continue button
-
Enter your app name for the App ID Description section (1). In the App ID Prefix section, select the Explicit option and enter Bundle Identifier(2).
For example, our iOS application ID looks like com.awesomecorp.messagingspace:
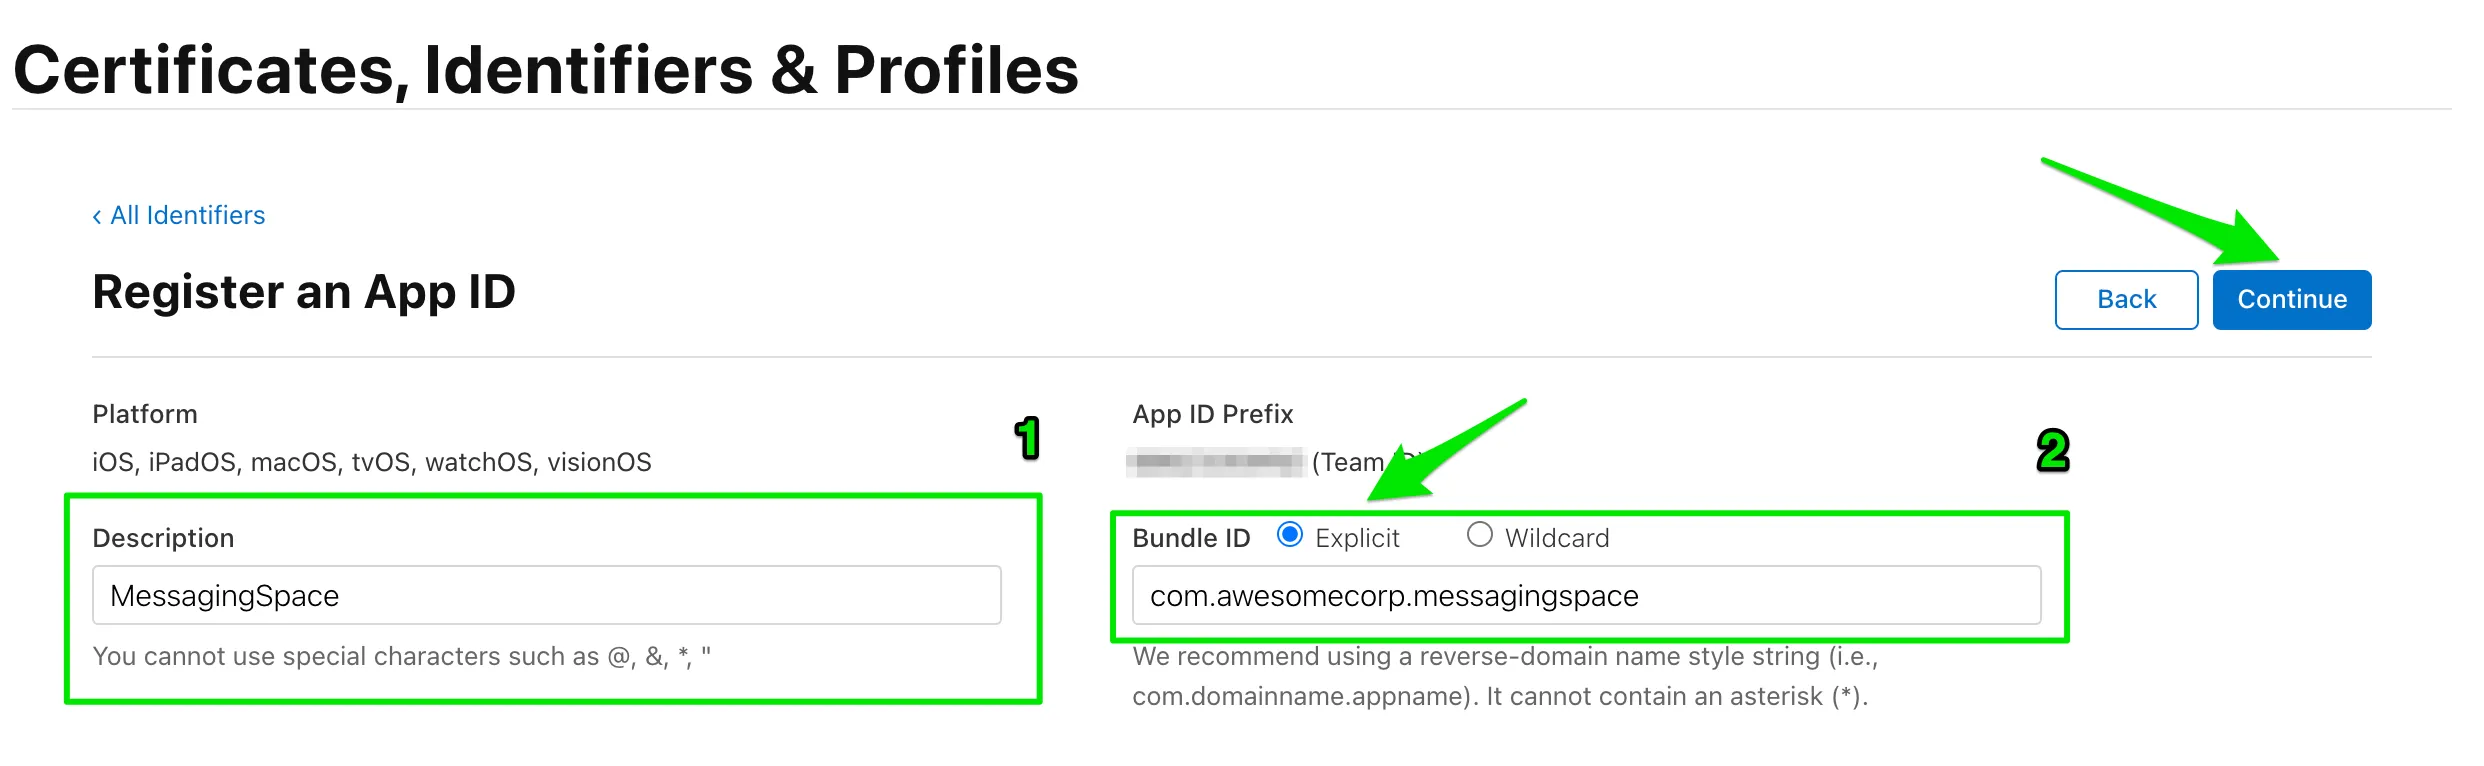
Note: Ensure you have created an App ID without a wildcard(make sure it doesn’t have an asterisk in it). Wildcard IDs cannot use the push notification service.
-
Once you have entered all of the information, press Continue button.
You will now be presented with an overview of your new app ID. Click Register button to continue.
Generate a Certificate Signing Request
Section titled “Generate a Certificate Signing Request”You need to generate a certificate signing request file so that you can use it to request an APNS SSL certificate later on.
Follow the instructions below to create one:
-
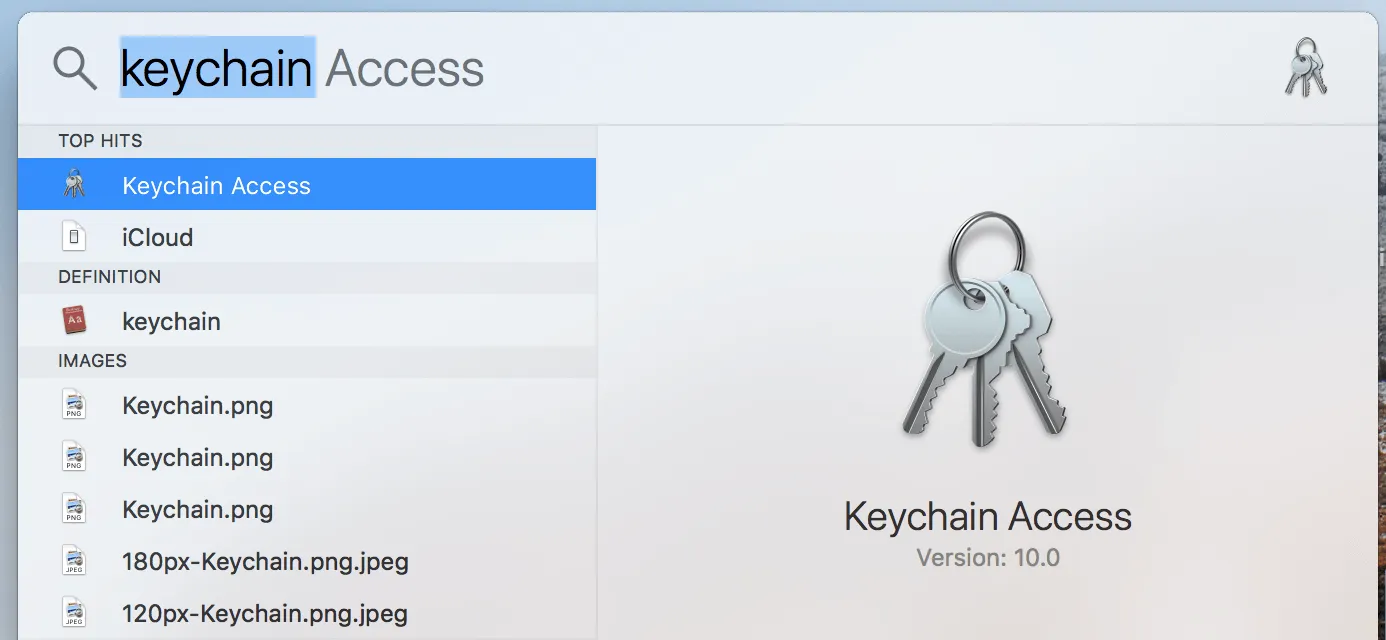
Launch the Keychain Access application in your macOS:
-
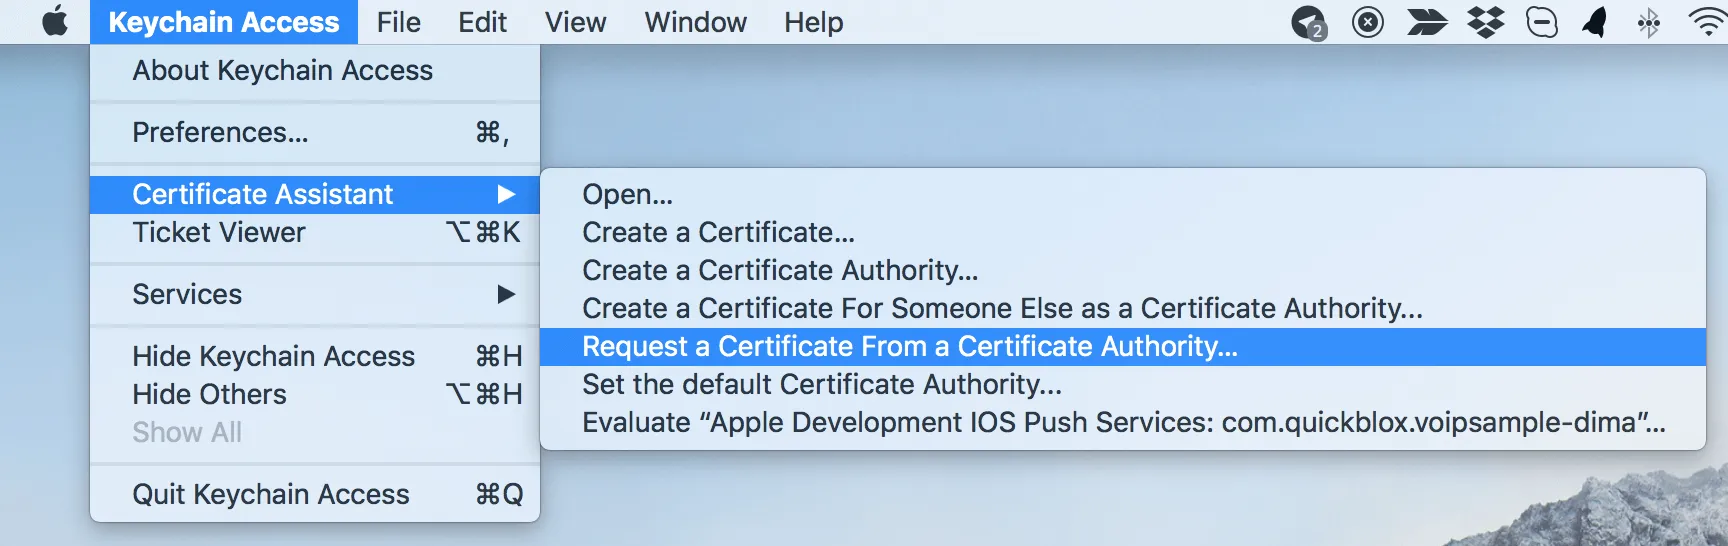
Select Keychain Access -> Certificate Assistant -> Request a Certificate From a Certificate Authority:
-
Enter the required information and check the ‘Saved to disk’ option. Click Continue:

-
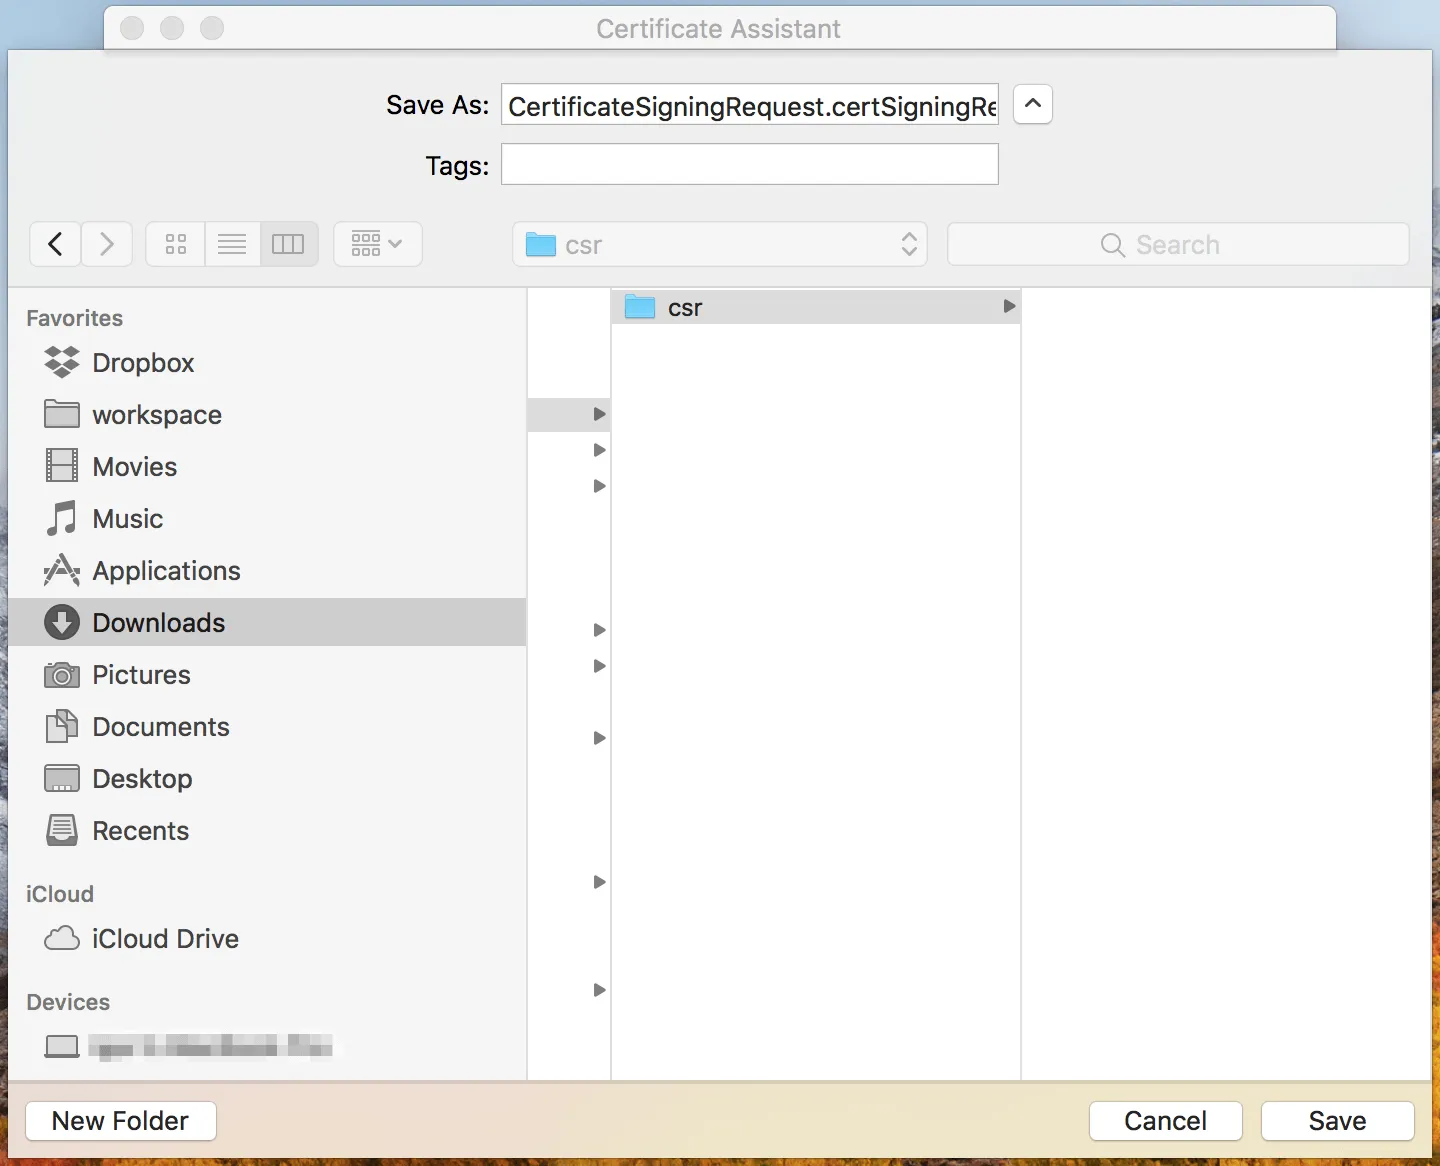
Save the certificate request using the suggested name and click Save. Click Done in the next screen:
Create universal APNS certificate
Section titled “Create universal APNS certificate”-
On the Certificates, IDs & Profiles screen, select Certificates in the left sidebar and then select App IDs in the right dropdown and then click on the plus button:
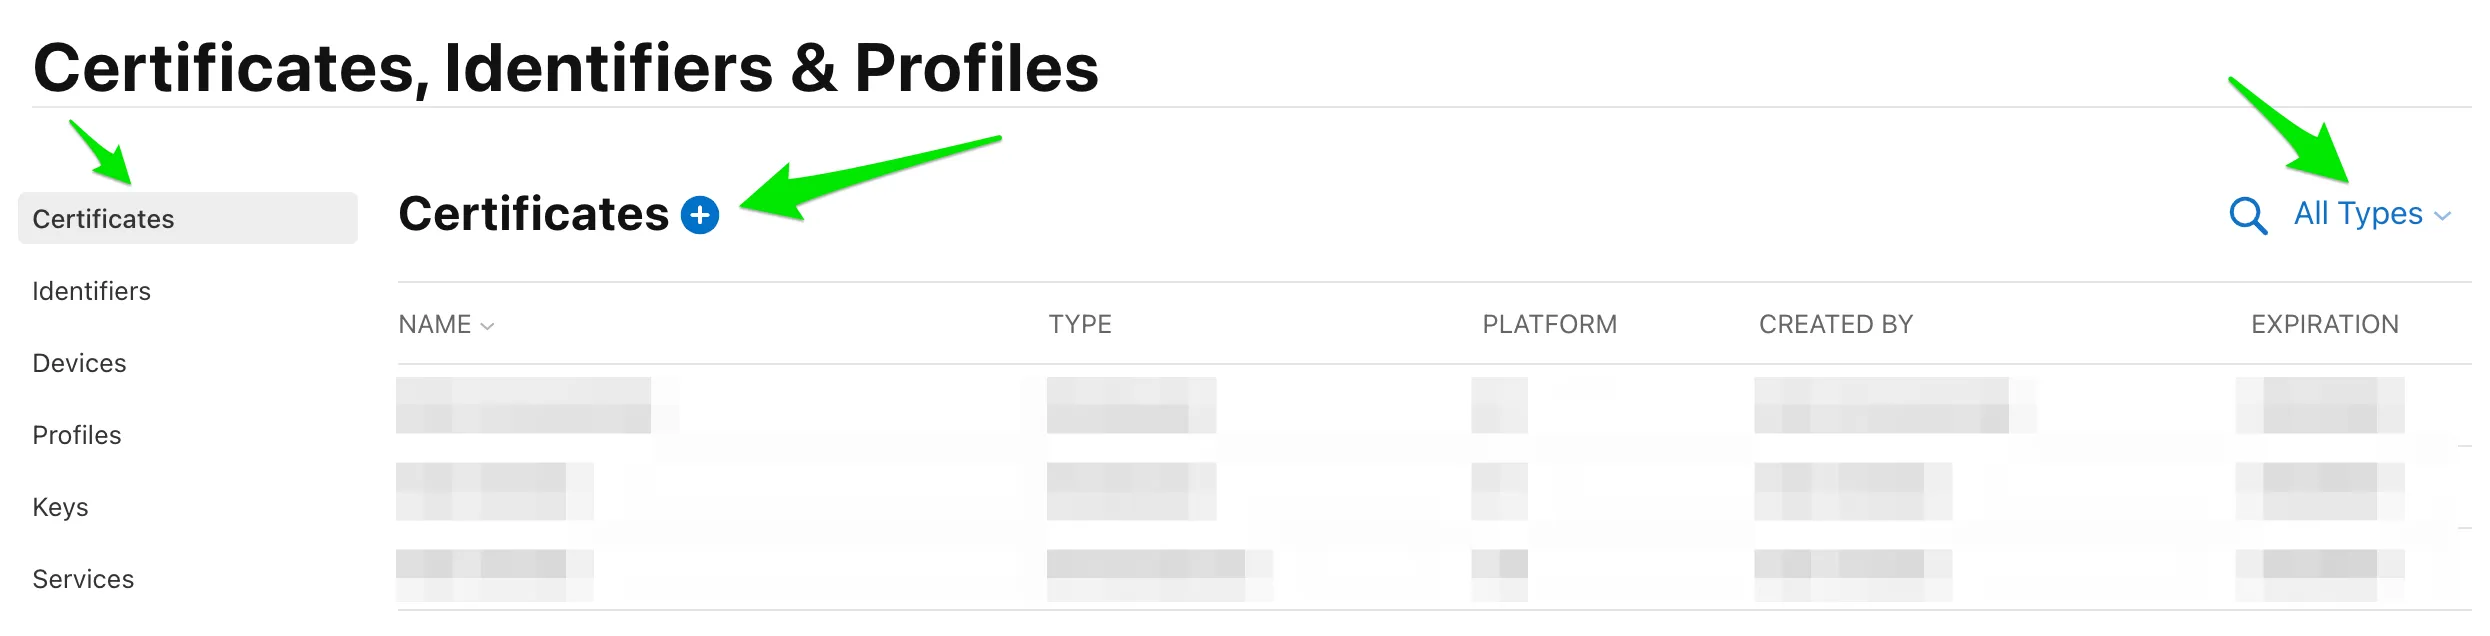
-
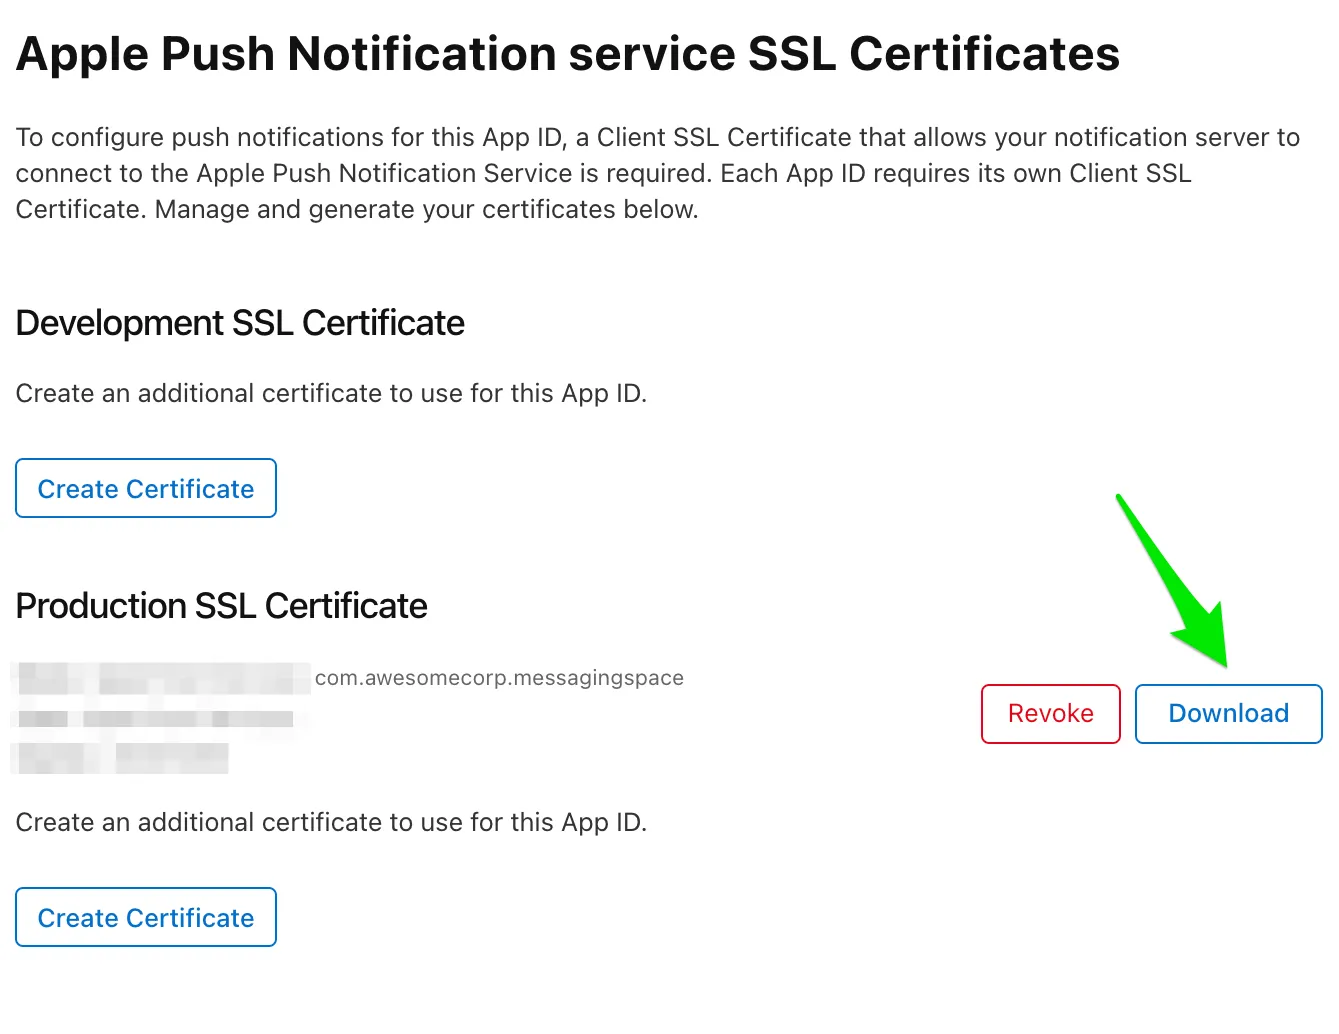
The Add iOS Certificate screen will appear. Choose Apple Push Notifications service SSL (Sandbox & Production) and click Continue:
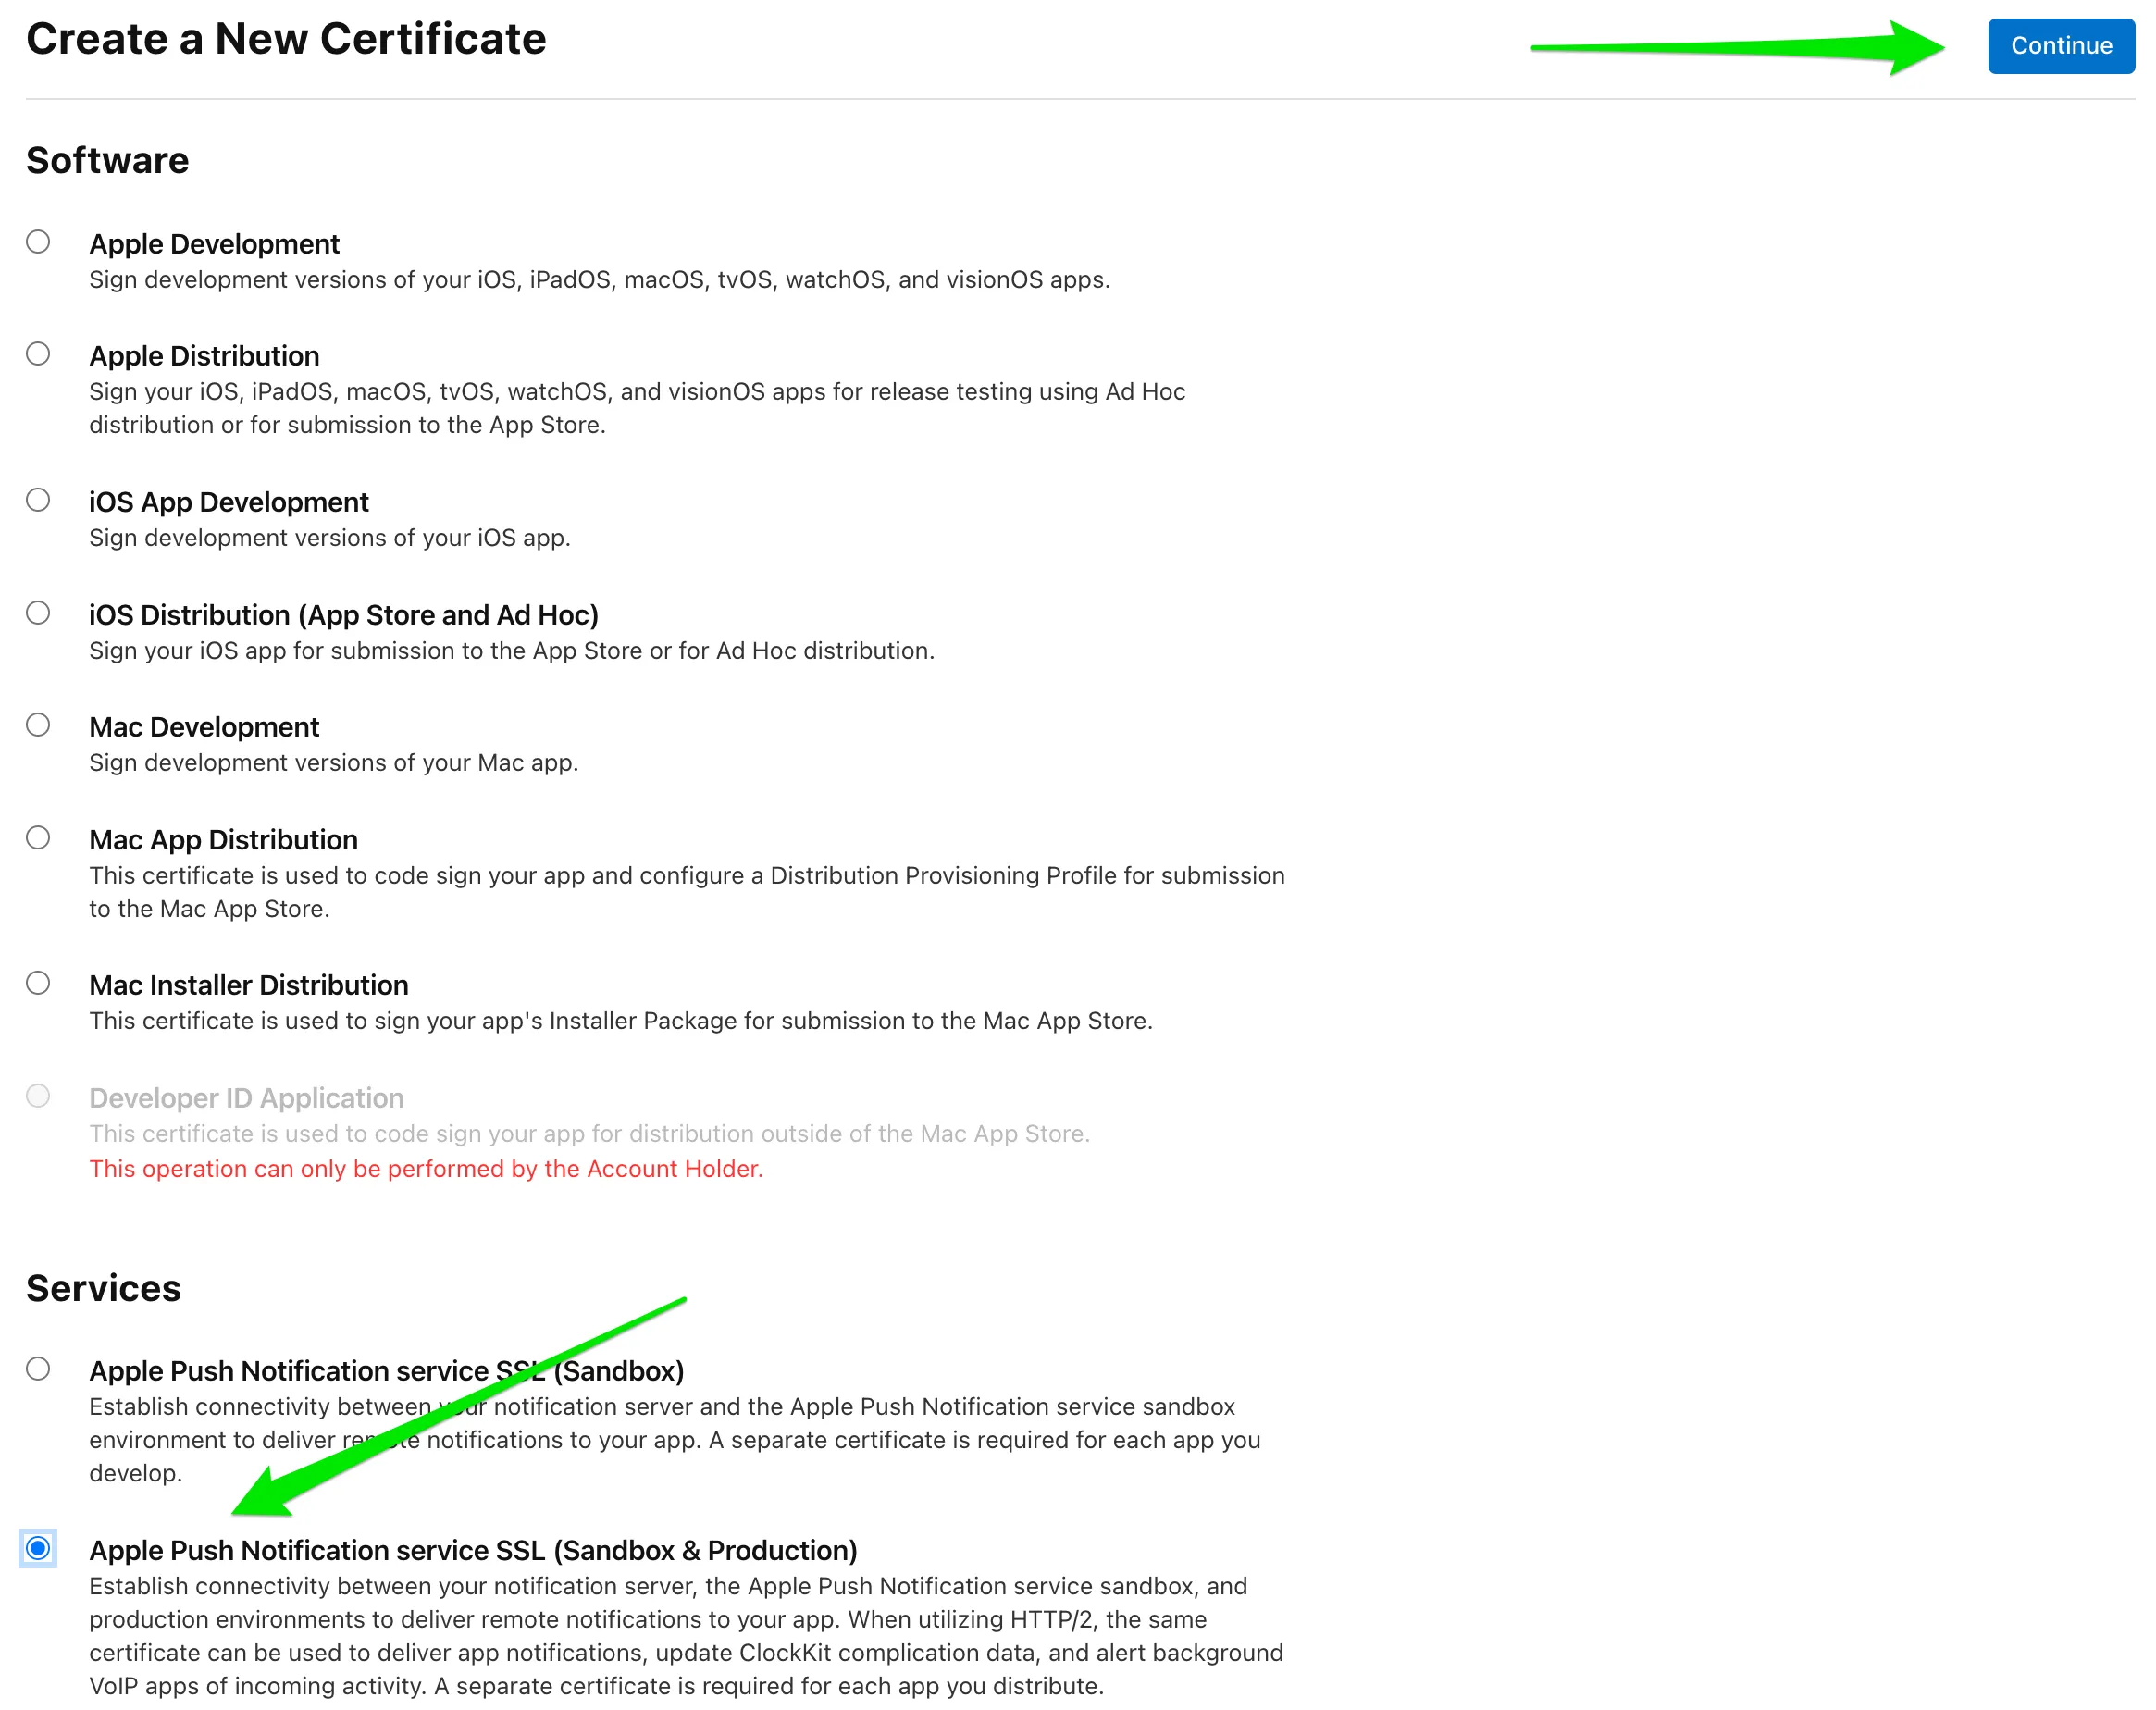
Here we will create a single universal push certificate which is good for both Development and Production environments.
-
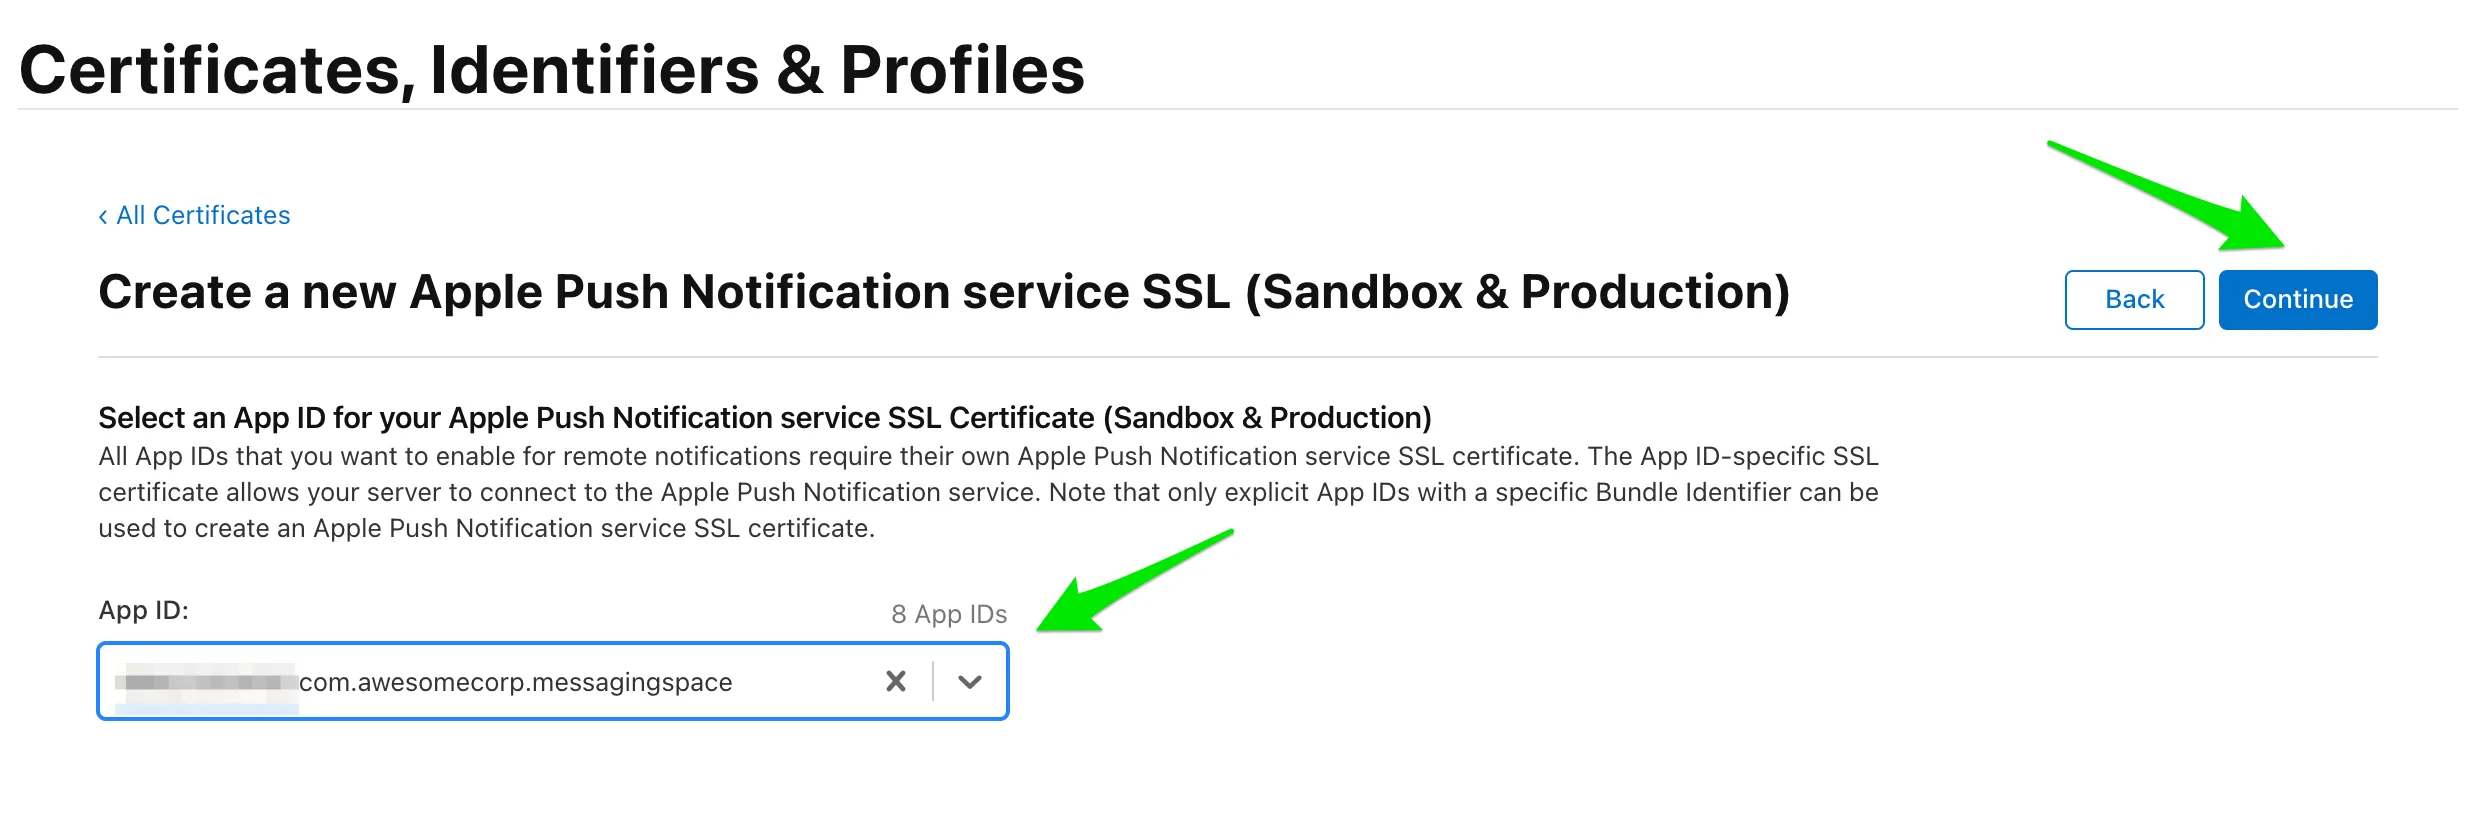
On the next screen choose an App ID you want to create a push certificate for. Then click Continue:
-
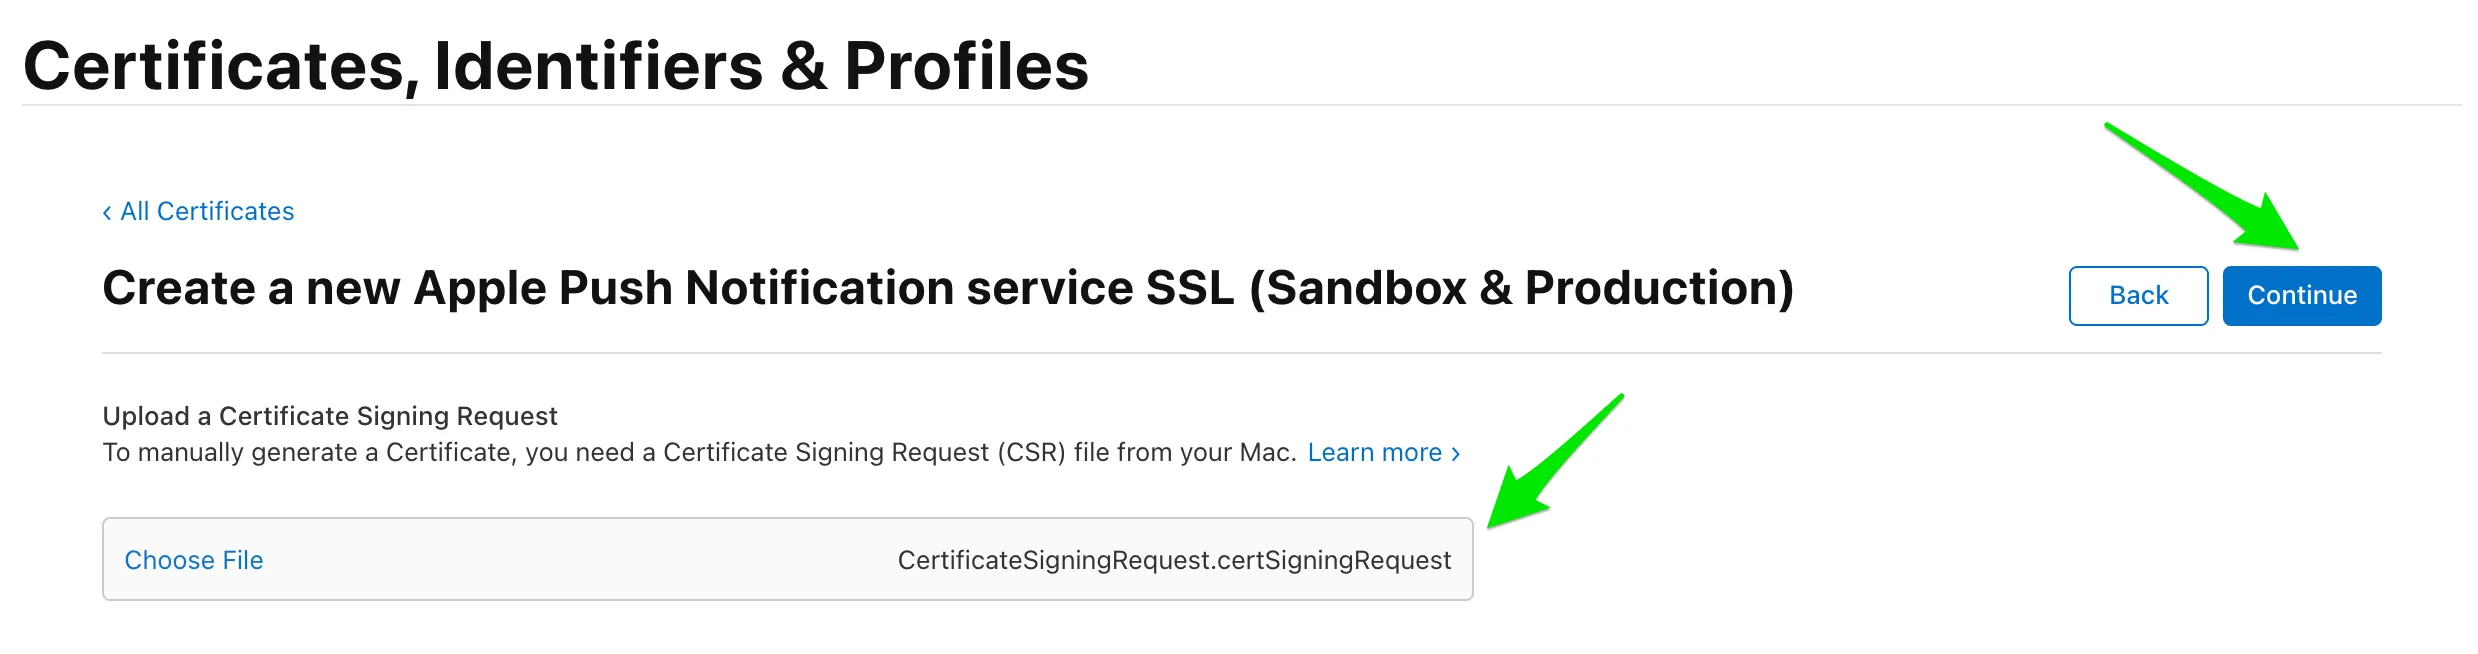
Click ‘Choose File…’ button to locate Certificate Request File that you have saved earlier. Click Continue:
-
Your APNS SSL Certificate will now be generated. Click Download and save it to your hard disk:
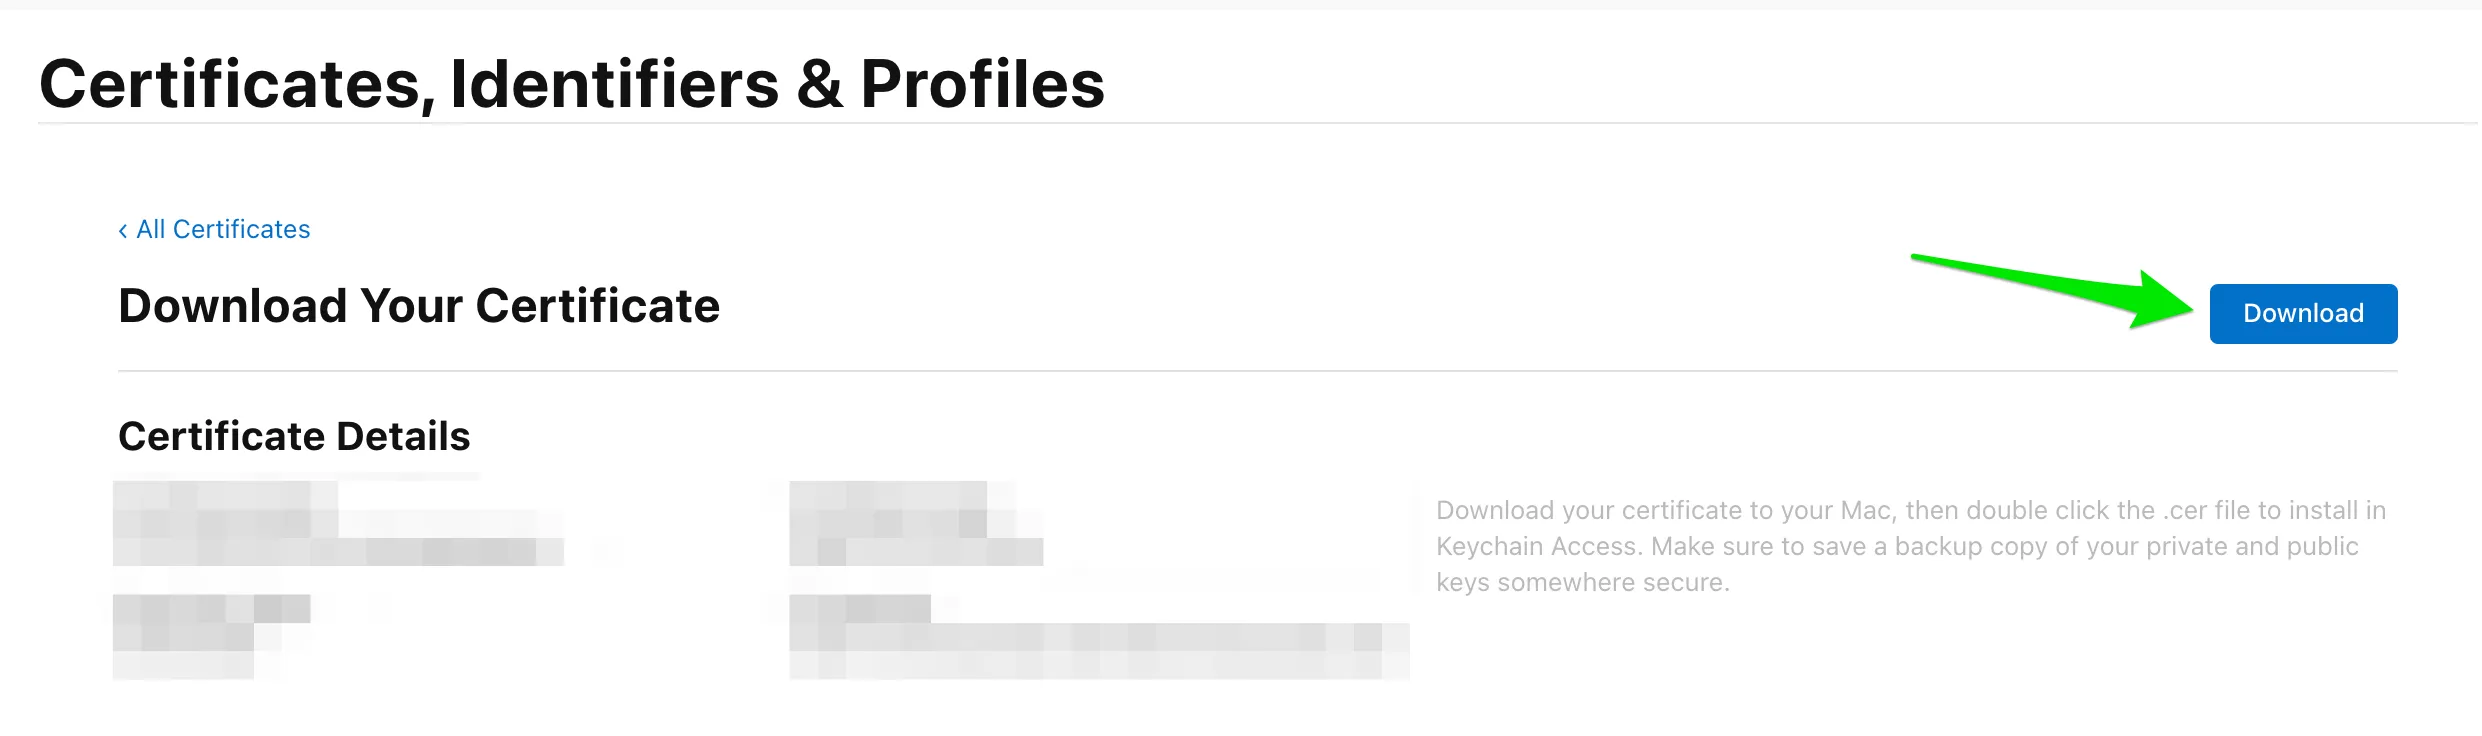
Also, you can download your new certificate on App ID details page.
Identifiers > Select your app id > Capabilities > Push Notifications > Edit:
Create p12 file
Section titled “Create p12 file”-
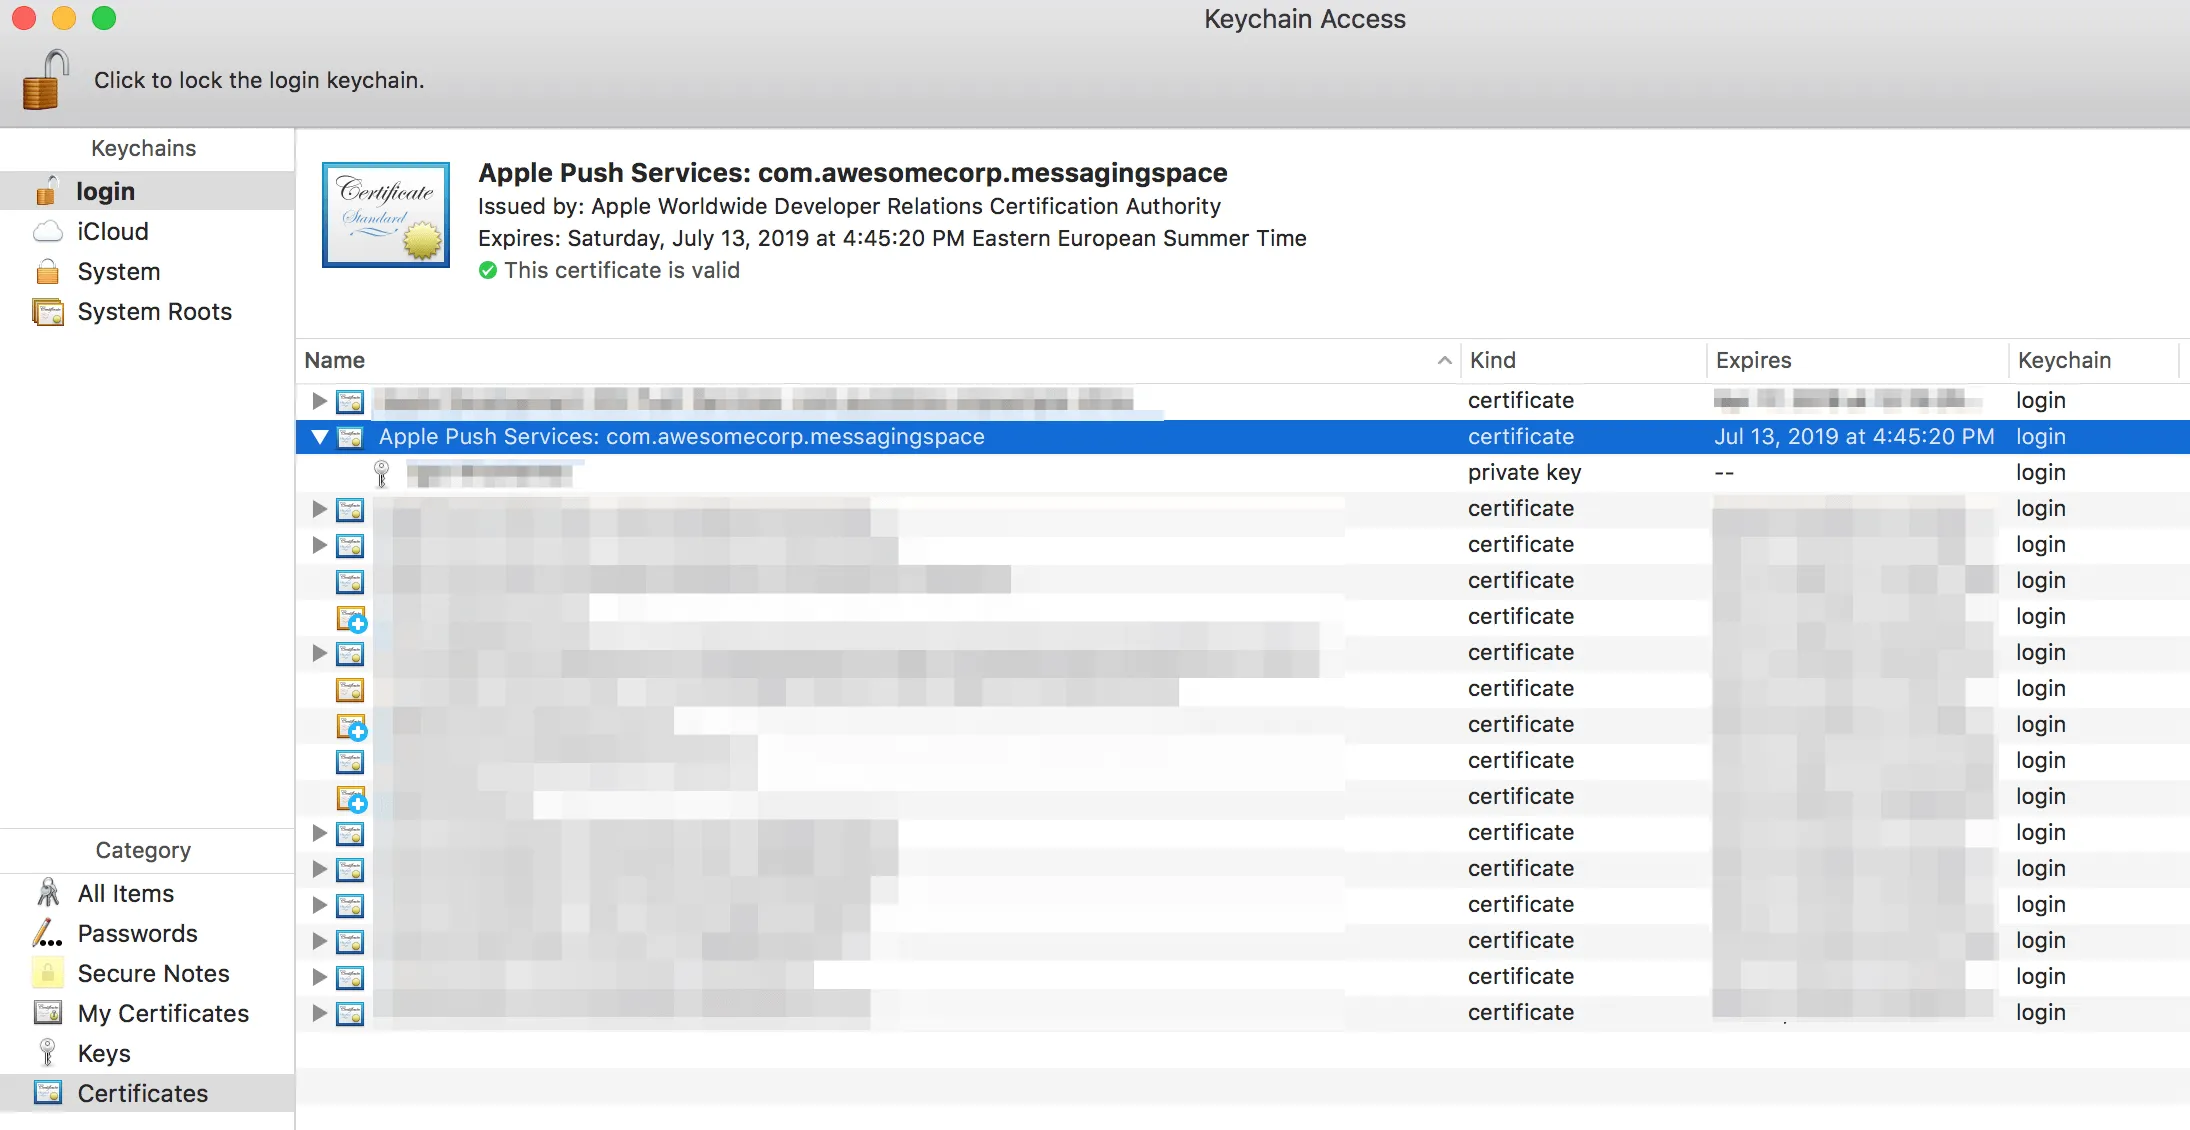
Once your certificate has been created, open the file with Keychain Access app on your computer. If you are asked which keychain to add the certificate to, select login option. SSL certificate will be used by provider(ConnectyCube) application so that it can contact the APNs to send push notifications to your applications.
-
Still in Keychain Access app, select Certificates option in the bottom section of the left sidebar. You will now need to find the certificate you just made; it will have the name Apple Push Services: < Bundle ID > and paired with a private key.
-
Right-click on this key and select Export “Apple Push Services …” option. In the popup that appears, you can call the file whatever you want, but make sure that File Format is set to Personal Information Exchange (.p12).
When exporting the certificate, you can provide a password for the p12 file.
That’s all - now you have a ready-to-go APNS certificate which can be used on both Development and Production environments of your iOS application.
Upload certificate to Dashboard
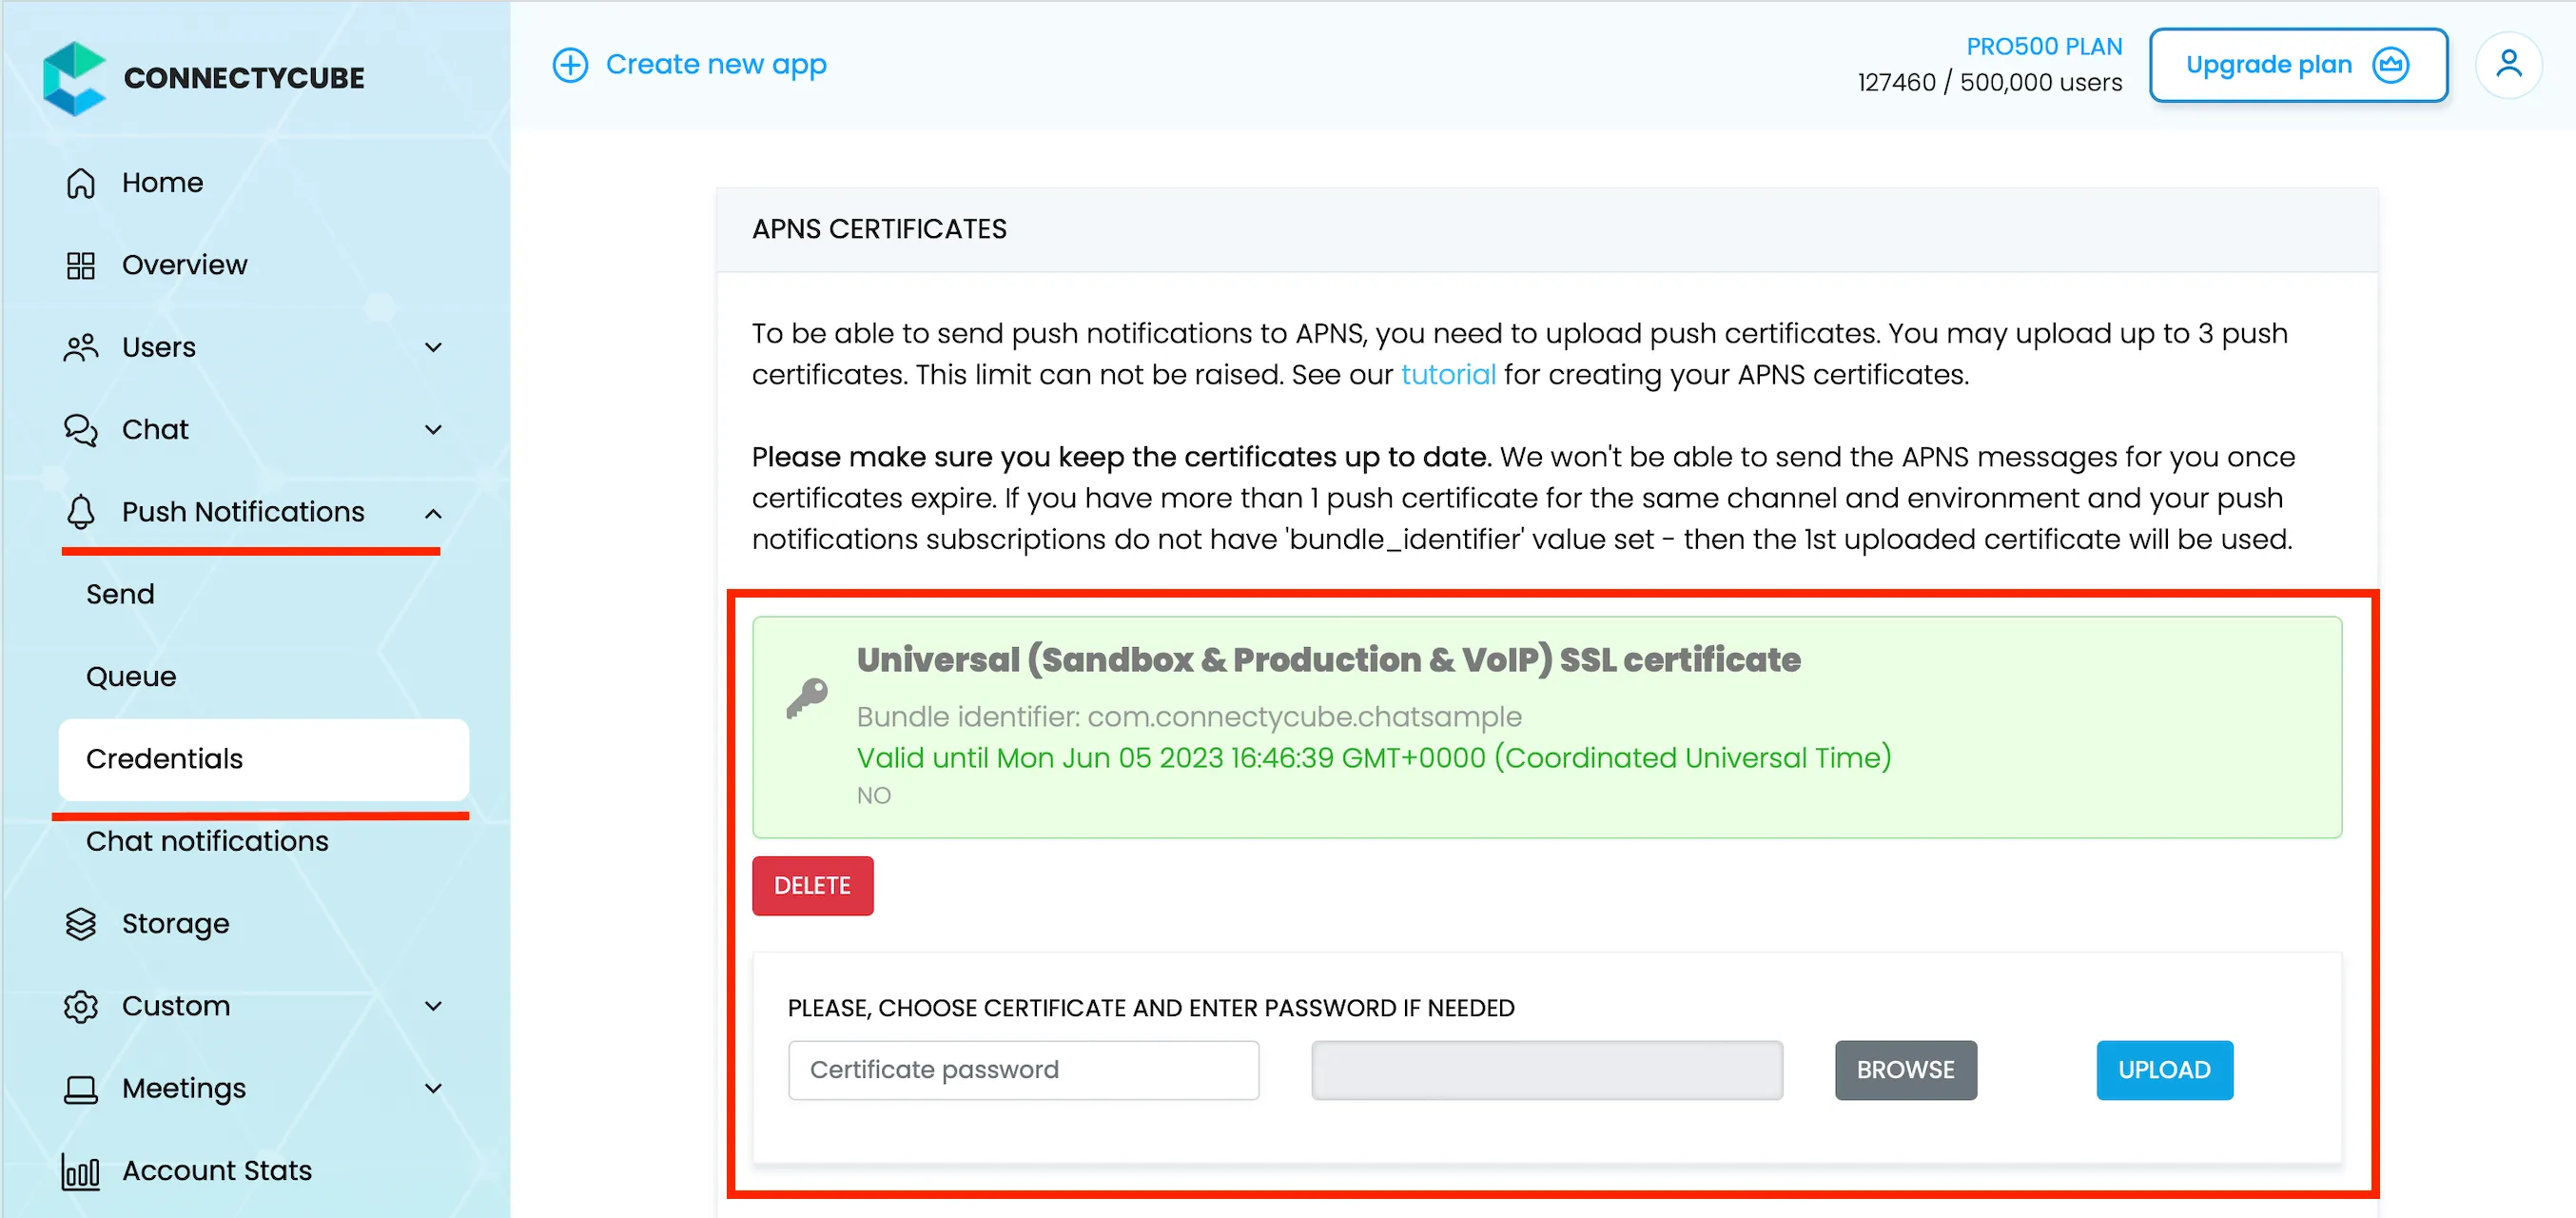
Section titled “Upload certificate to Dashboard”To upload APNS certificate to ConnectyCube Dashboard you need to do the following:
- Open your ConnectyCube Dashboard at admin.connectycube.com
- Go to Push notifications module, Credentials page
- Upload the newly created APNS certificate on Apple Push Notification Service (APNS) form.
Choose certificate and enter password if needed.
After this you will be able to start using push notifications in your iOS application.
Links you might find useful:
Section titled “Links you might find useful:”How to submit an iOS app to the App Store: Step-by-step guide
How to upload app to the Google Play Store: Step-by-step guide