How to submit an iOS app to the App Store: Step-by-step guide
Uploading the iOS application to AppStore might seem challenging for the first time, especially for people who never did that before. With a step-by-step guide and detailed instruction this process can be quite easy and clear to successfully release the first application.
Before you start, make sure you have the following things ready for the further work:
- Apple Developer Program Membership is active
- If you are new, visit https://developer.apple.com/programs/enroll/ to enroll in the Apple developer program.
Price: The Apple Developer Program is $99 USD per membership year
- If you are new, visit https://developer.apple.com/programs/enroll/ to enroll in the Apple developer program.
- iOS certificates for publishing to the App Store are created:
- Bundle ID - The Bundle ID is used to identify the app.
- Provisioning profile - The provisioning profile saves the configuration of the apps for different devices and must be used together with the distribution certificate and bundle ID to sign the app.
- iOS Distribution Certificate - Apple requires the app to be signed with a valid iOS distribution certificate. You can sign all your apps with a single certificate.
- Push Notification Certificate - To configure the Push notifications, you will use the tool One Signal. This requests a certificate from Apple to identify the app to send the notifications to. This certificate will be created on the Apple Developer Program.
The process of submitting application to the Apple App Store consists of 5 main steps:
Step 1: Create an App Store Connect record for the application
Step 2: Configure application using Xcode
Step 3: Archive and upload application to App Store Connect
Step 4: Configure application’s metadata and further details in its App Store Connect record
Step 5: Submit application for review
Step 1: create an App Store Connect record for the application
Section titled “Step 1: create an App Store Connect record for the application”Creating the record in App store Connect is the first major step that initiates the publishing procedure itself. It means, the app will be existing in the App store as a record and will be waiting for the build from the Xcode to be uploaded. Better to say, it is a “shell” of your application that will be fulfilled with the build and all necessary information later.
To create a record for the application in the App Store Connect:
-
Log in to App Store connect:
go to App Store Connect and log in with your Apple ID. Available sections become available right after login: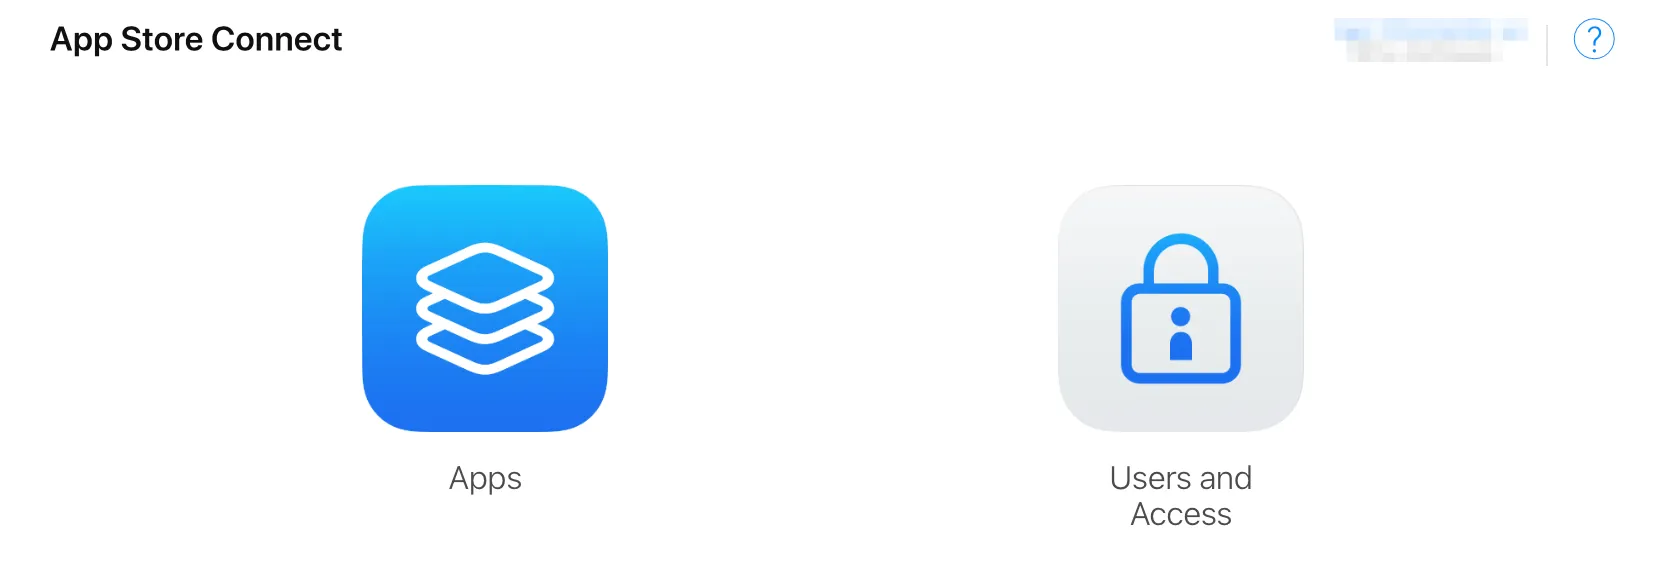
-
Create a New App:
- Click on “Apps”
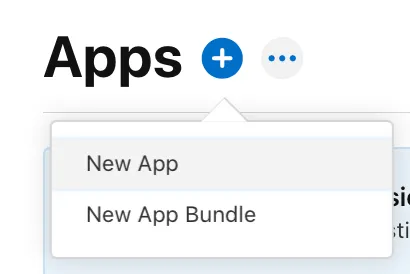
- Click on the ”+” button and select “New App”.
-
Fill in the required information. All fields are mandatory, you can’t change these details later, so be sure of what you enter:
- platform - the platform where your application operates;
- app name - the name of the application that will be displayed on the App Store;
- primary language - the language of the application;
- bundle ID - the unique identifier for your app on the App Store. This should match the one created when setting up iOS certificates and provisioning profiles.
- SKU - the unique identifier for your app that isn’t visible to users. It should match the Bundle ID and can include letters, numbers, hyphens, periods, and underscores, starting with a letter or number
- user access - set it if applicable.
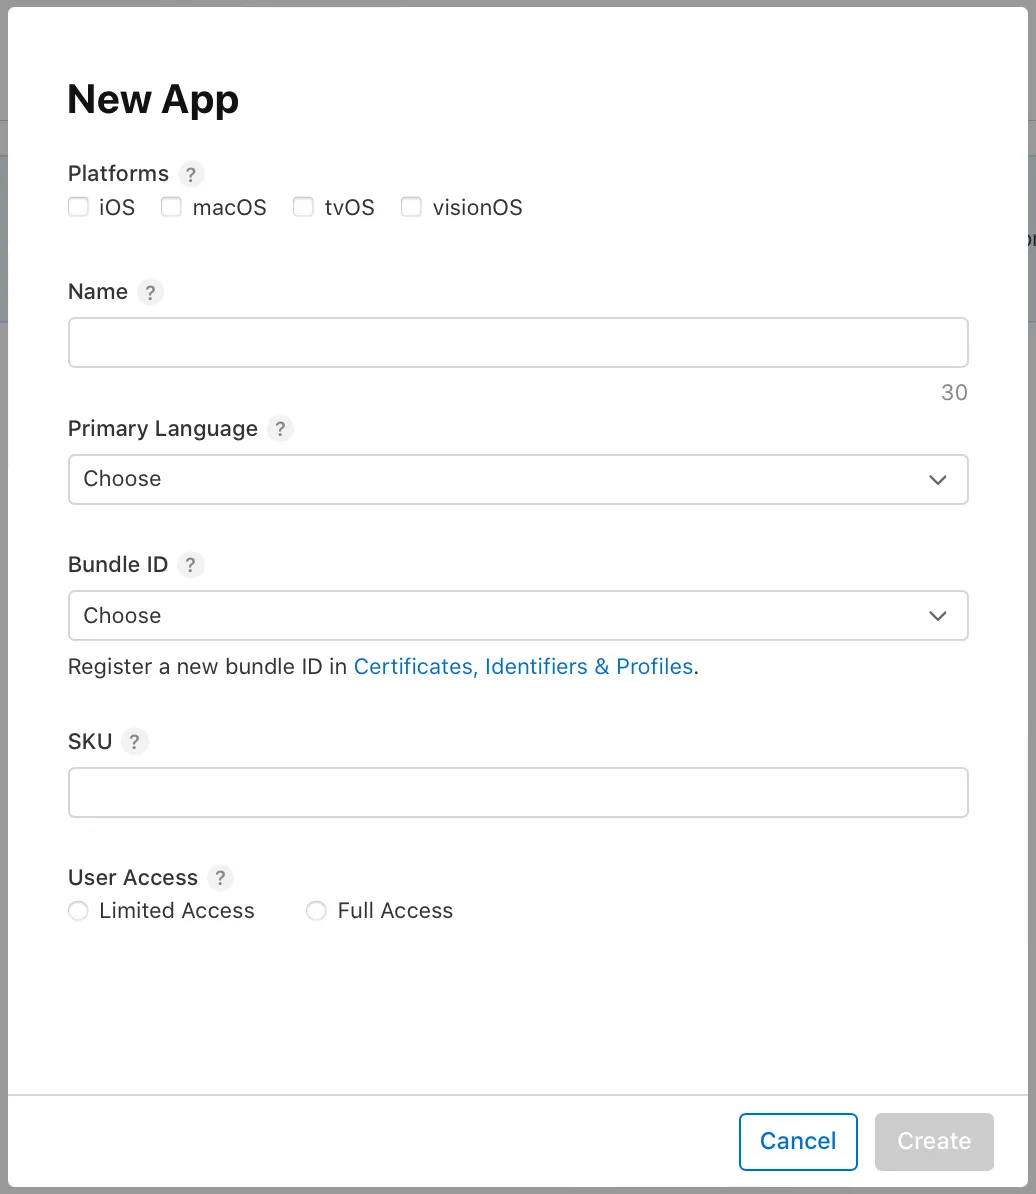
‘Create’ button becomes active when all the fields on the form are filled. Once the new application name and information from the forms are verified, the application is created and the window to input the distribution information for the created application is shown.

Note: adding required information to submit application to App store is covered below in ‘Configure application’s information in App Store Connect’ section
Step 2: Configure application in Xcode
Section titled “Step 2: Configure application in Xcode”When the record for the application is ready in the App Store Connect, the build needs to be uploaded from the Xcode to the created record, so the application will be considered as an application ready to be submitted.
For that, launch the Xcode and do the following:
-
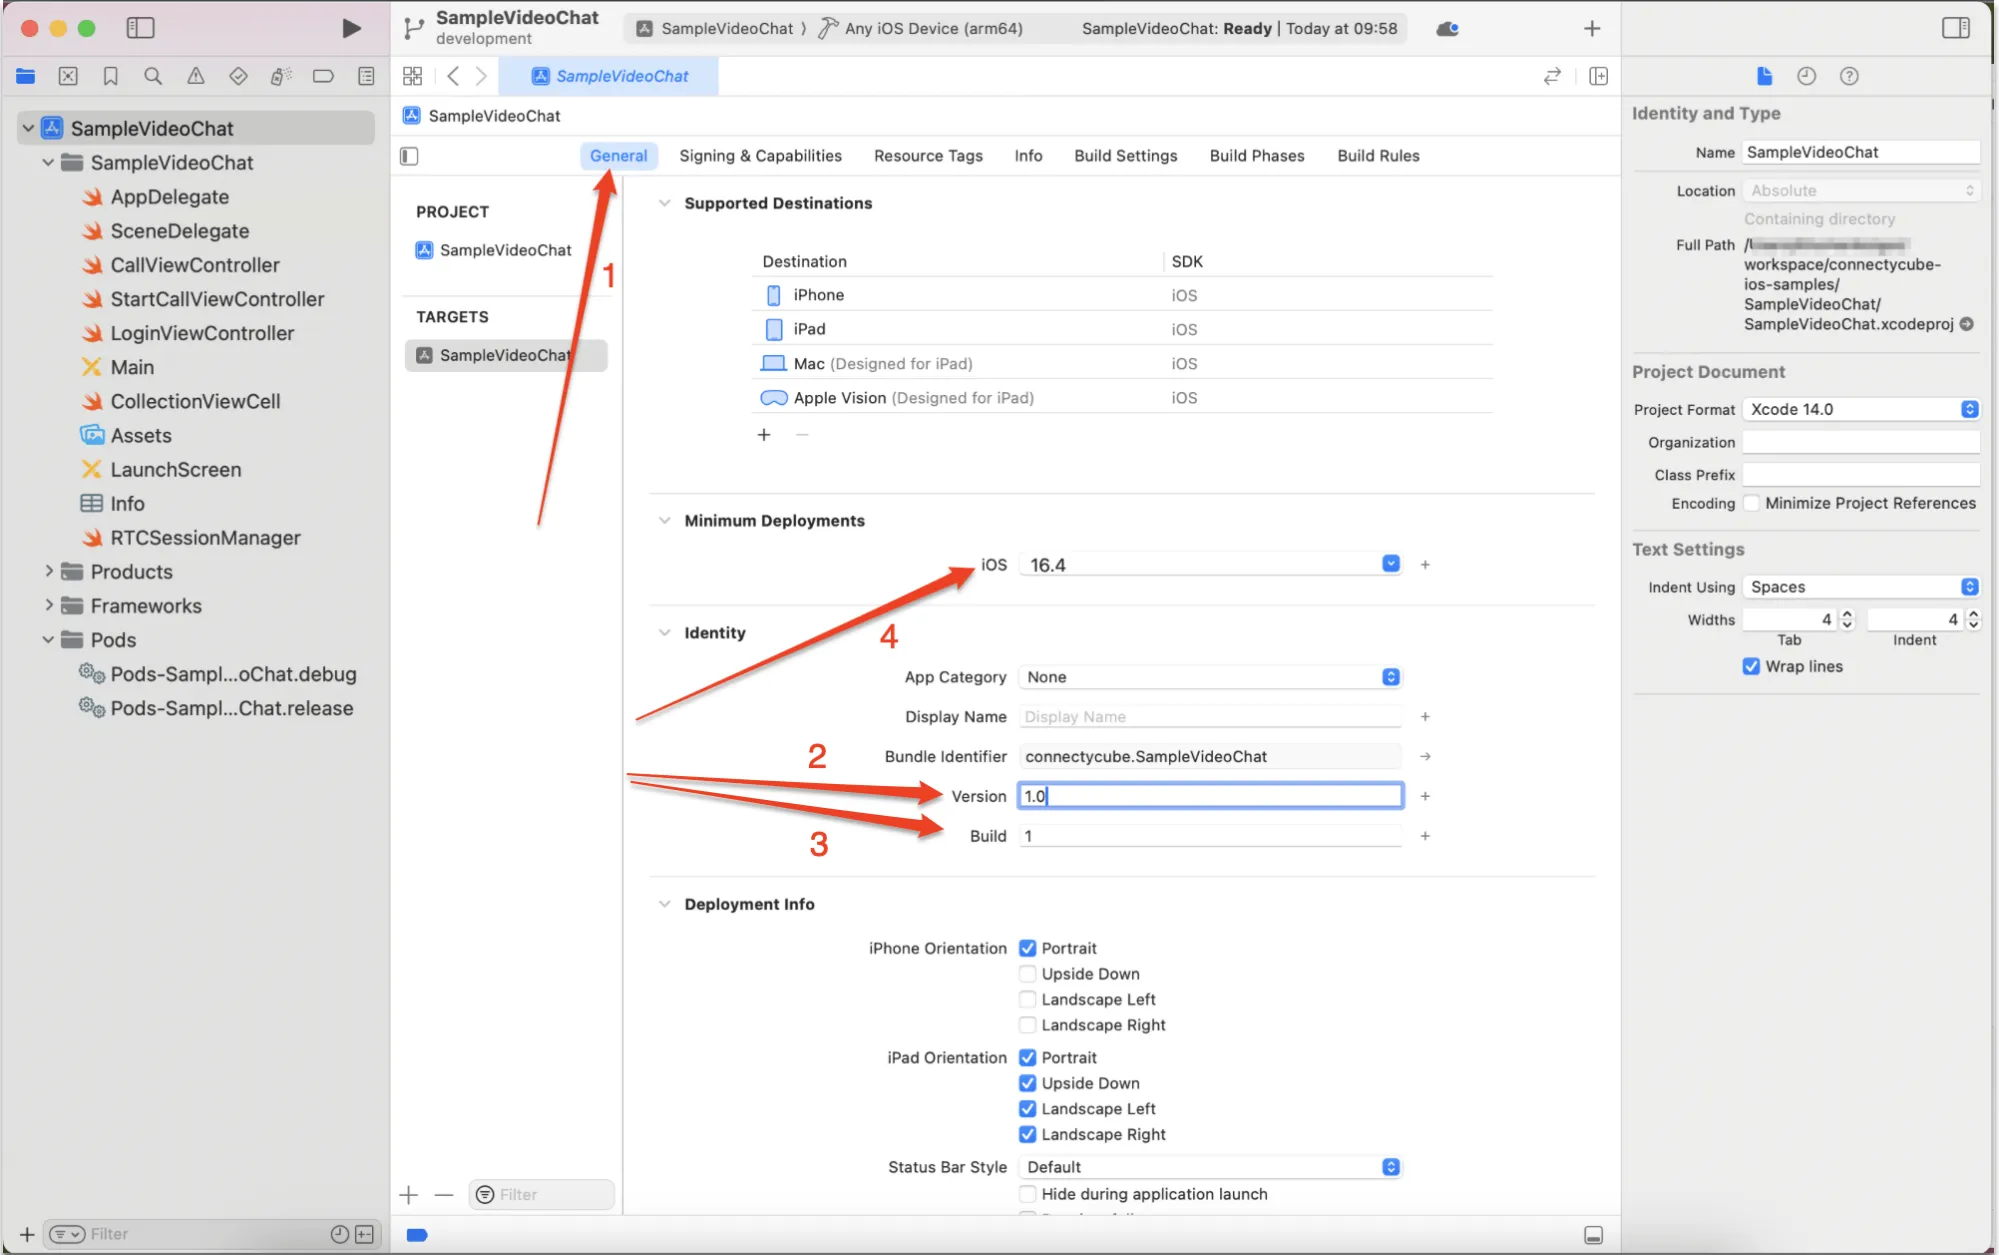
In Xcode, select your project in the Project Navigator.
-
Select the target and then go to the General tab.
-
Update the version and build numbers.
-
Set the deployment target: ensure that the deployment target is set to the appropriate iOS version.
Once the Version and Build Number are set, proceed with code signing:
-
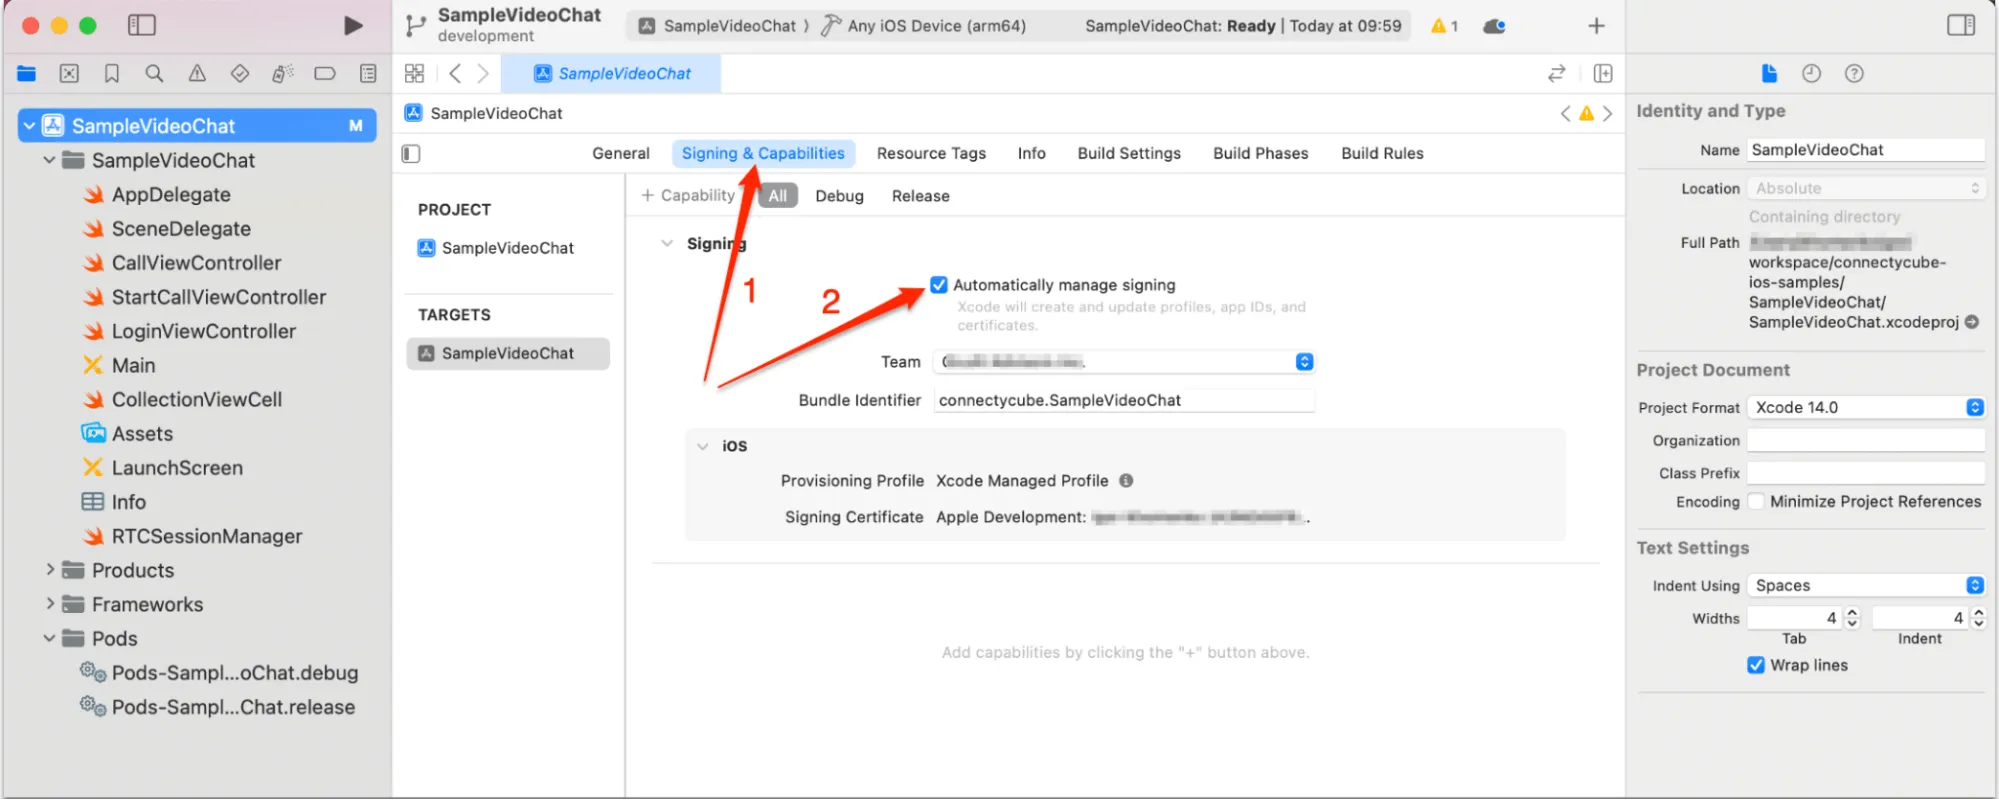
Go to the Signing & Capabilities tab.
-
Ensure that “Automatically manage signing” is checked.
-
Select your Apple Developer account.
Step 3: Archive and upload application using Xcode
Section titled “Step 3: Archive and upload application using Xcode”In Xcode, an archive of your app is a packaged version that includes everything needed to distribute the app, such as the compiled code, resources, and debugging information. It’s more than just a simple build, it’s a complete snapshot of your app in a state that’s ready for distribution.
You need an archive for submitting your app to the App Store because it ensures that your app is in the correct format, with all the necessary metadata and resources bundled together. The archive also allows Xcode to repackage your app based on your distribution settings, whether that’s for the App Store, TestFlight, or Ad Hoc distribution.
This process ensures that your app meets all the necessary requirements and is properly signed before being submitted to the App Store for review and distribution.
-
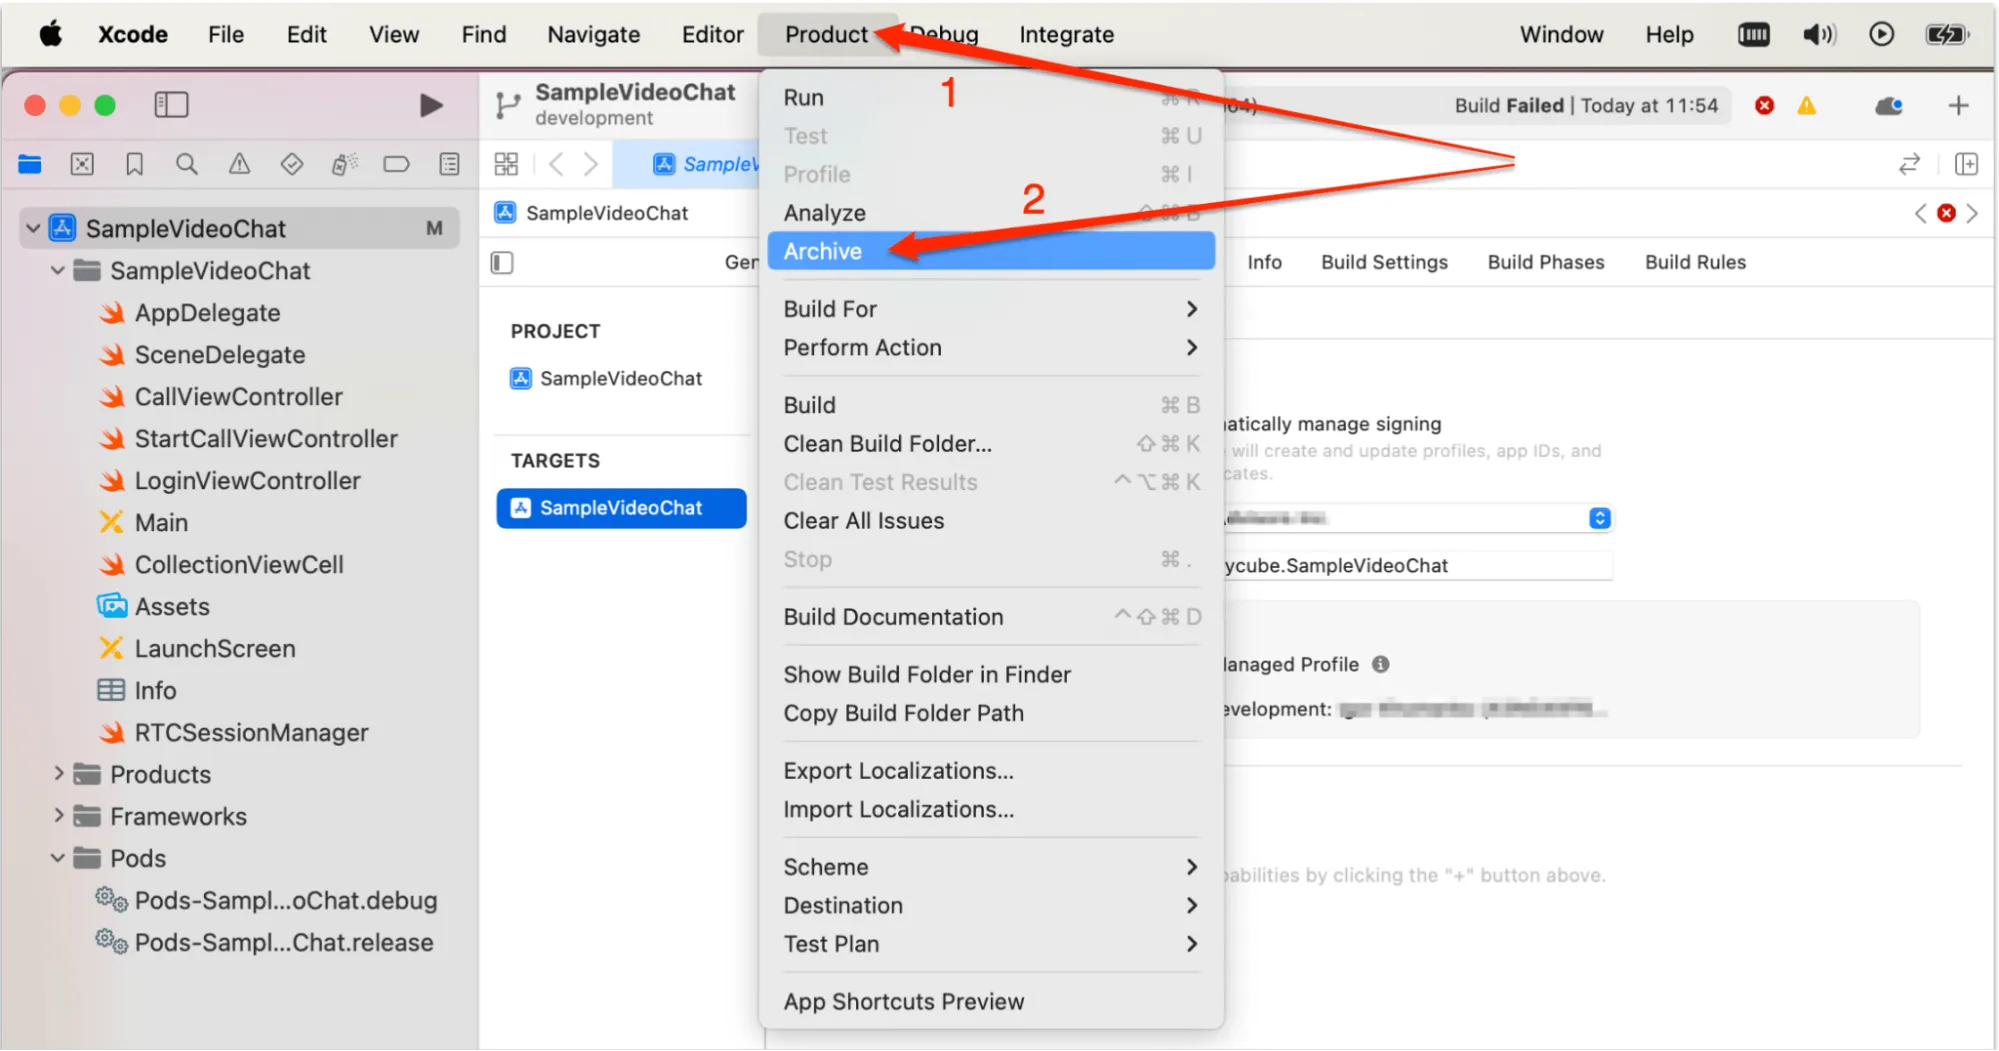
Archive your app:
- In Xcode, select the target and go to Product > Archive
- After the archive is created, the Organizer window will open.
-
Validate and upload your app
Before uploading, it’s essential to validate the archive to catch and resolve any potential issues. Once validated, you can upload your app to App Store Connect.- Select the archive in the Organizer window in Xcode
- Click on the “Distribute App” button
- Select “App Store Connect” as the distribution method
- Choose “Upload”
Follow the prompts to validate the archive and resolve any errors before proceeding and upload your application
After this step the build is uploaded and appears under the ‘Builds’ section. It will be available to be selected during the submitting the app for review in Step 5.
Step 4: configure application’s information in App Store Connect
Section titled “Step 4: configure application’s information in App Store Connect”The final step before the final submit of application for review is to add all necessary information about the application in the appropriate sections in App Store Connect. The information required for submitting the application becomes available when clicking on the created application (at this stage the application has ‘Prepare for submission’ status):
-
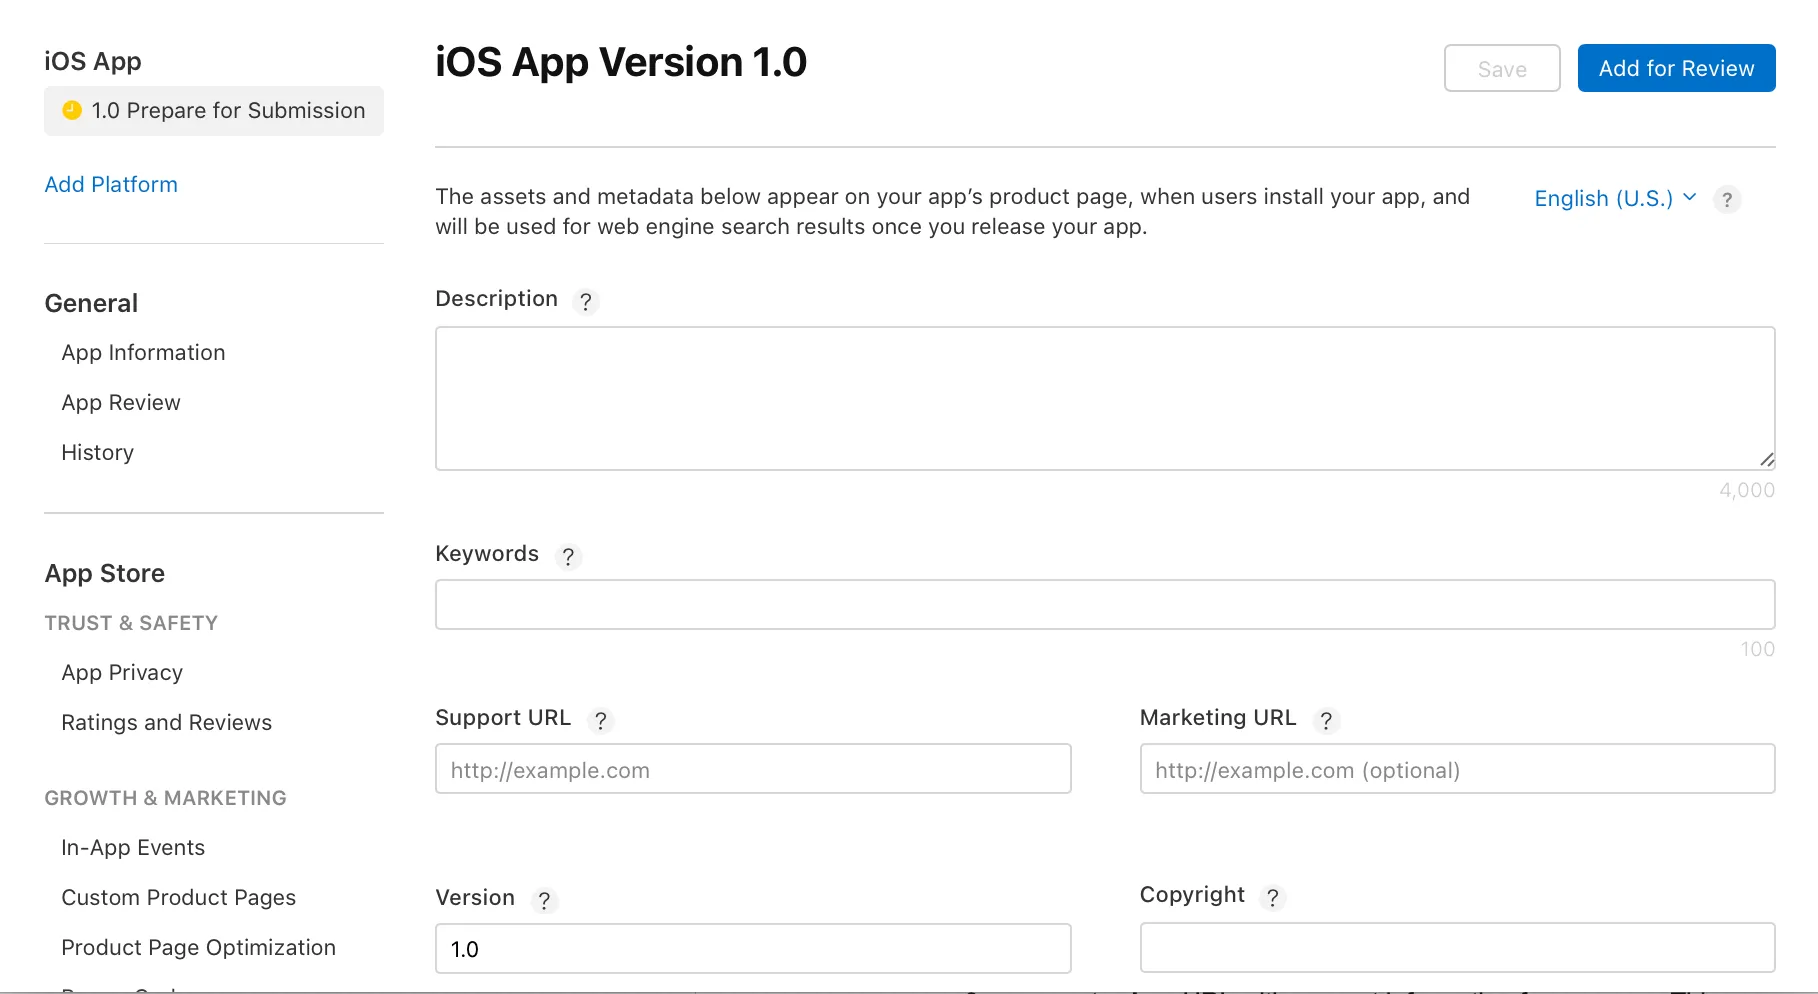
Enter app information - enter the app’s information, including the description, keywords, and app review information.
-
Upload screenshots - upload the screenshots for all required device sizes. This information is used for all platforms of the application. Any changes will be released with all next application versions.

After publishing an app to the App Store it appears on the application’s product page, when users install the application, and will be used for web engine search results once the application is released.
Step 5: Submit application for review
Section titled “Step 5: Submit application for review”When you are sure all required fields are filled out and all necessary documents are uploaded, you are ready for submission.
-
Go to the “iOS app” section and click on your app that is in ‘Ready for submission’ status now
-
Scroll page to ‘Builds’ section -> pick the build you want to push for review
-
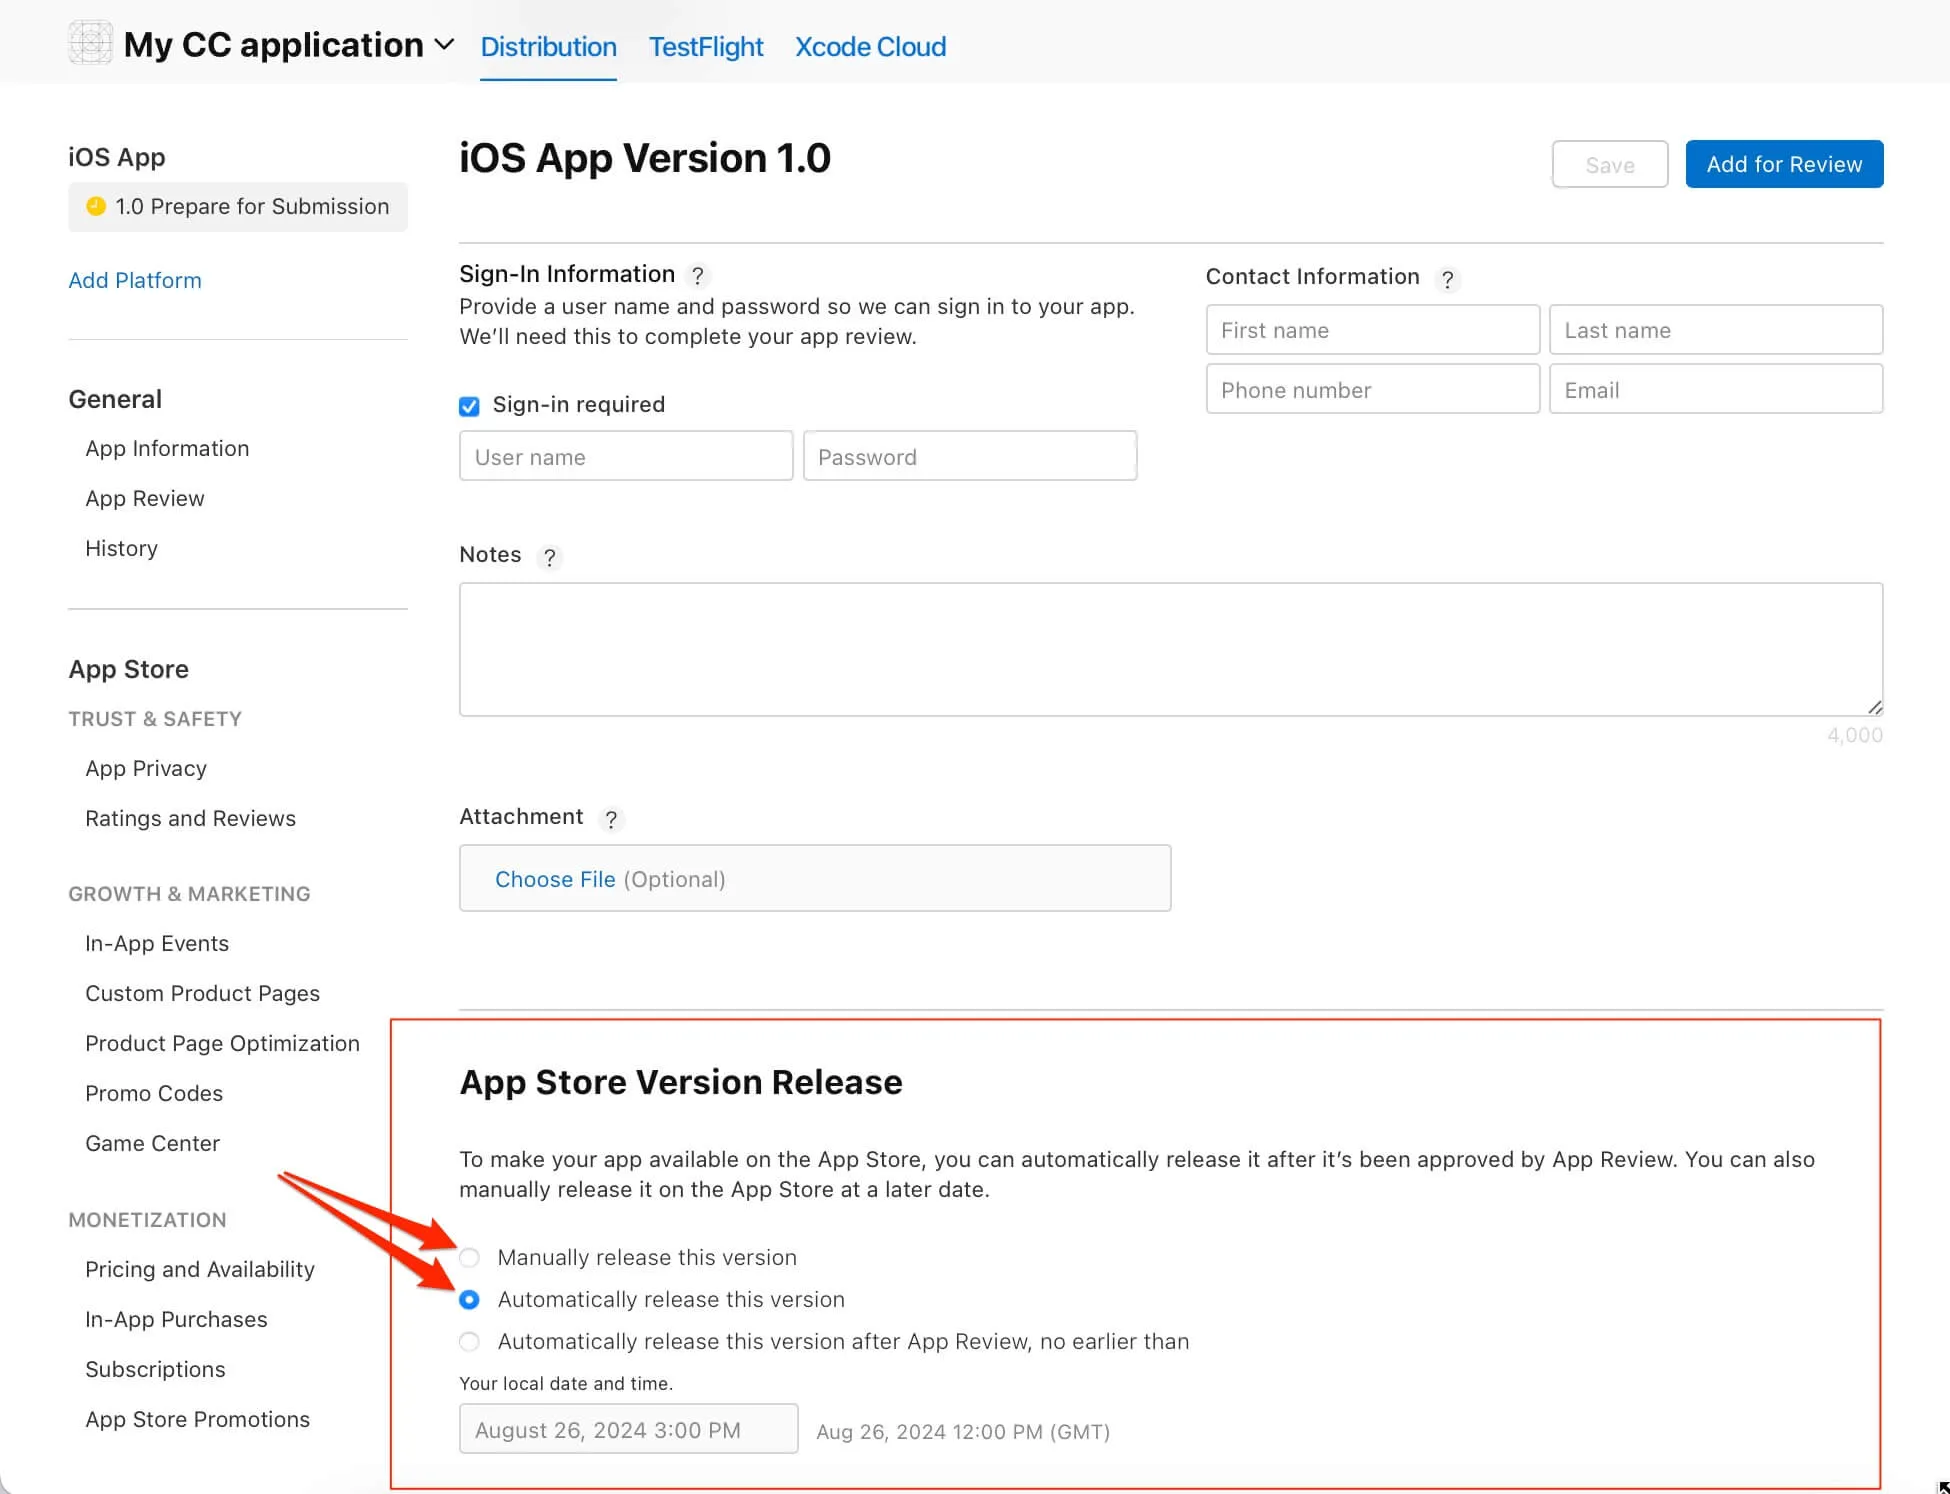
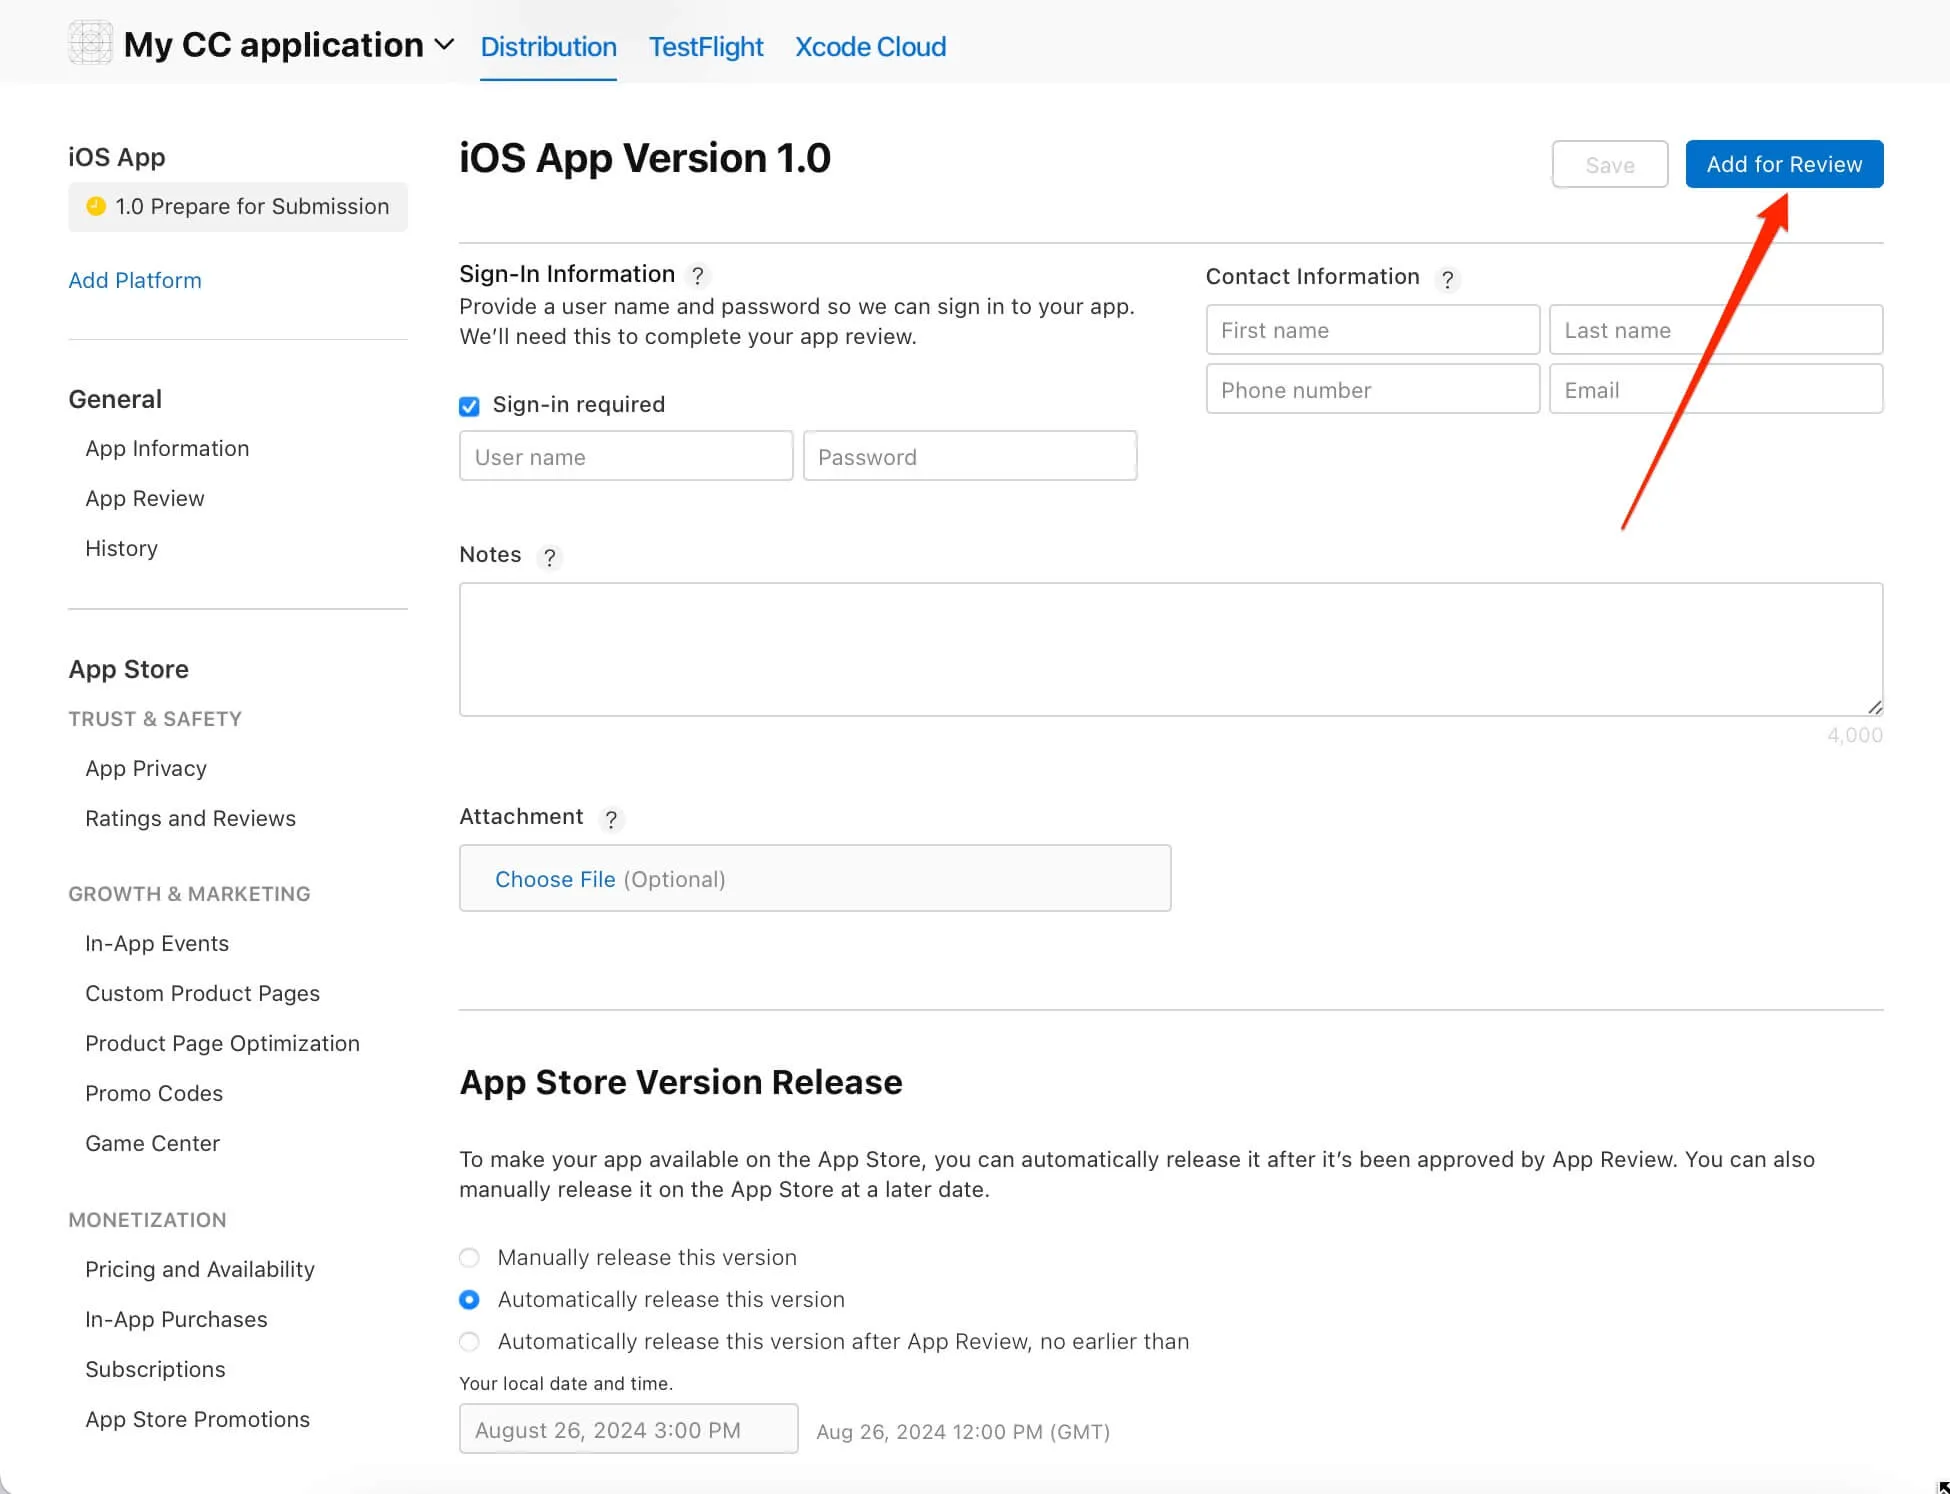
Scroll page down to ‘AppStore version release’ section -> select the appropriate submission options (e.g., Manual release or Automatic release after approval).
-
Click the “Add for Review” button.
-
Confirm submitting
Congrats! Now the app is in the ‘Wait for Approval’ status. Apple’s review process can take a few days to a week. You may receive feedback requiring changes. If Apple provides feedback, address the issues and resubmit the app.
If you choose manual release, go back to App Store Connect once your app is approved and release it. If you choose automatic release, the app will be released as soon as it’s approved.
Conclusion
Section titled “Conclusion”Thorough preparation can ensure a smooth submission. Once your app is live, you’ll be ready to reach a global audience and provide them with a high-quality iOS experience. Remember, the journey doesn’t end here—continue to monitor user feedback and update your app to keep it at its best.