External authentication via Custom Identity Provider (CIdP)
Custom Identity Provider (CIdP) feature is necessary if you have your own user database and want to authenticate users in ConnectyCube against it. It works the same way as Facebook/Twitter SSO.
With Custom Identity Provider feature you can continue use your user database instead of storing/copying user data to ConnectyCube database.
Login flow diagram
Section titled “Login flow diagram”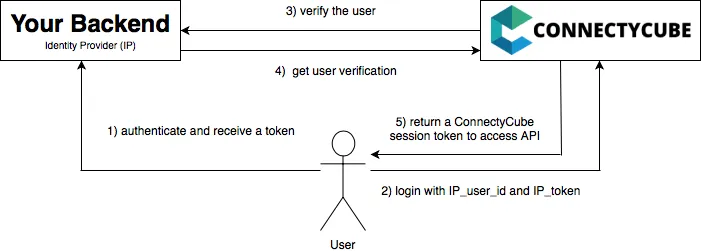
Here are explanations to the diagram:
-
A user logins in your Backend and receives a token.
-
The user logins to ConnectyCube with data received from your Backend:
POST https://api.connectycube.com/loginlogin=<IP-user-token>password=<any-random-value-to-pass-the-validation> -
ConnectyCube backend sends a request to your Backend to verify the user:
GET https://yourserver.co/user/verify?token={token}Note: This URL has to be configured in your ConnectyCube Dashboard (check the instructions below).
-
Get user verification confirmation from your Backend. If ConnectyCube server gets successful verification, a ConnectyCube User entity will be created (during first login) and ConnectyCube session token will be returned to access API.
-
Next step is login to Chat. Use user_id and ConnectyCube session token retrieved at the previous stage instead of password to log in to Chat.
Setup mapping
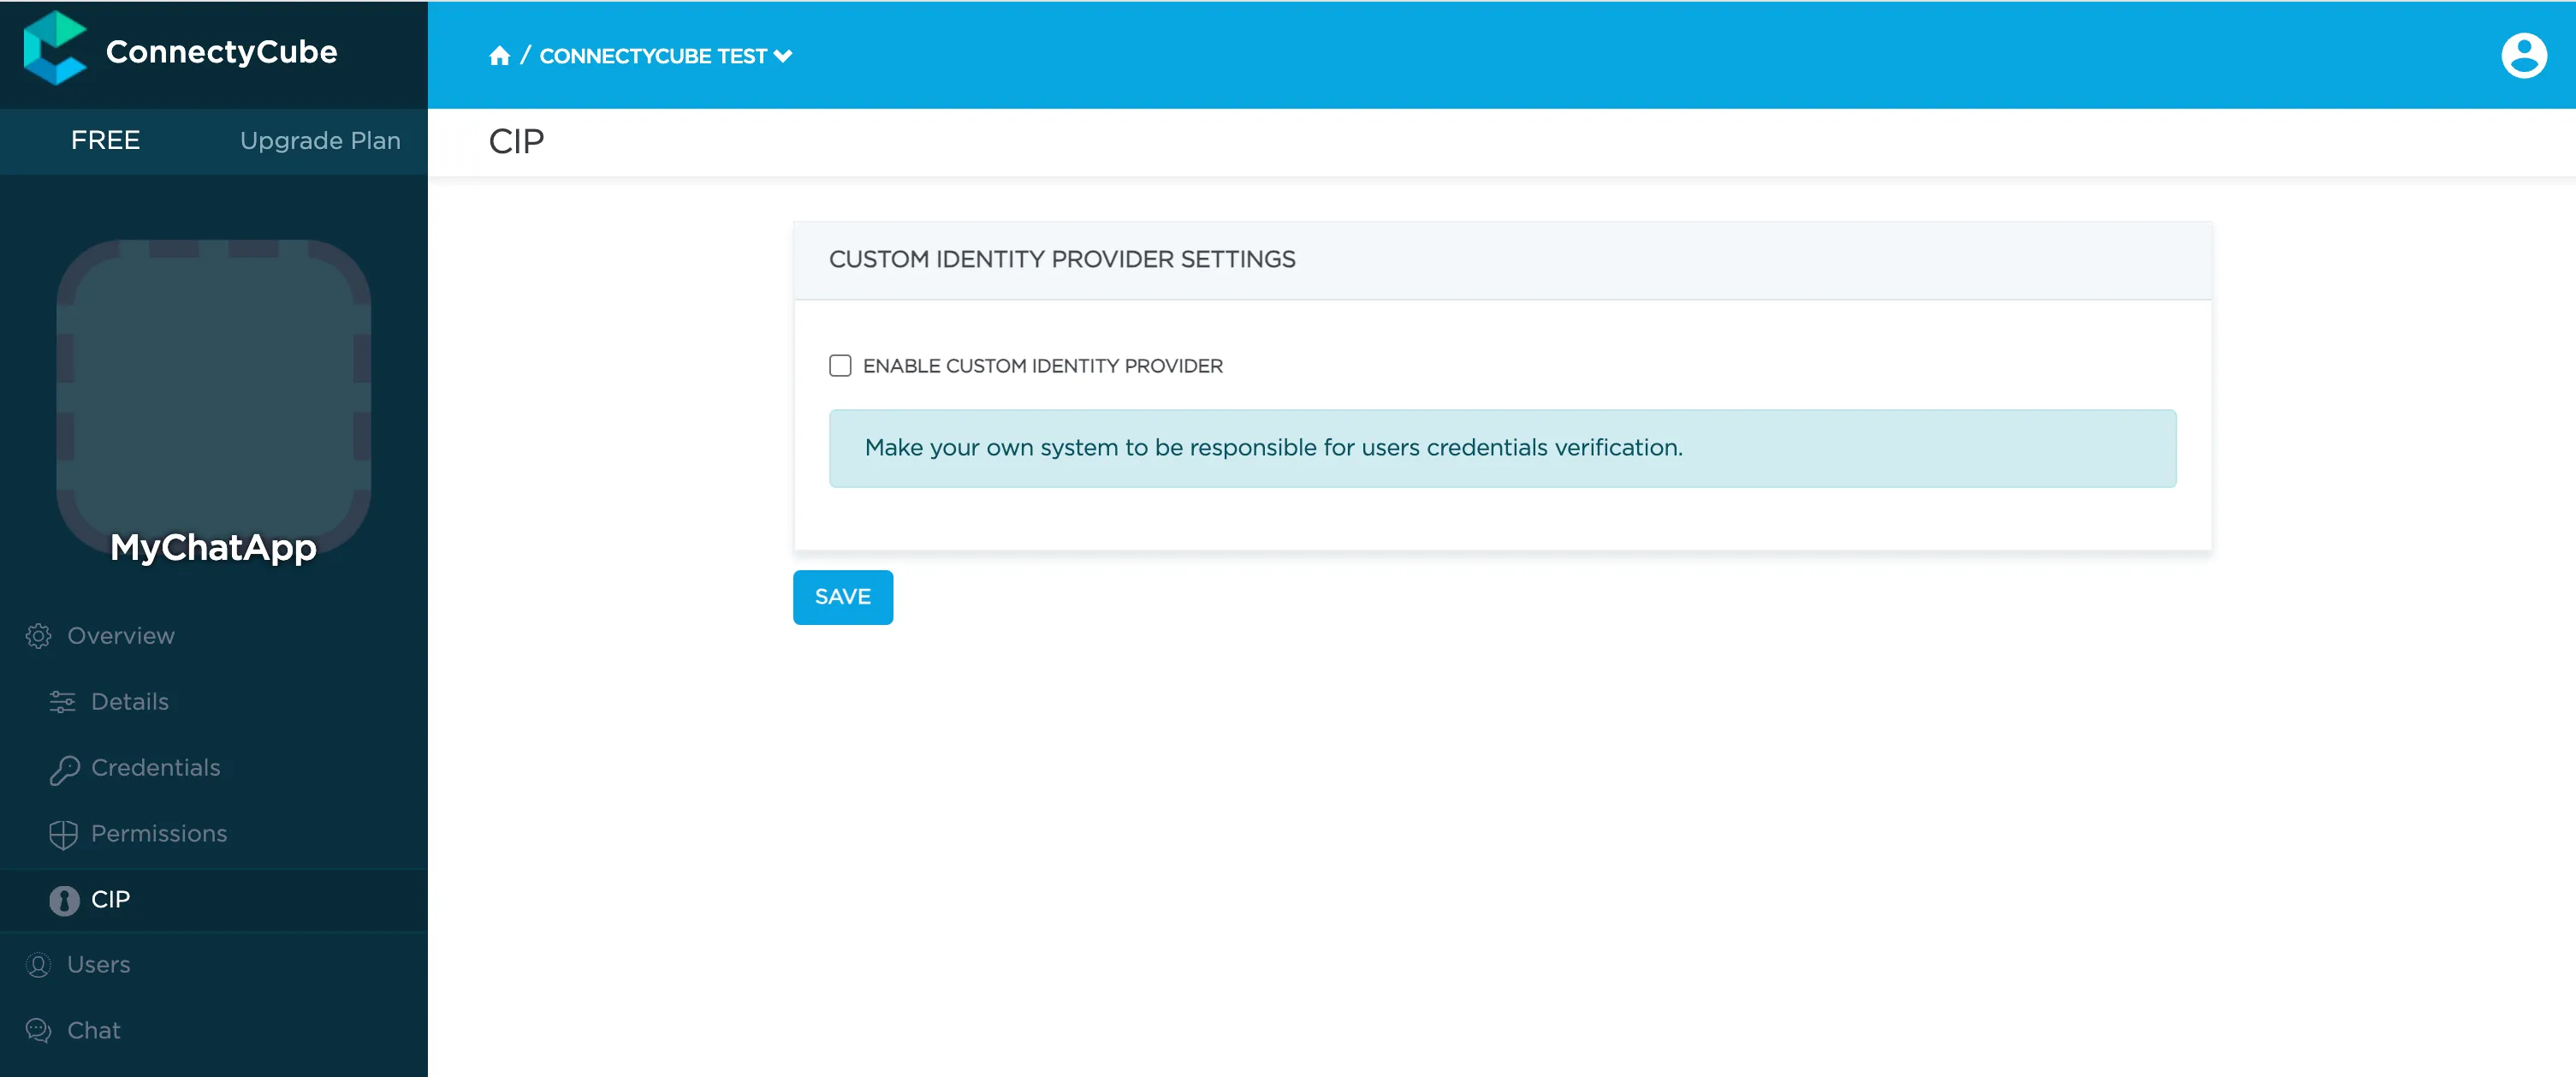
Section titled “Setup mapping”In order to use Custom Identity Provider feature you need to configure it in your ConnectyCube Dashboard as follows:
-
Go to your Dashboard > Your App > Overview > CIP page and enable Custom Identity Provider feature:
-
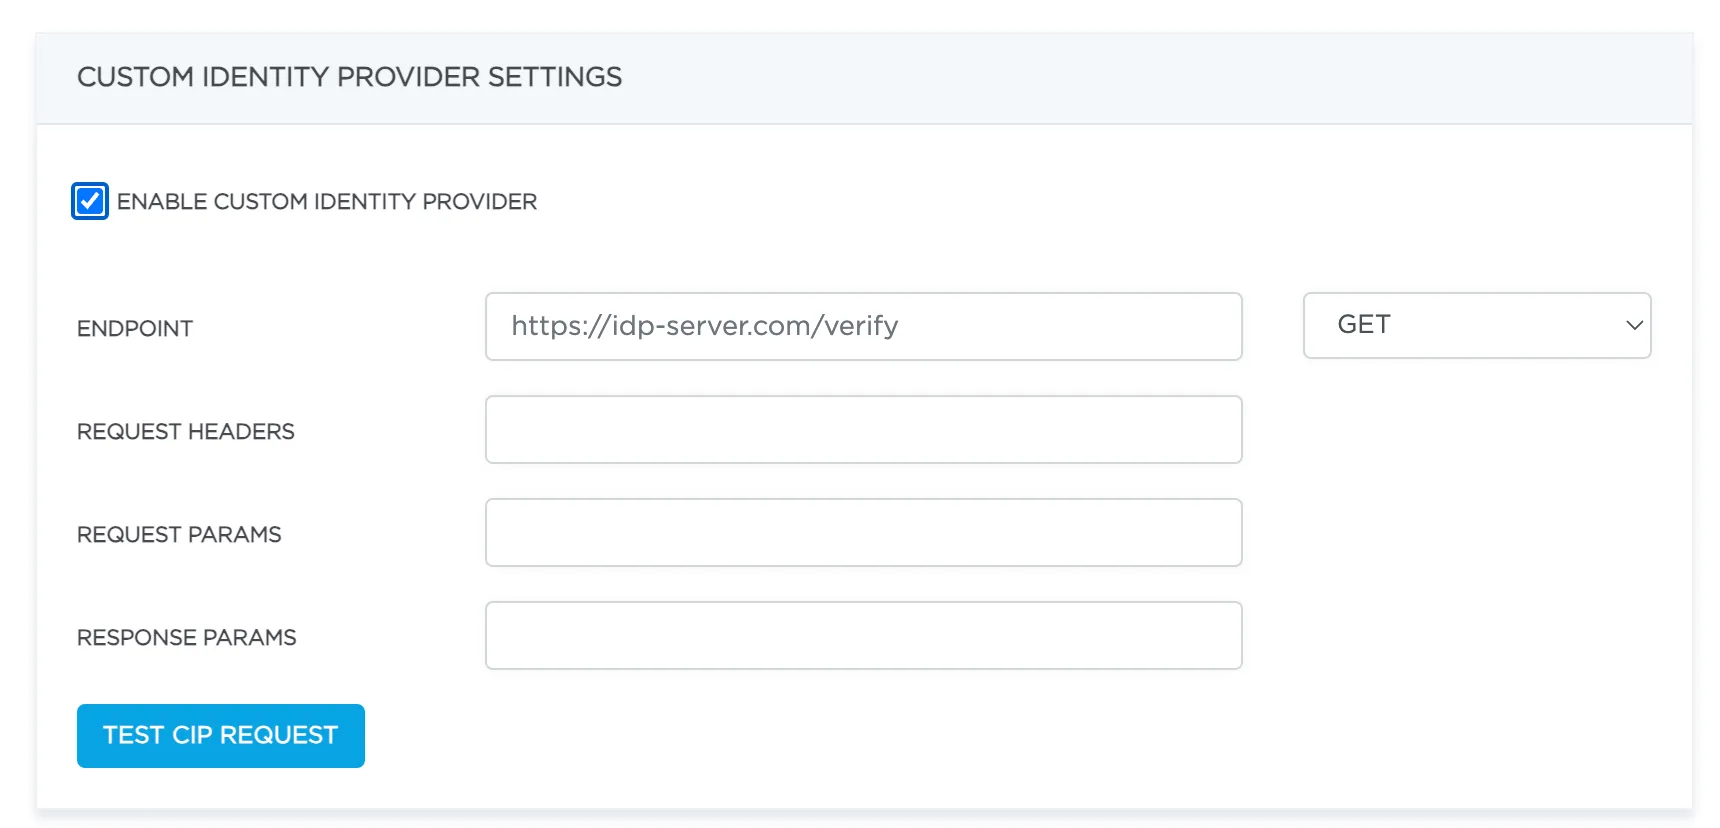
In the fields that appear configure your API URL to verify user and parameters mapping settings and click Update button:
Example of mapping
Section titled “Example of mapping”Let’s assume your API URL to verify users looks like following:
GET https://yourserver.co/user/verify?token={token}And it returns the following JSON response in case of successful verification:
{"user": {"id": 2345, "login": "simon371", "fill_name": "Simon Davis"}}In this case you need to set the following mapping parameters in ConnectyCube Dashboard:
-
API URL: https://yourserver.co/user/verify
-
Request params:
{"token": "#{login}"} -
Response params:
{"uid": "#{user.id}"}
After that you can login to ConnectyCube with the following login method:
POST https://api.connectycube.com/login
Params:login=<your_external_user_token>
The login parameter will be translated into token parameter then.
Starter Kit
Section titled “Starter Kit”There is a starter kit project to develop Custom identity provider service for ConnectyCube:
https://github.com/ConnectyCube/custom-idp-starter-kit
Have any issues?
Section titled “Have any issues?”Raise an issue https://github.com/ConnectyCube/custom-idp-starter-kit/issues