Chat Bots Getting Started
Bots are computer programs - third-party applications, that run inside ConnectyCube platform. Bots have almost same qualities as human: they have profile photos, names, they can send messages and upload files, and they can be added to and removed from group chats.
Use chat bots to enable users to conversationally interact with your service or your product.
Chat bots are controlled programmatically via ConnectyCube Javascript SDK
Build your own Chat Bot
Section titled “Build your own Chat Bot”Before you start
Section titled “Before you start”Before you start, make sure:
- You have access to your ConnectyCube account. If you don’t have an account, sign up here.
- An app created in ConnectyCube dashboard. Once logged into your ConnectyCube account, create a new application and make a note of the app credentials (App ID and Auth Key) that you’ll need for authentication.
Step 1: Create Bot user
Section titled “Step 1: Create Bot user”At ConnectyCube Dashboard, in Users module - create a new user to control your chat bot. Then save somewhere the user’s ID, login and password. We will need these values later.
Step 2: Create Node.js application to control your bot
Section titled “Step 2: Create Node.js application to control your bot”Open terminal and type the following commands:
mkdir my-chat-botcd my-chat-botnpm initThis will ask you a bunch of questions, and then write a package.json file for you. More information on npm init.
The main thing is that we have now a package.json file and can start develop our first chat bot.
Step 3: Connect ConnectyCube SDK
Section titled “Step 3: Connect ConnectyCube SDK”In terminal type the following command:
npm install --save connectycube
# yarn add connectycube
Step 4: Create index.js file
Section titled “Step 4: Create index.js file”In terminal type the following command:
touch index.jsIt will create the main entry point for your bot.
Then also open package.json file and add command to run our bot:
"scripts": { "start": "node index.js"},Now open the index.js file and let’s write some logic.
Step 5: Making heart beat of your bot
Section titled “Step 5: Making heart beat of your bot”Open index.js file and write the following code:
const Connectycube = require("connectycube");
// Initialise SDK
const APPLICATION_CREDENTIALS = {  appId: 0, // put your ConnectyCube App Id  authKey: "...", // put your ConnectyCube Auth Key};
ConnectyCube.init(APPLICATION_CREDENTIALS);
// Connect to Real-Time Chatconst BOT_USER_CREDENTIALS = {  userId: 0, // put your Bot user id  login: "...", // put your Bot user login  password: "...", // put your Bot user password};
const onError = (error) => {  console.log("Chat connect is failed", JSON.stringify(error));  process.exit(1);};
const onConnected = () => {  console.log("Bot is up and running");  // Add chat messages listener  Connectycube.chat.onMessageListener = onMessageListener;};
function onMessageListener(userId, msg) {  // process 1-1 messages  if (msg.type === "chat" && msg.body) {    const answerMessage = {      type: "chat",      body: msg.body, // echo back original message      extension: {        save_to_history: 1,      },    };
    Connectycube.chat.send(userId, answerMessage);  }}
const userCredentials = {  login: BOT_USER_CREDENTIALS.login, password: BOT_USER_CREDENTIALS.password};
ConnectyCube.createSession(userCredentials).then((session) => {  Connectycube.chat.connect(BOT_USER_CREDENTIALS).then(onConnected).catch(onError);}).catch((error) => {});
process.on("exit", function () {  console.log("Kill bot");  Connectycube.chat.disconnect();});
This is a simple bot that simply reply back with origin message. Nothing especial. But you got the idea.
You just need to put in APPLICATION_CREDENTIALS variable your ConnectyCube Application credentials and in BOT_USER_CREDENTIALS variable - you bot user credentials.
The complete source code of chat bot template is available https://github.com/ConnectyCube/connectycube-chatbot-template
Step 6: Run our bot
Section titled “Step 6: Run our bot”In terminal type the following command:
npm startNow you can send a message to your bot and will receive a reply.
Step 7: Improve bot’s intelligence - add AI
Section titled “Step 7: Improve bot’s intelligence - add AI”Create OpenAI API Key
Section titled “Create OpenAI API Key”Usually, it’s not enough just to build simple bot which echoes your messages. It’s better to add some intelligence for you bot.
Here is where ChatGPT OpenAI API comes to the rescue.
After making an OpenAI account, you’ll need an API Key. You can get an OpenAI API Key here by clicking on + Create new secret key.
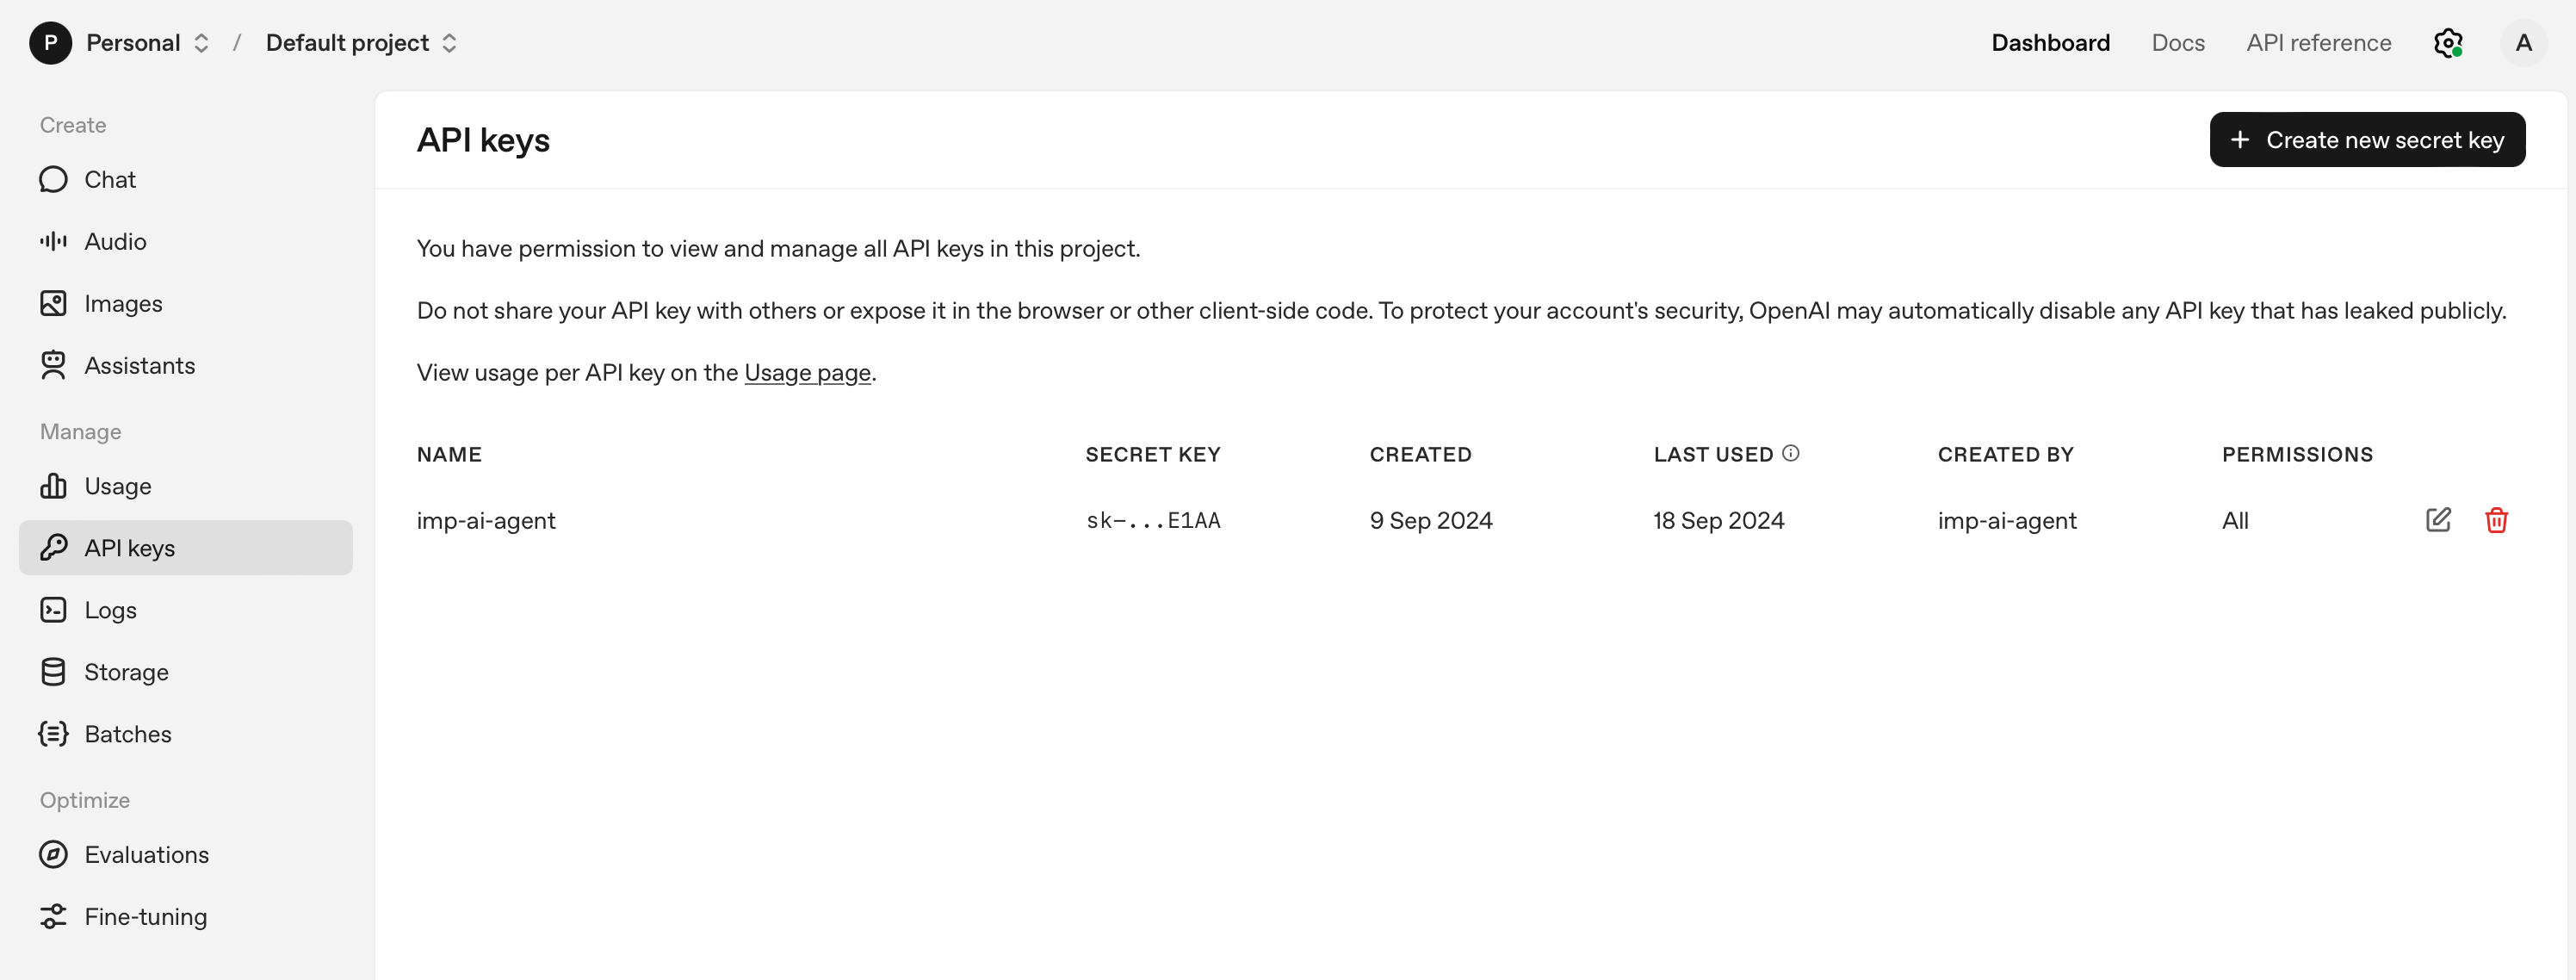
Save that API key for later to use the OpenAI client library in your ConnectyCube Chat Bot.
Connect OpenAI API SDK
Section titled “Connect OpenAI API SDK”Open index.js file and write the following code:
const { Configuration, OpenAIApi } = require("openai");const configuration = new Configuration({ apiKey: <YOUR_OPENAI_API_KEY> });
const openai = new OpenAIApi(configuration);const response = await openai.completions.create({  model: "gpt-3.5-turbo-instruct",  prompt: msg.body,  temperature: 0.7, // Creative risks the engine takes when generating text.  max_tokens: 3000, // Maximum completion length. max: 4000-prompt frequency_penalty: 0.7 // # between 0 and 1. The higher this value, the bigger the effort the model will make in not repeating itself.});
And then modify the answer message object:
const answerMessage = { type: "chat", body: response.choices[0].text, extension: { save_to_history: 1, },};This code imports openai, initializes a Configuration object. The function then calls the openai.completions.create function to use one of their language models to generate text based on msg.body.
Step 8: Host your bot
Section titled “Step 8: Host your bot”You can host your chat bot on any virtual server. If you do not have any in your mind - we will recommend the following:
What’s next
Section titled “What’s next”From here you can do a 1-1 chat with your chat bot. Simply use ConnectyCube.chat.send API from your mobile/web app to reach the bot.
You also can add a bot to group chat, so the bot can listen for all conversation within group chat and react accordingly. To add a bot to group chat, use ConnectyCube.chat.dialog.update API and pass bot User Id in push_all.occupants_ids param. To send/receive messages in a group chat - refer to Send/Receive chat messages - Group chat API documentation.